Citrix XenClient by the system administrator
 In a previous Citrix XenClient post, I showed the capabilities of this solution from the user's point of view. Let me remind you that XenClient is a first-level hypervisor, which is installed on bare hardware and allows you to simultaneously work on a computer with two or more operating systems. The advantage of XenClient compared to regular (let's say, user) virtual machines is that all operating systems have equal rights to access hardware resources and are completely isolated from each other. Accordingly, this allows you to simultaneously work in the "home" and "corporate" environments. In the event that you have one laptop for everything, this is very convenient: the working operating system is fully protected and constantly synchronized with the server, and your personal environment does not suffer from restrictions related to security policy.
In this article I will describe in more detail how to work with XenClient from the point of view of the system administrator. I'll show you how to set up users' machines in a couple of minutes, how data is backed up and what happens if a careless employee forgot a laptop in a taxi.
What's new?
The last time I worked with XenClient on a ThinkPad X201 laptop, which fully complies with the technical requirements of this product. This time, for tests, the ThinkPad T410s with NVIDIA Optimus graphics was used, allowing you to switch between a discrete NVIDIA video card and an integrated Intel GMA HD graphics system. XenClient does not yet support NVIDIA video cards, but over time such support will appear, so it makes sense to choose a similar configuration, which is called, for growth. In the meantime, I wanted to find out if the current version of the hypervisor is working normally, provided that the integrated graphics are used. There were no problems here: in the appropriate BIOS section the laptop was configured to use only Intel graphics.
')
In addition, at the very beginning of the year XenClient itself was updated: version 1.0 Service Pack 1 was released, which can be downloaded from this link . One of the notable changes in the new version is the ability to remotely administer the computer over SSH. In addition, there are no problems with high-definition video playback when using a graphics accelerator, which I encountered during the preparation of the previous material.
On the admin side
So, today we are testing the operation of a virtual operating system under XenClient in a corporate environment. In this scenario, the operating system is not installed on the computer with the XenClient using the installation image. Instead, a ready-made container with a virtual OS is loaded from the server. To manage computers with XenClient installed, use Citrix Synchronizer, which can also be downloaded from the company's website .
Configuring and managing employee computers is done via the Synchronizer web interface, which looks like this:

The main window of the system displays the available virtual OS images, but there is also the ability to view a list of users registered in the system and a list of the equipment used:

Opposite each device there is a Mark As Lost button, by pressing which the system image on the laptop will be automatically deleted the first time you connect to the Internet. It works as follows: for each virtual system, a certain frequency of checking for legitimacy is established: to access the OS, the user must connect to the Internet, enter the login and password for Citrix Synchronizer. If the user does not do this, access to the corporate OS will be automatically blocked. If the administrator has marked in Synchronizer that the computer is lost, the data from it will be automatically deleted, even if the correct access password is entered on the computer. At the same time, between the “reports” to the server, the user can easily work with the corporate OS, even without connecting to the Internet.

Let us turn to the settings of the virtual system image. The Phone Home Frequency field is responsible for sending a report on the use of the virtual OS, and the Lease Time parameter defines the maximum system uptime without connecting to the Internet. Here you can also set the frequency for creating automatic backups that will be uploaded to the server. You can also allow or prohibit the user from starting the backup system manually.

Some of the virtual OS settings in Synchronizer are standard: the administrator can set the number of processor cores used and the amount of memory. Much attention is paid to security. The screenshot above shows the permissions settings for connecting external devices in a virtual OS: if necessary, the administrator can prohibit working with external drives to avoid data leakage. By the way, the container itself with the virtual OS is stored on the user's computer in encrypted form. Access to the network is configured in the same way: for example, you can allow access to the wired network, but disable the connection via WiFi. Additional security in this case can be provided by the settings of security policies in Windows itself.

And a little more security settings: you can allow the user access to the optical drive of the laptop, but - only for reading. The harsh principles of data protection in some companies are forcing manufacturers of laptops at the hardware level to block the recording function of optical drives. This is, in a sense, a less expensive way to do the same.
On the user side
Let's move on to customizing a custom laptop. I described the installation of XenClient in the previous article ; it takes just a few minutes and does not require any special user involvement. If your computer meets the technical requirements (Intel processor and graphics, at least two gigabytes of RAM, support for virtualization technologies VT-x and VT-d), problems should not arise. Immediately upon installation or after the first launch of XenClient, you need to enter the Synchronizer server address and your login and password.
Then everything is simple: in the standard menu for adding a virtual machine, we select not Download from Disk (this is how we installed the “custom” OS), but Download from Synchronizer.
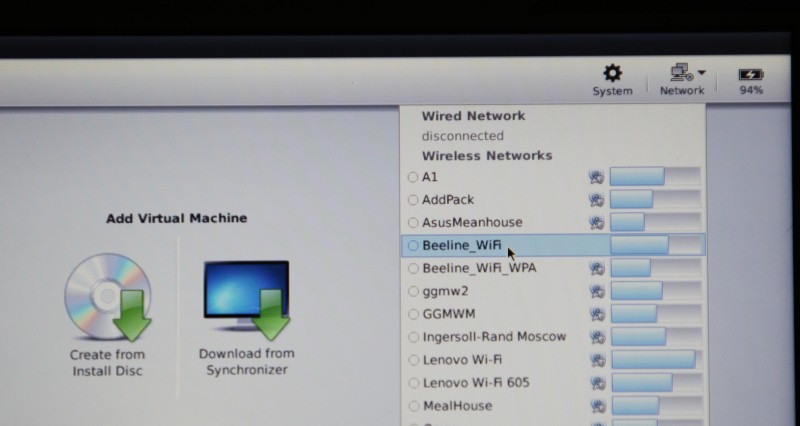
XenClient will contact the server and offer to load one of the virtual machines to choose from (there may be several of them). In my case, a container with virtual Windows 7 takes about 12 gigabytes, and via the Internet its download took quite a long time. But for the local enterprise network, where the initial configuration is performed, this should not be a problem.
After booting, the virtual OS is immediately available for use, with all the programs and settings provided by the system administrator. However, in our case, the XenClient suite of utilities for the virtual OS turned out to be outdated. This is not a problem: XenClient automatically connected a virtual drive to the system with the latest version of a set of utilities and drivers. Theoretically, the system can work without this set (in particular, Ubuntu Linux is installed and running normally), but some functions may not be available.

By clicking the small icon with the letter i in the description of the virtual machine, you can view information about the last backup and the time of the last connection to the Synchronizer server. Here you can start the backup process of the virtual machine manually. The entire image of the “fill in” system back to the server is not necessary: in my case, the incremental backup size is about 4 gigabytes - one third of the total size.

Downloading a backup can be paused at any time and restarted. At this time, you can use the virtual machine without any restrictions. If you lost your laptop, or it broke and sent to the service, it is enough to install XenClient on a new machine, enter the login and password for the Synchronizer, and when adding a new virtual OS, select “Restore from Backup”. After a while, you will get a working OS with all your data since the last backup.
When working with XenClient in a corporate environment, I brought only the most basic features. If necessary, the Citrix hypervisor also provides more complex designs, in particular, on-demand application delivery using the XenApp solution, as well as launching applications from the corporate environment in the user OS, while preserving all security settings. As you can see, XenClient is quite flexible in configuration, so it is convenient to use both the system administrator and the user. And all this - with a minimum (a few percent) loss of performance in the virtual OS compared to a similar system “on hardware”, and full transparency of the hypervisor for external devices.
Source: https://habr.com/ru/post/115562/
All Articles