Wacom Intuos3: eliminate pen play
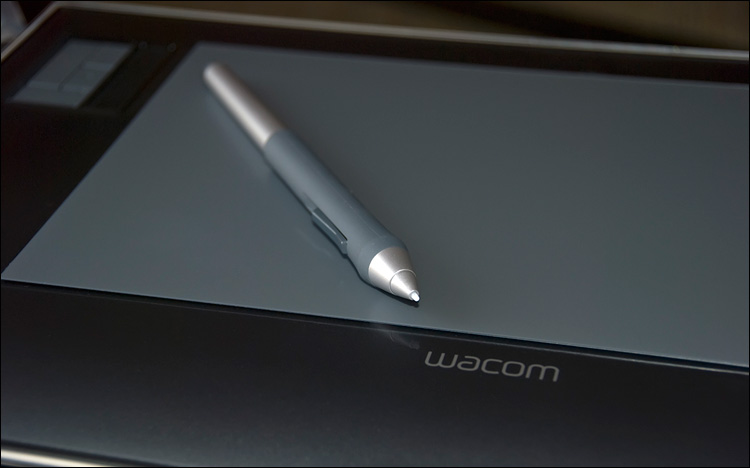
During the long-term operation of the Wacom Intuos3 tablet, the previously well-knit Grip Pen slowly began to loose the lead. It was not lateral wear - the Teflon rod noticeably dangled back and forth along its axis. In operation, this caused a feeling of a certain laxity, when at the moment of touching the tablet with the pen - with your fingers, you feel a sort of squabbling . Once it became unbearable, I decided to unleash a curious child inside me and try to eliminate this annoying trifle on my own.
Having twirled the pen in my hands, I quickly figured out how to remove the rocking chair and the rubber holder. Then everything was not obvious and I went to Google for help. Almost the very first link led me to this article on Habré, which describes the fix pen from the Volito kit. Structurally, it is somewhat different from the pen Intuos3, but how to proceed further - it becomes clear.
')
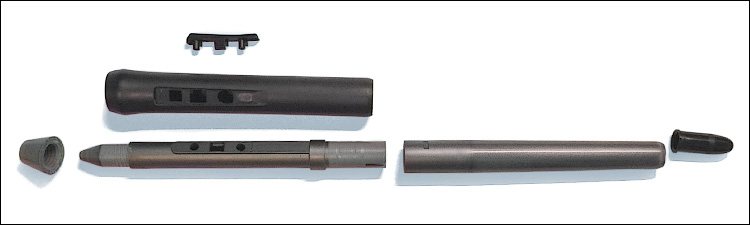
So, to disassemble the pen, you must first pry the rocking button at both ends and gently pull it up so that it snaps off. Then unscrew the conical nut and pull off the rubber stocking. Next you need to separate the halves of the pen. They are planted vnatyag, hold only by friction, but hold very tight. The halves have a lock in the form of a pin and a groove, so you can not turn them. It is necessary to carefully, but very strongly pull them in different directions. Be careful not to bend to the side so as not to break the parts. When the halves disperse, be careful - do not lose the eraser cap and its two tiny springs.
Body parts:
Tiny springs of an eraser (here and further: divisions on a ruler from above - millimeter):

After opening the case, carefully remove the circuit board from it.

There are two identical nodes on it, containing a receiving-transmitting coil (red) and a
update: in the comments I was corrected that in fact the pressure sensor is capacitive. Edited further description according to this information.
Let's take a closer look at this sensor. His scheme is as follows:
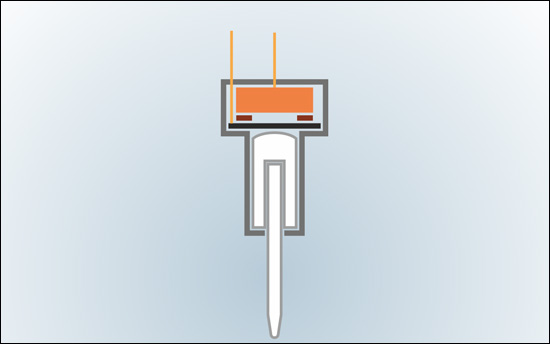
The lead is inserted into a white plastic pusher with a rounded end ...
When we click on the pen, the stylus presses on the pusher. The pusher with its round part presses the flexible black plate. It looks like a thin round washer with petals, with large diagonal notches on each side.

One of the petals of this plate is pressed against one of the two terminals of the sensor (there is a dent in the photo). To the plate, through the thinnest remote spacer ...
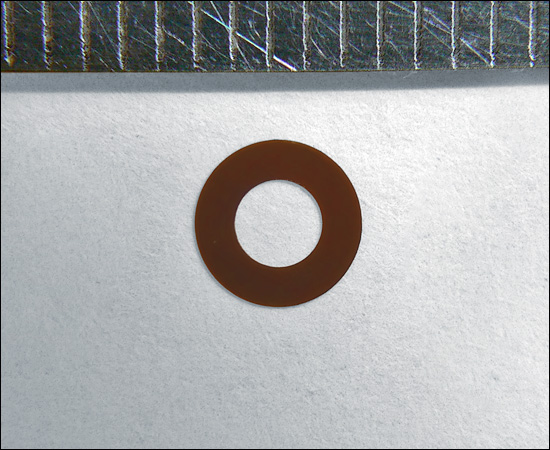
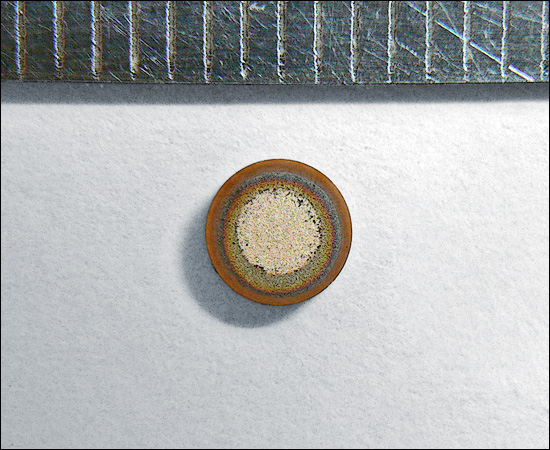
... adjacent ceramic washer. On the one hand, it is absolutely smooth, but on the other hand there is a metallized patch on it (in the photo).
This pin of the ceramic washer is pressed against the other output of the sensor.
Black plate and plating are capacitor plates. When the pusher begins to press on the black plate, it changes its position in space, until it touches the ceramic washer. With further pressure, apparently, the notches on the black plate begin to deform. Thus, the capacitance characteristics of the capacitor change and the pen microprocessor obtains information about the pressure force.
During operation, the notches on the plate wear off (on the ceramic washer even visible black rubber crumb, which I then removed with a thin brush) and there is a gap between it and the pusher. This gap obviously generates the same axial play.
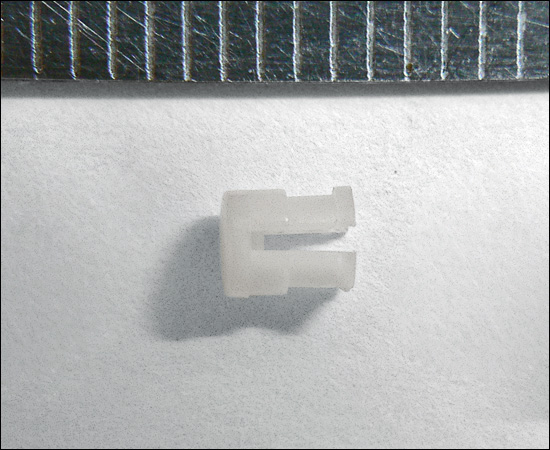
Having studied the internal device of the sensor, I decided to eliminate the gap by inserting an additional washer between the front end of the pusher and the body so as not to disturb the design of the sensor itself.
With the help of

... and immediately installed in its place. An express check showed that the thickness of the material of the washer is too large - the sensor constantly generated a slight half-pressure.
Experimentally, the thickness of the washer was reduced from 0.4mm to 0.2mm using a thin emery cloth.
Tip: such a small shybochka on sandpaper does not want to slide into any. We press it on top with a file and with it we carry the shaybochka on sandpaper.
The final result completely satisfies me: the stylus completely ceased to play, and the pen works off pressing as it should be.
The truth was not without blunders: disassembling the body of the sensor, I accidentally scattered its contents and put the ceramic washer in the wrong direction during assembly. As a result, he received 10 minutes of hemorrhoids in an attempt to adjust the pen. The pressure was worked out only to the smallest extent and amounted to ~ 0-10%. I realized my mistake only when I disassembled the second sensor (now neatly), hoping to replace the parts that I allegedly had broken.
But this way you can carefully and safely disassemble the pressure sensor:
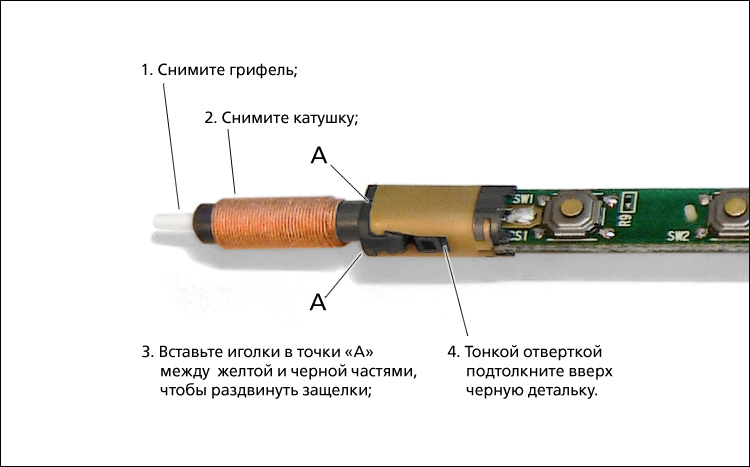
Be careful not to damage the pressure plate tab with a screwdriver in step 4.
For a better understanding, the black part of the body looks like this:

Actually, this is the end of this story.
Thanks to the tools ...

... and Boomburum for help in creating a publication, without it there could be no post.
All is well that ends well!
Update: Eliminating the axial play, I began to feel the stylus dangling from side to side. Developed a mounting hole in the body of the pen. This gap well removed a strip of thin transparent tape.
At first, I wanted to stick an adhesive tape on the stylus itself, but then I realized that in this case the hole in the case would continue to grow. Therefore, having cut off a piece of the required size from a scotch, I rolled a tube out of it with a glue part outside, inserted it into the hole and leveled it with a needle, and then with the slate itself.
Now the use of a pen is tactilely reminiscent of the use of a fountain pen or a pencil; there is absolutely no talk.
Of course, over time, the tape will wear out, but replacing such an improvised pad is a matter of 2-3 minutes.
Source: https://habr.com/ru/post/114464/
All Articles