Splash! - development of the game for Windows Phone 7. Part II
In the previous part of our article ( Part I ) we covered the basic issues of creating games for Windows Phone 7, the choice of tools and technologies. Now we will examine in detail the issues of programming and interaction with the phone.
The entire game logic will be put into a separate class GameController. Now the Update function in the game class looks like this:
Please note that we are passing a GameTime class object to GameController.Update. It has an ElapsedGameTime property that indicates how much time has passed since the previous call to the Update function. As a rule, this time is fixed and on the phone is 33 milliseconds, but it’s better not to count on this, but to use the transmitted value in all calculations.
We will use ElapsedGameTime wherever it is necessary to calculate the movements of objects of the game world. For example, if we need to calculate the new position of the white ball (under the influence of the tilt of the phone), then the code will look like this:
The radius of the balls and blots (at the moment of their appearance) will be calculated as follows:
Naturally, we will do all these calculations in separate classes - each of them will have its own similar Update function (gameTime). And GameController.Update will only call them.
Drawing is also transferred to the GameController class. The Draw function in the game class now looks like this:
Please note that we are passing to the GameController.Draw only an object of the class SpriteBatch - it is intended solely for drawing. We do not need GameTime here, since all the necessary calculations have already been done in the Update function.
')
Next, GameController.Draw will call similar Draw (spriteBatch) functions on classes that implement the logic of the game world.
Drawing itself looks pretty simple:
The texture can be obtained by downloading it from the content:
But if you pass a different color, the texture will be drawn with the imposition of this color. If you specify a color with an alpha channel, the texture will be drawn translucent. Thus, we can control the smooth appearance and disappearance of objects and the change in their color (all this is required in our game).
For mixing two colors, use the Color.Lerp function. And to add an alpha channel, use the Color.FromNonPremultiplied function.
There are other variations of the spriteBatch.Draw function that allow you to rotate a texture and scale it. They are useful to us too.
Displaying text is as easy as displaying graphics:
The object of the SpriteFont class can be obtained by downloading it from the content:
Here you can also specify the color of the text. And if you set the color with the alpha channel, the text will be drawn translucent.
If you specify coordinates for displaying text with a float position, the text may appear slightly distorted. Therefore, we will round coordinates to integers wherever smooth text movement is not required.
There are other variations of the spriteBatch.DrawString function that allow you to rotate text and scale it. But it must be remembered that any such manipulations cause distortion of the text. This is because XNA does not work with the original vector font, but with its raster representation, which is created at the time of compiling the project and added to the content.
To determine where the user clicked on the screen, you must obtain data from the class Microsoft.Xna.Framework.Input.Touch.TouchPanel:
Thus, we get all the points on the screen that the user just touched with his fingers.
However, we will also need data on where the user made a single tap on the screen (clicked and released). This is necessary to keep track of the on-screen button presses, such as Pause. To obtain this data, we will use gesture support.
At the beginning, at the start of the game, let us point out that we need the support of precisely such gestures (tap):
Then we can receive gestures in each iteration of the game cycle:
To obtain data on the tilt of the phone, we will use the Microsoft.Devices.Sensors.Accelerometer class. Unfortunately, the accelerometer cannot receive data directly (as we did with the TouchPanel) - it only supports the event model. Therefore it is necessary to make an auxiliary class that creates an object and subscribes to its event:
In the event handler, we will memorize the value of the acceleration and save it for future use:
The acceleration vector contains information about all three axes (X, Y and Z), but we need only the first two - and with respect to the portrait orientation of the phone. Therefore, the property that returns the acceleration in our coordinate system will look like this:
It is this acceleration that we will attach to our white ball.
A more visual representation of the axes of the accelerometer can be obtained here .
Playing sounds in XNA is done using the Play function on an object of the SoundEffect class. An object of this class can be downloaded from the content:
Actually, that’s all - we don’t have to do anything else with the sounds.
Finally the game is done: the white ball is controlled by the accelerometer, the others chase after it and turn into blots when you press them with your finger, the glasses count, there are sounds. It seems everything is ready? Not here it was!
Now you need to make the windows: the start window (main menu), the pause dialog and the window for completing the game (with the display of points and a record).
Windows in XNA for Windows Phone is not at all, so you have to do them yourself. It is not as difficult as it may seem at first glance.
It is enough to make a basic control with basic properties: Parent, Children, Bounds, Visible, Enabled and the Update and Draw functions. Then we make several heirs: Window, Button, Label, etc.
After that, you can already easily place the elements inside the windows.
The game on the phone can be interrupted at any time - by pressing the hardware Home button or by another external event. Therefore, it is necessary to attend to the preservation of the state of the game at any time and the subsequent restoration of this state when loading the game.
To store the state (and at the same time the settings), use the System.IO.IsolatedStorage.IsolatedStorageSettings.ApplicationSettings class. This class implements the IDictionary <string object>, so working with it is very simple. Add the current state of all objects in the game world (fortunately, we have a few of them) in this dictionary and call the IsolatedStorageSettings.ApplicationSettings.Save () function.
Saving will be done at the time of exit from the application, for this we will block the OnExiting function in the game class:
The restoration of the state is done in a similar way - when the application is loaded, we obtain data from IsolatedStorageSettings.ApplicationSettings and restore all the objects in the game world.
Our application will not always be in the active state - sometimes it can be deactivated (by incoming call, for example), and then activated again.
To track these events, block the OnActivated and OnDeactivated functions in the game class.
When you deactivate the application, we will transfer the game to pause mode - in order to return to the game, the user finds a dialogue with a proposal to continue the game.
In addition, in order not to waste the computing resources of the phone in an inactive state, we will add the following code to the beginning of the Update function in the game class:
Our game (or rather, the game content) is loaded for a few seconds, and at the same time it shows no signs of life - only a black screen is visible. It would be necessary to somehow show the user that the application is running. To do this, draw a beautiful splash-screen to show it when you start the game:
In Silverlight, the application for Windows Phone is enough to add the SplashScreenImage.jpg file to the project - and it will automatically appear when it is loaded. However, this does not work for XNA projects.
We'll have to redo the loading of content - first load the texture for the splash-screen and draw it when you first call the Draw function. And then load the rest of the content and launch the game. And while the rest of the content will be loaded, the user will be able to watch our splash-screen on the screen.
Now the start of the application looks much nicer.
In order for our game to appear on the phone in the Games section (you can get there by clicking the button that says XBOX LIVE on the phone’s start screen), you need to edit the WMAppManifest.xml file in the project. In this file, instead of the line Genre = "Apps.Normal", you should write Genre = "Apps.Games".
At the same time, we will indicate the name and description of the game in the same file (in the Title and Description attributes). And remove the extra requirements (section). In this section, leave only /> - to support the accelerometer. All the rest in this version of the game we do not need.
There should be two pictures in the project: GameThumbnail.png and Background.png.
The first picture is needed to display the game in the Games section, and the second is on the start screen of the phone. Both images must be the same size: 173x173 pixels.
Since our game will be paid, we need to add support for the trial mode. Trial verification is already built into the platform and is performed using the Microsoft.Phone.Marketplace.LicenseInformation class:
Since this function works rather slowly, we will not call it at each iteration of the game cycle. Instead, we will call it only when the application is activated - in the OnActivated function of the game class, and save the result in a variable.
If the application is running in trial mode, then after a few minutes of the game, we will show the user a dialog with a proposal to buy the application or start a new game.
When you click on the Buy button, we call the display of our application in the Windows Phone Marketplace:
After the purchase, the user can return to the application and continue the game.
Finally, everything is ready and we send the application to the Windows Phone Marketplace. Before publication, it is thoroughly tested by Microsoft and a verdict is issued a few days later: it has not passed. What is the matter?
The problem was in the very code that we left in the Update function:
The hardware Back button should work in a certain way everywhere - to return the user to the previous screen. And exit from the application on it should be made only if the user is on the start screen of the application (in the main game menu). If we are in the pause dialog, then the Back button should return us to the game.
In our case, the Back button always caused an exit from the application. We remove this code, do the correct processing of the Back button and give it back for review. Reconsideration takes much less time.
And here, at last, have accepted! Now the game is in the Windows Phone Marketplace.
In total, about two weeks were spent on development (and two more weeks were spent on placing the game in the store). The result was a very nice and exciting game:

The editorial site of the Best WP7 Games reviewed this game: www.bestwp7games.com/splash-fun-accelerometer-game-for-wp7-review.html
And a week after the appearance, the game hit the Top 100 paid games in the Windows Phone Marketplace.
Download the game here
What conclusion can be drawn from the experience of developing this game? Creating games for Windows Phone 7 is really very simple!
Game logic
The entire game logic will be put into a separate class GameController. Now the Update function in the game class looks like this:
protected override void Update(GameTime gameTime) { // Allows the game to exit if (GamePad.GetState(PlayerIndex.One).Buttons.Back == ButtonState.Pressed) this.Exit(); GameController.Update(gameTime); base.Update(gameTime); } Please note that we are passing a GameTime class object to GameController.Update. It has an ElapsedGameTime property that indicates how much time has passed since the previous call to the Update function. As a rule, this time is fixed and on the phone is 33 milliseconds, but it’s better not to count on this, but to use the transmitted value in all calculations.
We will use ElapsedGameTime wherever it is necessary to calculate the movements of objects of the game world. For example, if we need to calculate the new position of the white ball (under the influence of the tilt of the phone), then the code will look like this:
position += (float)(acceleration * gameTime.ElapsedGameTime.TotalSeconds); The radius of the balls and blots (at the moment of their appearance) will be calculated as follows:
radius += (float)(GrowSpeed * gameTime.ElapsedGameTime.TotalSeconds); Naturally, we will do all these calculations in separate classes - each of them will have its own similar Update function (gameTime). And GameController.Update will only call them.
Draw graphics
Drawing is also transferred to the GameController class. The Draw function in the game class now looks like this:
protected override void Draw(GameTime gameTime) { GraphicsDevice.Clear(Color.Black); spriteBatch.Begin(); GameController.Draw(spriteBatch); spriteBatch.End(); base.Draw(gameTime); } Please note that we are passing to the GameController.Draw only an object of the class SpriteBatch - it is intended solely for drawing. We do not need GameTime here, since all the necessary calculations have already been done in the Update function.
')
Next, GameController.Draw will call similar Draw (spriteBatch) functions on classes that implement the logic of the game world.
Drawing itself looks pretty simple:
spriteBatch.Draw(texture, position, color); That is, we can display only ready-made textures - drawing 2D primitives (lines, rectangles, ellipses, etc.) in XNA is not provided.The texture can be obtained by downloading it from the content:
Texture2D texture = Content.Load<Texture2D>(assetName); Textures are already loaded, all positions are calculated. But with the color you can do something interesting. If we need the original color of the texture, then we must pass Color.White.But if you pass a different color, the texture will be drawn with the imposition of this color. If you specify a color with an alpha channel, the texture will be drawn translucent. Thus, we can control the smooth appearance and disappearance of objects and the change in their color (all this is required in our game).
For mixing two colors, use the Color.Lerp function. And to add an alpha channel, use the Color.FromNonPremultiplied function.
There are other variations of the spriteBatch.Draw function that allow you to rotate a texture and scale it. They are useful to us too.
Display text
Displaying text is as easy as displaying graphics:
spriteBatch.DrawString(spriteFont, text, position, color); The object of the SpriteFont class can be obtained by downloading it from the content:
SpriteFont spriteFont = Content.Load<SpriteFont>(assetName); Here you can also specify the color of the text. And if you set the color with the alpha channel, the text will be drawn translucent.
If you specify coordinates for displaying text with a float position, the text may appear slightly distorted. Therefore, we will round coordinates to integers wherever smooth text movement is not required.
There are other variations of the spriteBatch.DrawString function that allow you to rotate text and scale it. But it must be remembered that any such manipulations cause distortion of the text. This is because XNA does not work with the original vector font, but with its raster representation, which is created at the time of compiling the project and added to the content.
Touchscreen
To determine where the user clicked on the screen, you must obtain data from the class Microsoft.Xna.Framework.Input.Touch.TouchPanel:
foreach (var item in TouchPanel.GetState()) { if (item.State == TouchLocationState.Pressed || item.State == TouchLocationState.Moved) { // Get item.Position } } Thus, we get all the points on the screen that the user just touched with his fingers.
However, we will also need data on where the user made a single tap on the screen (clicked and released). This is necessary to keep track of the on-screen button presses, such as Pause. To obtain this data, we will use gesture support.
At the beginning, at the start of the game, let us point out that we need the support of precisely such gestures (tap):
TouchPanel.EnabledGestures = GestureType.Tap; Then we can receive gestures in each iteration of the game cycle:
while (TouchPanel.IsGestureAvailable) { GestureSample gesture = TouchPanel.ReadGesture(); if (gesture.GestureType == GestureType.Tap) { // Get guesture.Position } } Accelerometer
To obtain data on the tilt of the phone, we will use the Microsoft.Devices.Sensors.Accelerometer class. Unfortunately, the accelerometer cannot receive data directly (as we did with the TouchPanel) - it only supports the event model. Therefore it is necessary to make an auxiliary class that creates an object and subscribes to its event:
accelerometer = new Microsoft.Devices.Sensors.Accelerometer(); accelerometer.ReadingChanged += AccelerometerChanged; accelerometer.Start(); In the event handler, we will memorize the value of the acceleration and save it for future use:
private void AccelerometerChanged(object sender, AccelerometerReadingEventArgs e) { vector = new Vector3((float)eX, (float)eY, (float)eZ); } The acceleration vector contains information about all three axes (X, Y and Z), but we need only the first two - and with respect to the portrait orientation of the phone. Therefore, the property that returns the acceleration in our coordinate system will look like this:
public Vector2 Acceleration { get { return new Vector2(vector.X, -vector.Y); } } It is this acceleration that we will attach to our white ball.
A more visual representation of the axes of the accelerometer can be obtained here .
Losing sound
Playing sounds in XNA is done using the Play function on an object of the SoundEffect class. An object of this class can be downloaded from the content:
SoundEffect sound = Content.Load<SoundEffect>(assetName); Actually, that’s all - we don’t have to do anything else with the sounds.
Window
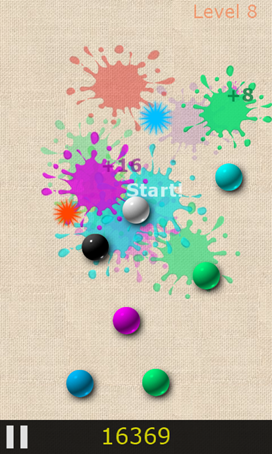
Finally the game is done: the white ball is controlled by the accelerometer, the others chase after it and turn into blots when you press them with your finger, the glasses count, there are sounds. It seems everything is ready? Not here it was!
Now you need to make the windows: the start window (main menu), the pause dialog and the window for completing the game (with the display of points and a record).
Windows in XNA for Windows Phone is not at all, so you have to do them yourself. It is not as difficult as it may seem at first glance.
It is enough to make a basic control with basic properties: Parent, Children, Bounds, Visible, Enabled and the Update and Draw functions. Then we make several heirs: Window, Button, Label, etc.
After that, you can already easily place the elements inside the windows.
State saving
The game on the phone can be interrupted at any time - by pressing the hardware Home button or by another external event. Therefore, it is necessary to attend to the preservation of the state of the game at any time and the subsequent restoration of this state when loading the game.
To store the state (and at the same time the settings), use the System.IO.IsolatedStorage.IsolatedStorageSettings.ApplicationSettings class. This class implements the IDictionary <string object>, so working with it is very simple. Add the current state of all objects in the game world (fortunately, we have a few of them) in this dictionary and call the IsolatedStorageSettings.ApplicationSettings.Save () function.
Saving will be done at the time of exit from the application, for this we will block the OnExiting function in the game class:
protected override void OnExiting(object sender, EventArgs args) { GameController.SaveState(); base.OnExiting(sender, args); } The restoration of the state is done in a similar way - when the application is loaded, we obtain data from IsolatedStorageSettings.ApplicationSettings and restore all the objects in the game world.
Application Activation and Deactivation
Our application will not always be in the active state - sometimes it can be deactivated (by incoming call, for example), and then activated again.
To track these events, block the OnActivated and OnDeactivated functions in the game class.
When you deactivate the application, we will transfer the game to pause mode - in order to return to the game, the user finds a dialogue with a proposal to continue the game.
In addition, in order not to waste the computing resources of the phone in an inactive state, we will add the following code to the beginning of the Update function in the game class:
if (!IsActive) { SuppressDraw(); return; } Splash screen
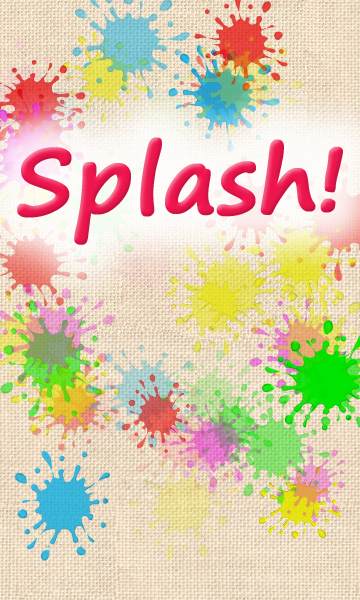
Our game (or rather, the game content) is loaded for a few seconds, and at the same time it shows no signs of life - only a black screen is visible. It would be necessary to somehow show the user that the application is running. To do this, draw a beautiful splash-screen to show it when you start the game:
In Silverlight, the application for Windows Phone is enough to add the SplashScreenImage.jpg file to the project - and it will automatically appear when it is loaded. However, this does not work for XNA projects.
We'll have to redo the loading of content - first load the texture for the splash-screen and draw it when you first call the Draw function. And then load the rest of the content and launch the game. And while the rest of the content will be loaded, the user will be able to watch our splash-screen on the screen.
Now the start of the application looks much nicer.
The location of the game on the phone
In order for our game to appear on the phone in the Games section (you can get there by clicking the button that says XBOX LIVE on the phone’s start screen), you need to edit the WMAppManifest.xml file in the project. In this file, instead of the line Genre = "Apps.Normal", you should write Genre = "Apps.Games".
At the same time, we will indicate the name and description of the game in the same file (in the Title and Description attributes). And remove the extra requirements (section). In this section, leave only /> - to support the accelerometer. All the rest in this version of the game we do not need.
There should be two pictures in the project: GameThumbnail.png and Background.png.
The first picture is needed to display the game in the Games section, and the second is on the start screen of the phone. Both images must be the same size: 173x173 pixels.
Trial mode
Since our game will be paid, we need to add support for the trial mode. Trial verification is already built into the platform and is performed using the Microsoft.Phone.Marketplace.LicenseInformation class:
var license = new Microsoft.Phone.Marketplace.LicenseInformation(); return license.IsTrial(); Since this function works rather slowly, we will not call it at each iteration of the game cycle. Instead, we will call it only when the application is activated - in the OnActivated function of the game class, and save the result in a variable.
If the application is running in trial mode, then after a few minutes of the game, we will show the user a dialog with a proposal to buy the application or start a new game.
When you click on the Buy button, we call the display of our application in the Windows Phone Marketplace:
var market = new Microsoft.Phone.Tasks.MarketplaceDetailTask(); market.Show(); After the purchase, the user can return to the application and continue the game.
Back button
Finally, everything is ready and we send the application to the Windows Phone Marketplace. Before publication, it is thoroughly tested by Microsoft and a verdict is issued a few days later: it has not passed. What is the matter?
The problem was in the very code that we left in the Update function:
protected override void Update(GameTime gameTime) { // Allows the game to exit if (GamePad.GetState(PlayerIndex.One).Buttons.Back == ButtonState.Pressed) this.Exit(); ... } The hardware Back button should work in a certain way everywhere - to return the user to the previous screen. And exit from the application on it should be made only if the user is on the start screen of the application (in the main game menu). If we are in the pause dialog, then the Back button should return us to the game.
In our case, the Back button always caused an exit from the application. We remove this code, do the correct processing of the Back button and give it back for review. Reconsideration takes much less time.
Result
And here, at last, have accepted! Now the game is in the Windows Phone Marketplace.
In total, about two weeks were spent on development (and two more weeks were spent on placing the game in the store). The result was a very nice and exciting game:
The editorial site of the Best WP7 Games reviewed this game: www.bestwp7games.com/splash-fun-accelerometer-game-for-wp7-review.html
And a week after the appearance, the game hit the Top 100 paid games in the Windows Phone Marketplace.
Download the game here
What conclusion can be drawn from the experience of developing this game? Creating games for Windows Phone 7 is really very simple!
Source: https://habr.com/ru/post/113285/
All Articles