Installing Request Tracker 3.8
Greetings,% habrauser%!
Background:
At the moment I am working in a small office, which is engaged in consulting, auditing and IT services. Although the office is small, the number of clients grew at a fast pace, and it was already very difficult to manage without a normal helpdesk. Having reviewed a decent list of products, both paid and free, our choice fell on the product of the company BestPractical , which is called a very simple Request Tracker.
')
Request Tracker is an open source enterprise-wide accounting and tracking system for applications that allows you to manage tasks, problems, and external requests from users. The system is written in Perl object-oriented language. The system began to be developed from 1996, and is used by system administrators, technical support staff, IT managers, developers, and marketing departments.
ru.wikipedia.org/wiki/Request_Tracker
Was selected by the following criteria
- free (it is possible to use the SaaS model with a monthly fee)
- cross platform (written in PERL)
- free GPLv2 license
- very well documented
- supports various DBMS (MySQL, PostgreSQL, SQlite, Oracle DB)
- Integrated RTFM engine (similar to Wiki)


The current version is 3.8.8 of May 5, 2010, and now we will install it.
Installation:
I use Freebsd 8 branches as an operating system. As usual, before installing anything, update the ports:
# portsnap fetch updateAs a web server, I will use the classic version: apache 2.2 with mod_perl2 (you can use nginx or lighttpd)
# cd /usr/ports/www/apache22 && make install clean
# cd /usr/ports/www/mod_perl2 && make install clean
Now install RT 3.8 itself:
# cd /usr/ports/www/rt38 && make install cleanAs a DBMS, I will use MySql 5.1
# cd /usr/ports/database/mysql51-server && make install cleanAfter installation, we register the ability to run applications in /etc/rc.conf
apache22_enable="YES"

mysql_enable="YES"
and now we start only mysql-server
# /usr/local/etc/rc.d/mysql-server startNow we check if all RT dependencies are installed correctly:
# /usr/local/sbin/rt-test-dependencies --with-mysql --with-modperl2If we see the line “All dependencies have been found” at the end, then everything is fine, if not, then configure the CPAN and install the missing dependencies:
# /usr/bin/perl -MCPAN -e shell
# /usr/local/sbin/rt-test-dependencies --with-mysql --with-modperl2 –install
With the software figured out, now move on to configuring RT. RT has two configuration files RT_Config.pm and RT_SiteConfig.pm. The RT_Config.pm file contains default values that are replaced with the values from the RT_SiteConfig.pm file. Therefore, open the RT_SiteConfig.pm file and specify your values instead of the default ones:
Set( $rtname, 'Firma');
Set($WebBaseURL , "rt.domen.com");
Set( $WebPath , "");

Set($DataBaseType , 'mysql');
Set($DatabaseHost , 'localhost');
Set($DatabaseRTHost , 'localhost');
Set($DatabaseName , 'rt3');
Set($DatabaseUser, 'rt38');
Set($DatabasePassword , password);
Set($Timezone, 'Asia/Sakhalin');

Set($CorrespondAddress, 'support@domen.com);
Set($CommentAddress, 'suppport-comment@domen.com);
Set($RTAddressRegexp, '^support(-comment)?\@(domen)\.(com)$');
Set($OwnerEmail, 'sergey@domen.com');

Set($AutoCreate, {Privileged => 1});
Set($NotifyActor, 1);
1;
Before that, we start a user in mysql and specify his username and password in this file. Now we initialize the RT database (we initialize from the root, the script itself will give the necessary rights for the user, which we specified in RT_Config.pm):
# rt-setup-database --action init --dba root --prompt-for-dba-passwordAssign permissions to configuration files:
# Chown www /usr/local/etc/rt38/RT_Config.pm
# Chmod 600 /usr/local/etc/rt38/RT_Config.pm
# Chown www /usr/local/etc/rt38/RT_SiteConfig.pm
# Chmod 600 /usr/local/etc/rt38/RT_SiteConfig.pm
In principle, everything is ready to launch RT, but we have one nuance, corporate mail works through Google Apps and the support@domen.com account is there, therefore we need to somehow teach RT to receive mail from Google Apps. This will help us fetchmail, install:
# cd /usr/ports/mail/fetchmail/ && make install cleanSince gmail works on an encrypted protocol, we need to slip these fetchmail certificates. To do this, create a directory for certificates:
# mkdir /usr/local/certs/Create a file inside this directory:
# touch /usr/local/certs/gmail.pemAnd run the script to get a certificate:
# openssl s_client -connect pop.gmail.com:995 -showcerts > /usr/local/certs/gmail.pemEdit the resulting file, delete everything before ----- BEGIN CERTIFICATE ----- and everything after ----- END CERTIFICATE ----- Then copy the utility for hashing
# cp /usr/src/crypto/openssl/tools/c_rehash /usr/local/bin/c_rehash
# chmod +x /usr/local/bin/c_rehash
And we perform hashing the certificate:
# c_rehash /usr/local/certs/Now we need to get a certificate thumbprint and insert it into the fetchmail config
# openssl x509 -in /usr/local/certs/gmail.pem -noout -md5 –fingerprintFingerprint received, it remains to correct the configuration of fetchmail'a to about this:
defaults protocol pop3,
timeout 60,

fetchall

set logfile=/var/log/fetchmail

poll pop.gmail.com
port 995
username support@domen.com
password '****'
mda "/usr/local/bin/rt-mailgate --url ip-address --action correspond --queue General"
ssl
sslcertpath /usr/local/certs/
sslfingerprint "6B:**:**:**:**:**:**:**:**:**:**:**:**:**:B6"
(here is a small digression, fetchmail is started from its user fetchmail, but for some reason, he didn’t want to work with me, but wrote “fetchmail: Cannot switch the user id to 0: Operation not permitted” in logs, therefore, as a temporary solution to this problem, I started fetchmail as root, which is not good. If someone knows the solution to the problem, I will be very happy to hear)
Add to /etc/rc.conf
fetchmail_enable="YES"

fetchmail_user="root"
we create a log file for fetchmail, in fact, it already puts logs in / var / log / maillog but so that they do not mix with the rest
# touch /var/log/fetchmailand start fetchmail
# /usr/local/etc/rc.d/fetchmail startBy default, fetchmail checks mail every 900 seconds; this can be configured by correcting the start script.
It remains to fix the apache config virtual host of the following content and start it
<VirtualHost *:80>
ServerName rt.domen.com
ServerAdmin sergey@domen.com
DocumentRoot /usr/local/share/rt38/html
AddDefaultCharset UTF-8
PerlModule Apache::DBI
PerlRequire /usr/local/bin/webmux.pl
<Directory /usr/local/share/rt38/html>
Order allow,deny
Allow from all
SetHandler perl-script
PerlResponseHandler RT::Mason
</Directory>
<Location /NoAuth>
Order allow,deny
Allow from IP-ADDRESS
Satisfy any
</Location>
<Location /REST/1.0/NoAuth>
Order allow,deny
Allow from IP-ADDRESS
Satisfy any
</Location>
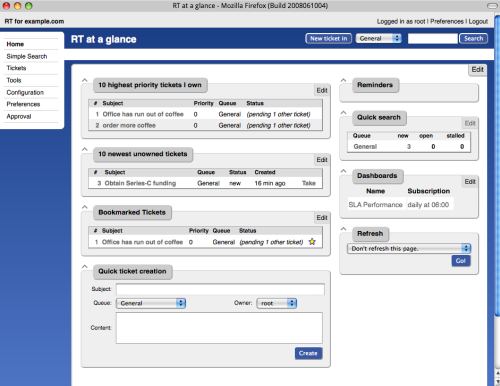
</VirtualHost>We send a letter to support@domen.com and go to rt.domen.com and see what we have, the standard login / password is root / password. If something is wrong, look at the apache and fetchmail logs.
This completes the installation of Request Tracker 3.8. If this topic is interesting, I will continue to write about this system, and in the next article we will look at the setting.
PS not much detail painted?
Source: https://habr.com/ru/post/112348/
All Articles