Home Cisco VoIP Lab Based on GNS3 Emulator
As in many other areas of communication, our beloved Cisco company is striving to consolidate its leading position in the VoIP market. It was under the auspices of this technology that the last Cisco Expo took place. Cisco strongly encourages and develops this area, and given the fact that VoIP specialists today are among the most expensive network engineers , more and more networkers are turning their attention to this area.
The Cisco certificate line has a separate “concentration” for VoIP professionals, consisting of three certificates: CCNA Voice , CCNP Voice and CCIE Voice . Cisco has produced and continues to produce a huge amount of training materials to prepare for these certifications, but then there is a stumbling block for those interested: where to practice?
What is IP telephony? IP telephony is a technology that allows you to use any IP-based packet-switched network as a means of organizing and conducting international, long-distance and local telephone calls and fax transmission in real time. In other words, using easily accessible Internet channels, you can make calls to anywhere in the world where there is a telephone or Internet access.
')
Well, if you have a hands-on experience with VoIP and access to Cisco VoIP equipment. But if not, it does not matter at all. For those who want to learn, but are not ready at the moment to spend $ 1000 on equipment, I want to tell you how to make a home Cisco VoIP lab based on all of us’s favorite GNS3 emulator and Cisco IP Communicator softphones (CIPC). The first tool is free, you can download it from the official site. IOSs for devices and CIPC can be easily found on torrents.
The basis of Cisco's VoIP network is Cisco Communication Manager. In its “big” version, it runs on a separate server, and there is also a version for “small and medium businesses,” as determined by Cisco, which is built into IOS for Integrated Services Routers (ISR) and is called Cisco Communication Manager Express. It is her, because of its simplicity, we will emulate.
Our goal is to “glue” our virtual network, in which the Cisco router will run with Communication Manager Express running on it, and the real network.
1. First, create a loopback interface in Windows, on which we are going to emulate a router (for illustration purposes, we will configure the system on Windows 7 Ultimate). To do this, go to the installation dialog of new equipment, there we select the installation of the network adapter by Microsoft, called “The Microsoft Adapter for Loopback”.

The created adapter will act as an “exit” from the virtual network to the real network.
2. Already at this stage we can interact with the virtual network, but only from one computer. And our goal is to open access to it from all machines of the real network.
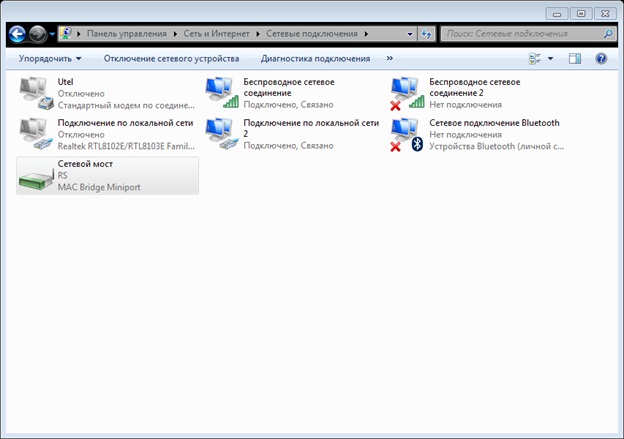
To do this, go to "Change adapter settings", select both adapters - the real one, with which we exit to the real network, and the virtual loopback that we just created - and click "Create a bridge". As a result, we get a bridge connection, which allows traffic to be exchanged with our virtual interface and the real one.
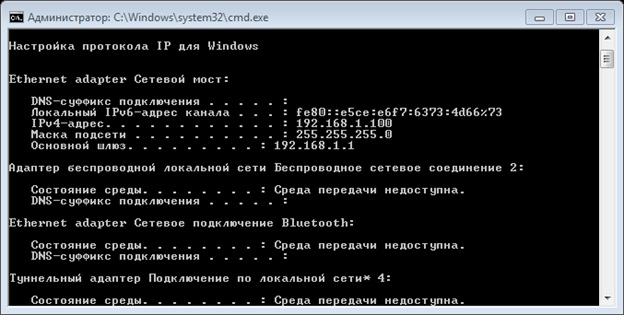
When creating a bridge, the system itself assigns it an IP address, and we need to know it. The ipconfig command will help us with this. With its help in my case, I easily found out that Windows assigned the address 192.168.1.100 to my bridge.
3. Now let's begin the most interesting thing: creating a router in GNS3 and configuring Cisco Communication Manager Express (CME).
For my experiment, I chose the 7200 platform and IOS c7200-adventerprisek9_sna-mz.150-1.M. On the one hand, it includes CME, which is quite functional for me, and on the other hand, this is the default iOS for this platform on my emulator. But nothing prevents you from choosing, for example, the platform 3600 and some other IOS - it's all about your goals and your tastes.
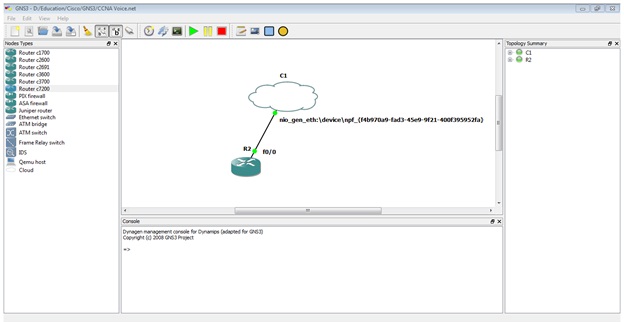
Let's create a router and Cloud in the emulator. In the Cloud, you must specify our loopback adapter as an NIO Ethernet. It all should look like this:
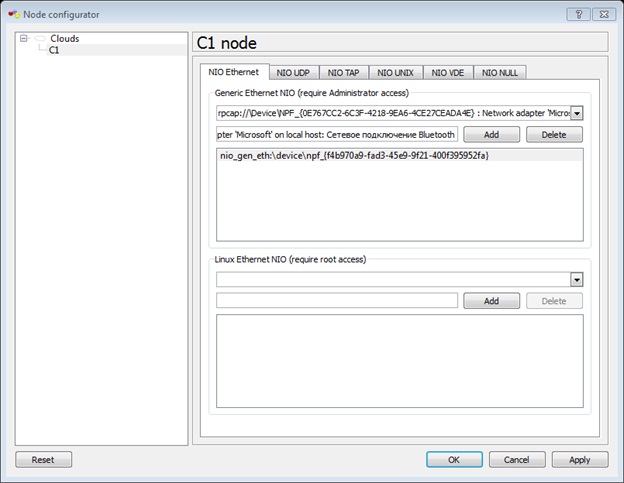
This completes the cloud setup.
To begin with, you will have to insert a card with one or several Ethernet ports of your choice into the router. After that we will be able to connect the port of this router with the Cloud port - after our manipulation, a virtual port appeared in the Cloud object, which corresponds to our loopback interface.
Everything, we start Tsisko.
I will not delve into the theory - I will leave it to you to study for independent work, especially since there is a lot of it, and it is damn interesting, as it always happens with Tsisko. In the field of VoIP, as in many others, Cisco has developed and used many proprietary standards. It is possible that they are tomorrow's standards of the entire industry, because a huge number of technologies and standards widely used today, starting with Power over Ethernet and ending with MPLS, were originally developed by Cisco Systems as proprietary standards.
But I digress, back to our router. First we need to configure its interface so that it can communicate with the network, and the network with it. The interface needs to be assigned an IP address that is included in our network, but not used by other devices, including the newly created bridge. In my case, I stopped at the address 192.168.1.50. Go to configuration mode and enter:
interface FastEthernet0/0
ip address 192.168.1.50 255.255.255.0
no shutdown
Now, attention! We need to check whether we did everything right. If the networks are working, we should be able to ping real machines on our network from the virtual router and vice versa.

Works? Perfectly! Go to the router again.
The basic CME settings are hidden in the router under the command of telephony-service. We will need to make the following manipulations with it:
telephony-service
max-ephones 10
max-dn 10
ip source-address 192.168.1.50 port 2000
auto assign 1 to 10
The max-ephones command sets the maximum number of IP phones that this router will serve, and max-dn, respectively, the maximum number of lines. Here we can specify any number up to the maximum, but it should be borne in mind that, depending on these commands, the router allocates some of its resources for VoIP, and it’s better that these values are close to real.
The command ip source-address specifies from which interface the CME should accept requests to connect telephones to it.
With the auto assign 1 to 10 command, we tell the router that we want it to automatically assign lines with numbers from 1 to 10 to the connected phones.
Now let's configure the lines (remember that the entire configuration of the router is done in configuration mode):
ephone-dn 1
number 101
ephone-dn 2
number 102
Using the ephone-dn command, we create a line, and number assigns a phone number to this line. Entering these commands should look like this:
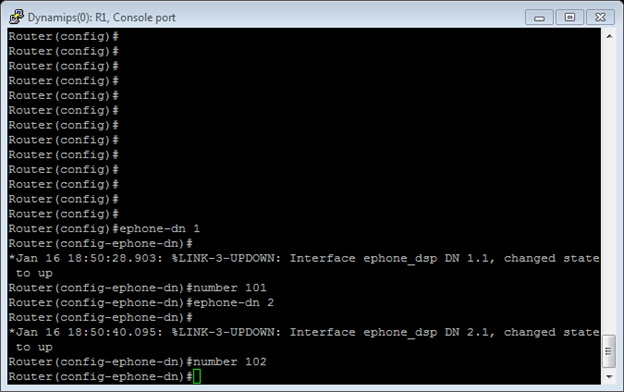
System messages that pop up on the command line will help us understand that the lines are activated and turned on.
4. The next step is to install and configure Cisco IP Communicator. You should have no problems with the installation, and after downloading Java you will see such a telephone number on the screen:
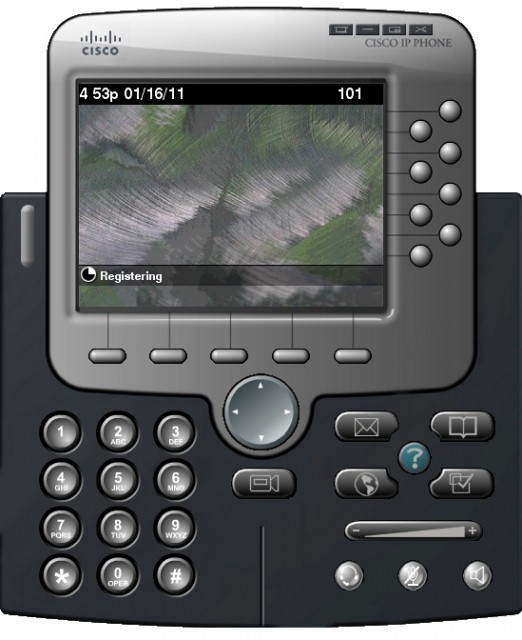
Clicking on the image with the right button, select Preferences. There, in the Network settings, you need to specify the adapter through which our computer goes to the network, and the TFTP server. As a TFTP server, you need to specify the address of our virtual router. That is, in our case, 192.168.1.50.
After that, your phone will reboot, find the CME, log in there and look like this:
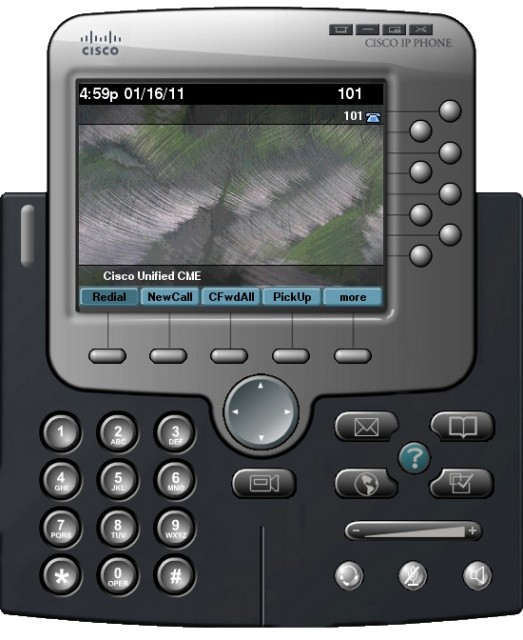
Having made the same manipulations on the second computer in your network, you will receive a second phone with the corresponding number, and so on.
Thus, by building up a virtual network, and raising more and more new softphones on computers, we can create a rather complex and nontrivial infrastructure and pull it in enough to earn the right to call ourselves a Cisco Certified VoIP Specialist.
There is an opinion that the Tsiski emulator is the first step to a rubber woman. It certainly has the right to exist. However, no one is born CCIE, everyone passes each of the stages to the heights on their own, and GNS3 can do a good job for those who want to understand the tricks of tsiskovskogo VoIP.
And there - who knows, maybe you will like it so much that you decide to buy yourself a real lab on eBay.
Good luck and see you on the Cisco exams!
Source: https://habr.com/ru/post/112098/
All Articles