Install Juniper JunOS 10 M / T series

This article describes the installation of Juniper JunOS version 10.4 for M / T series routers on a VMware virtual stand and the subsequent conversion to QEMU Image for use in GNS3.
Pro version
We install the latest version of JunOS, but I would like to note that the installation of earlier versions is done in the same way, so you can take any JunOS OS install media without thinking, there are also no technical reservations about domestic versions containing cryo modules.
General idea
JunOS is based on FreeBSD and hardware partly on the x86 architecture, which I mentioned in my previous article.
The plan is:
creating a virtual machine -> installing FreeBSD -> installing JunOS on FreeBSD, after deceiving the PIC check -> completing the installation of JunOS -> converting for QEMU.
There are a lot of screenshots under the cut.
Let's get started
At the end of the article I give a link to the reference material.
')
And so we create a virtual machine with a similar configuration:
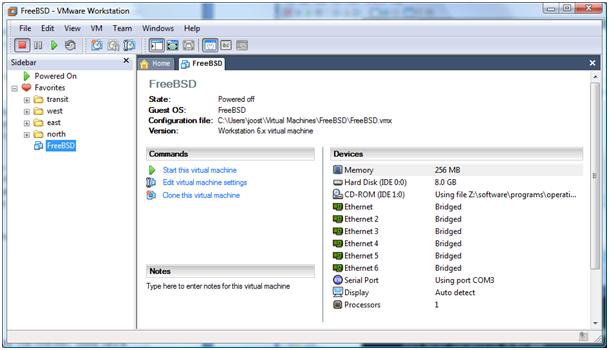
RAM should set 512MB at the time of installation, after you decide.
NIC is better to take one, then it will not be difficult to use more.
8GB HDD is enough, no more than 2.5GB will actually be occupied
I took 4.11-RELEASE-i386-miniinst.iso as a basis.
To emulate a console interface, you can use the HW Virtual Serial Port from the HW-Group, create a pair of COM ports, pair up. Assign one to a virtual machine (in our case COM3), connect to the other console.

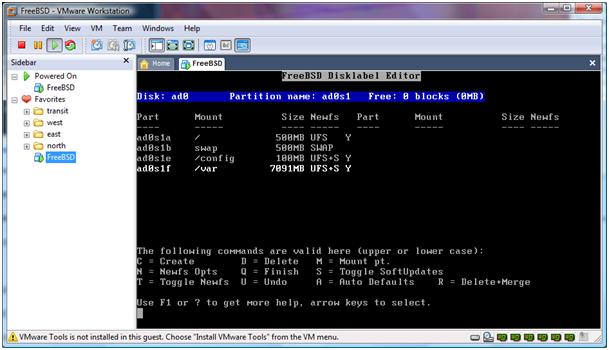
We make disk layout:
- Click "c", set the value "500M" <press enter>, then select "FS", then enter "/" <press enter>
- Click "c", set the value "500M" <press enter>, then select "Swap"
- Click "c", set the value "100M" <press enter>, then select "FS", then enter "/ config" <press enter>
- Click "c", agree with the set value <press enter>, select "FS", enter "/ var" <press enter>, thus we get a partition the size of everything that remains unused after creating the previous ones.
- Click "q" to complete this operation.
Choose "Exit"

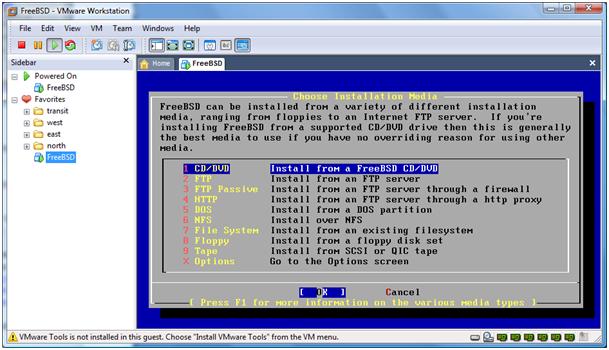
Select the source CD / DVD
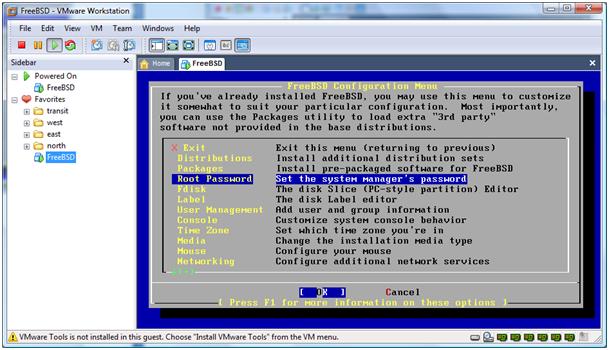
Set the root password, after
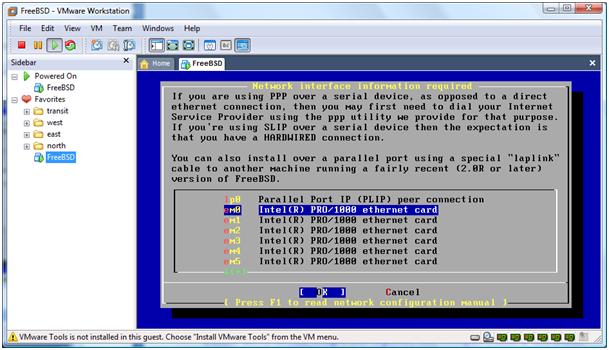
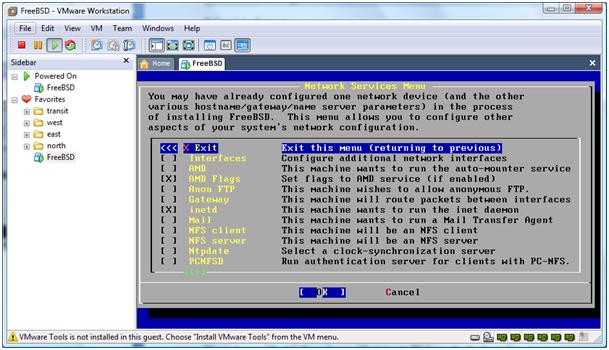
Configure the network:
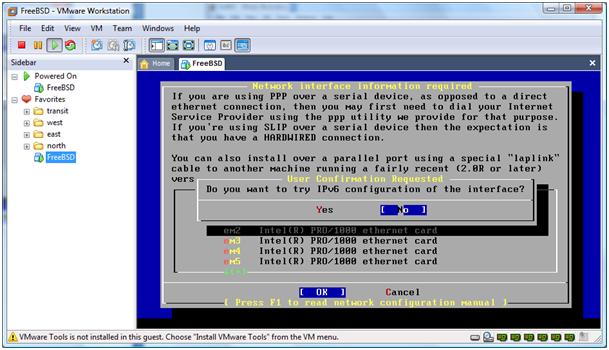
Choose our adapter:
Although if you, for example, made a bridge to your network and have DHCP there, you can automatically receive it.

Or manually set:

Agree with:

Exit and <hit enter>
Find the item "Exit install" and exit.

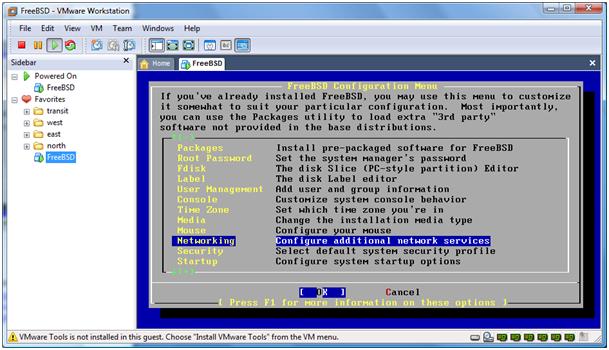
All of our FreeBSD is ready to install JunOS.
The important point: you need to make an edit in the virtual machine configuration.
File with VMX extension:
Find the string
scsi0.present = "TRUE"and replace the value with FALSE
the string
scsi0.virtualDev = "lsilogic"just delete.
Save the file, run our virtual system, these edits will eliminate problems with SCSI, Junper is loaded exclusively from the IDE.
Soon it will be JunOS ...
The next step is to copy to / var / tmp, archive with install JunOS media.
The way to do this is up to you, for example, to raise FTP on a machine and download on FreeBSD
It is important that before downloading the file via FTP, switch to binary mode by the client.
Maybe it will be easier for you to mount USB to a virtual machine or something else.
And we have jinstall-xxx-xxx-signed.tgz in / var / tmp, now we need to do a trick:
Do something like:
#mkdir blah;cd blah;tar zxvf ../jinstall-xxx-xxx-signed.tgz
#mkdir blah;cd blah;tar zxvf ../jinstall-xxx-xxx.tgz
#mkdir blah;cd blah;tar zxvf ../pkgtools.tgz
#cp -v /usr/bin/true bin/checkpic
, PIC
#tar zcvf ../pkgtools.tgz *
#cd ../;rm -rf blah
#tar zcfv /var/tmp/jinstall-xxx-xxx.tgz *
I also advise you to remove unnecessary folders and files from unpacking and install:
#pkg_add -f jinstall-xxx-xxx.tgz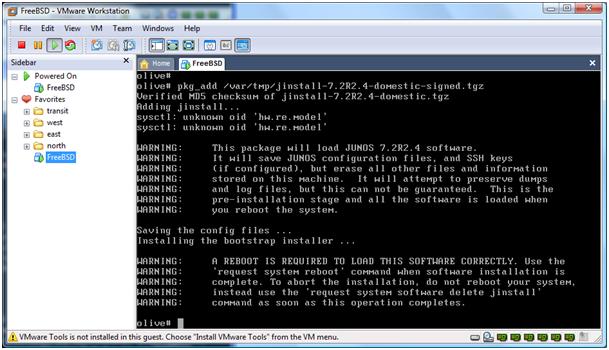
After installation we will execute
shutdown -r now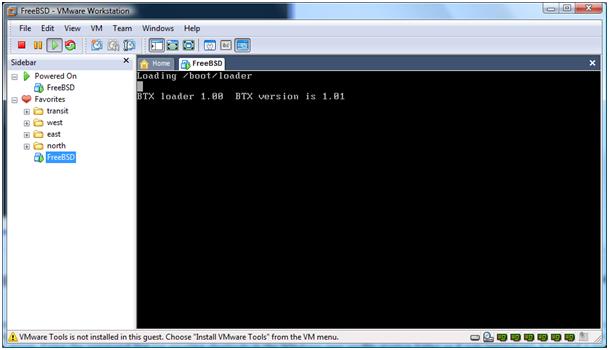
Overload. Wait until the installation is complete and the login prompt appears.
Log in, log in to the team of the same name, correctly shut down JunOS with the request system halt command
Conversion
To use our virtual router in a GNS3 environment, an image for QEMU is required.
To get it, we use the qemu-img utility, which is part of QEMU. The command to convert from me looks like this:
qemu-img convert juniper.vmdk -O qcow juniper.imgAfter receiving the coveted image, create a new juniper router profile in QEMU, add an instance to the workspace and launch it.
The same familiar inscription BTX loader, according to the advice received in the comments to the first article, will not just wait, but open the console and we will be able to observe the JunOS boot. And at the end of time we will see a greeting.
Curtain show version :
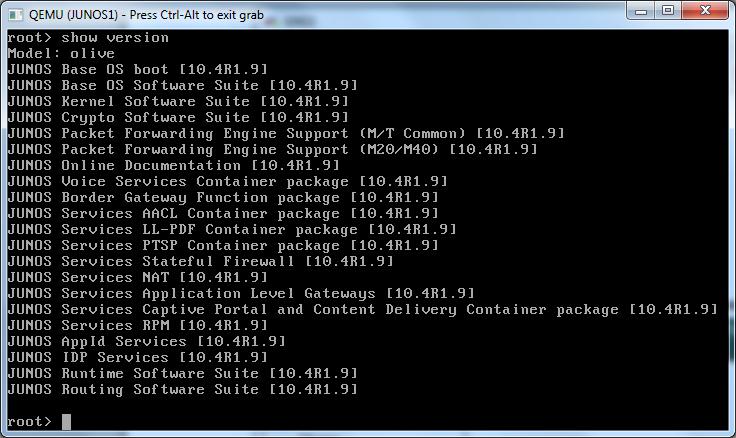
Now we have JunOS 10, you can start experimenting.
The next article is a JunOS build based on the J series recovery image.
Conclusions about the possibilities of virtualization JunOS on the PC, examples of what is “good” and what is absolutely “bad.
Reference materials:
Joost's Blog - joost.blogsite.org/wordpress/?p=15
zloBlog - www.zlonet.ru/page/ustanovka-junos-10-na-pc
Thanks for attention.
UPD 17.01: Edit errors.
Source: https://habr.com/ru/post/111974/
All Articles