Creating a series of pictures with images of their sequence numbers
In the computer club under my jurisdiction, RunPad Shell is used as the shell (alternative desktop). A new version of it has recently been released in which a long-awaited feature finally appeared: processing environment variables in the path to the splash file.
I have long wanted to put on each computer a screensaver with its number, but did not want to configure each computer separately. And now it is possible with one blow to prescribe the path “J: \ _ rs \ scrsvr \ % rs_machine% .jpg” to everyone and it’s easy to draw pictures.
But how can you get a set of pictures with images of their sequence numbers?
Drawing by hand is stupid and not sporting. All my life it is necessary to put up with the fact that it will work out right away, because the second time the hand will not rise.
')
Write a program - rough and straightforward. Especially considering that almost all programs have already been written to us, and you just need to find the right one.
The solution wanted to get as simple and flexible. But necessarily with the involvement of any previously unexplored tools and technologies, so that it is interesting and useful.
From the improvised means there was only home Linux, so the action plan was chosen as follows:
The manual has a special section " ImageMagick Text to Image Handling " which describes all the parameters relating to the application of text on images. I will not describe everything that came in handy to me, but I will focus only on one interesting feature.
My attention immediately attracted the subsection of Best Fit to Image . It says that when you use the -size (canvas size) option instead of -pointsize (font size), imagic will choose the maximum font size to fill the entire image with text. At first glance, this is exactly what you need.
We try:
The result is depressing. Firstly - the picture is generated for almost 20 seconds . Apparently IM generates several images by sequentially increasing the size, while the inscription still fits into the specified dimensions.
Secondly - on the monitor the inscription will be located not in the center. If you cut off all unnecessary, replacing the -gravity center parameter with -trim + repage , you get a smaller image than specified in the task .
We'll have to pick up the size manually. In this case, you may need to be able to specify the coordinates, starting from which imagic will have to insert text, since the indent from the bottom, in the first version, appeared not without reason.
In addition to Label, there are several other drawing methods: Caption, Draw and Annotate. However, Caption does not allow you to specify the coordinates in which you want to put the inscription, and Draw, based on the documentation, curve and outdated.
Inscription using Annotate is possible only on an existing image, so it was necessary to additionally specify the xc parameter in order for the canvas to be automatically created. Since you can also specify the canvas color in the same parameter, you can no longer use the -background parameter.
It turned out almost the same as in the first case, but now it takes less than a second to generate the image and it is possible to indicate the relative offset of the label. Use it by moving the text below.

Well, that's exactly what you need. On this with Image Magic, you can finish.
Before, I didn’t really read any Bash scripts, let alone write anything on it. The general idea of the language was of course, but the experience was completely absent.
A wonderful guide, Advanced Bash Scripting ( eng , rus ), helped me start, which, as far as I know, is also published in paper form. Patience was enough only for the first couple of chapters and having understood the variables, I immediately switched to cycles.
It turned out that you can drive the cycle in several ways. With my brevity and clarity, I liked this more:
In many scripting languages, you can ask the interpreter to execute the system command by enclosing it in `reverse apostrophes`, and by escaping a line feed with a backslash \, you can enter a multiline command even into the console.
Now you can try to put it all together.
Happened!
After that, I played a little more with the imagic parameters and, thanks to a successful example, I achieved a glow from the numbers corresponding to the name of the club - “Neon” :-)

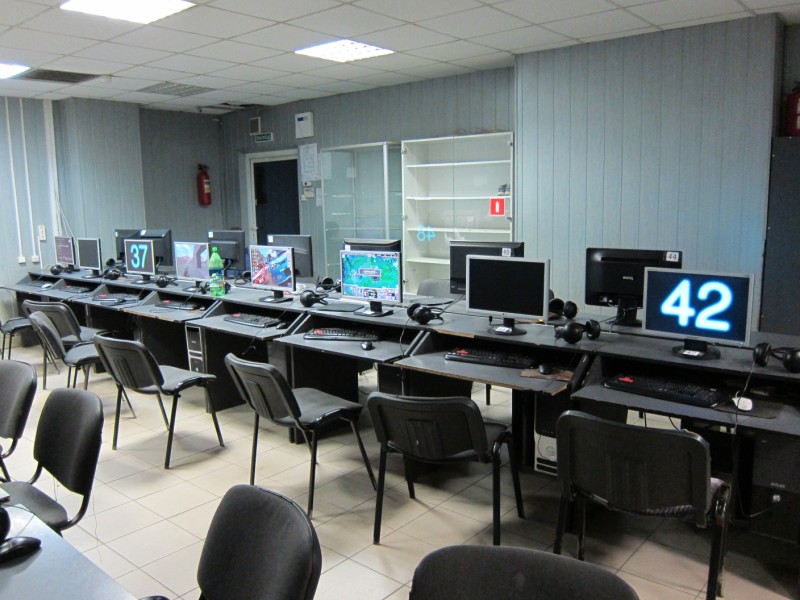
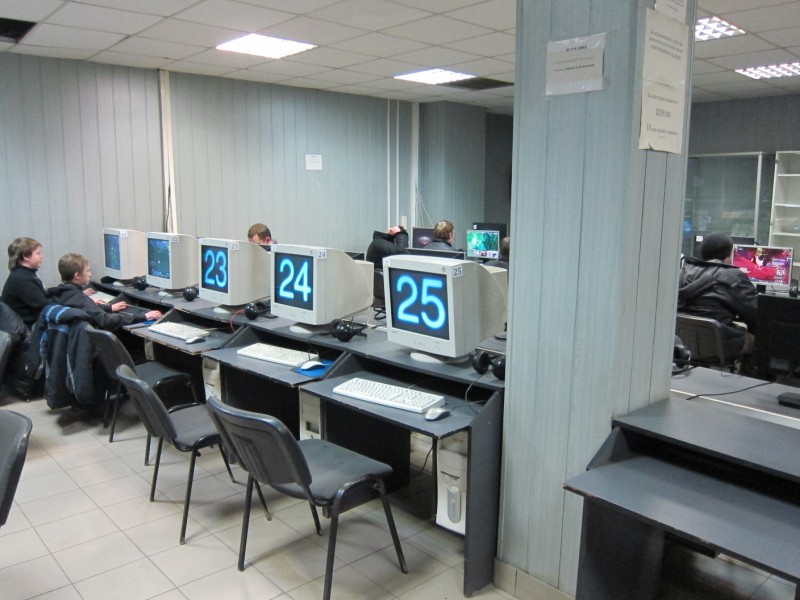
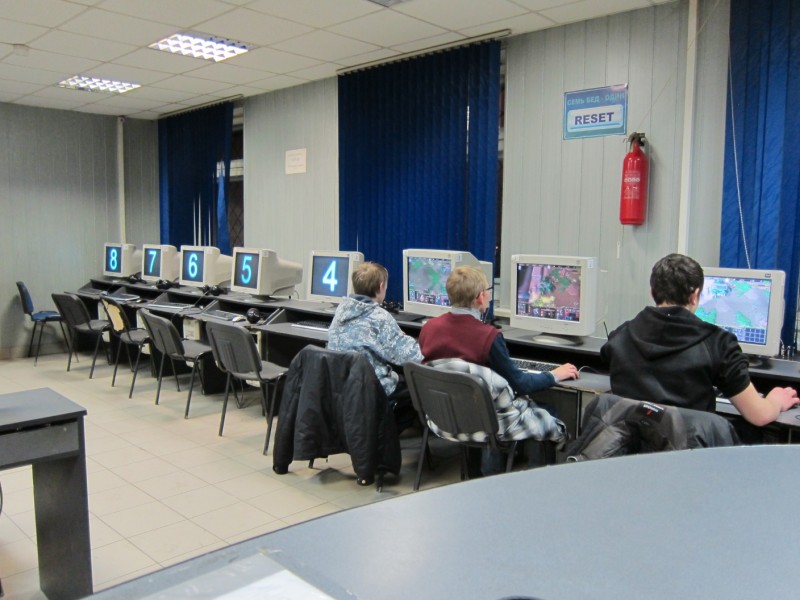
I have long wanted to put on each computer a screensaver with its number, but did not want to configure each computer separately. And now it is possible with one blow to prescribe the path “J: \ _ rs \ scrsvr \ % rs_machine% .jpg” to everyone and it’s easy to draw pictures.
But how can you get a set of pictures with images of their sequence numbers?
Drawing by hand is stupid and not sporting. All my life it is necessary to put up with the fact that it will work out right away, because the second time the hand will not rise.
')
Write a program - rough and straightforward. Especially considering that almost all programs have already been written to us, and you just need to find the right one.
The solution wanted to get as simple and flexible. But necessarily with the involvement of any previously unexplored tools and technologies, so that it is interesting and useful.
From the improvised means there was only home Linux, so the action plan was chosen as follows:
- We take the unfamiliar Image Magic and find out what keys he needs to pass to the input in order to get a certain resolution image with the inscription in the largest possible font (so that you can see it from afar).
- We take Bash and study previously unknown shell scripting until it becomes clear how to organize it using a cyclic command launch with a loop counter among the parameters.
- We try to connect 1 and 2 and writing a script, which with the help of imagic will create a set of pictures with the given parameters.
Image magic
The manual has a special section " ImageMagick Text to Image Handling " which describes all the parameters relating to the application of text on images. I will not describe everything that came in handy to me, but I will focus only on one interesting feature.
My attention immediately attracted the subsection of Best Fit to Image . It says that when you use the -size (canvas size) option instead of -pointsize (font size), imagic will choose the maximum font size to fill the entire image with text. At first glance, this is exactly what you need.
We try:
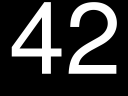
convert -size 1024x768 -background black -fill white -gravity center label:42 image.jpgThe result is depressing. Firstly - the picture is generated for almost 20 seconds . Apparently IM generates several images by sequentially increasing the size, while the inscription still fits into the specified dimensions.
Secondly - on the monitor the inscription will be located not in the center. If you cut off all unnecessary, replacing the -gravity center parameter with -trim + repage , you get a smaller image than specified in the task .
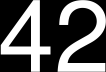
convert -size 1024x768 -background black -fill white -trim +repage label:42 image.jpgWe'll have to pick up the size manually. In this case, you may need to be able to specify the coordinates, starting from which imagic will have to insert text, since the indent from the bottom, in the first version, appeared not without reason.
In addition to Label, there are several other drawing methods: Caption, Draw and Annotate. However, Caption does not allow you to specify the coordinates in which you want to put the inscription, and Draw, based on the documentation, curve and outdated.
Inscription using Annotate is possible only on an existing image, so it was necessary to additionally specify the xc parameter in order for the canvas to be automatically created. Since you can also specify the canvas color in the same parameter, you can no longer use the -background parameter.
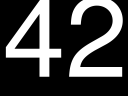
convert -size 1024x768 xc:black -pointsize 900 -fill white -gravity center -annotate +0+0 "42" image.jpgIt turned out almost the same as in the first case, but now it takes less than a second to generate the image and it is possible to indicate the relative offset of the label. Use it by moving the text below.
convert -size 1024x768 xc:black -pointsize 900 -fill white -gravity center -annotate +0+70 "42" image.jpgWell, that's exactly what you need. On this with Image Magic, you can finish.
Bash scripting
Before, I didn’t really read any Bash scripts, let alone write anything on it. The general idea of the language was of course, but the experience was completely absent.
A wonderful guide, Advanced Bash Scripting ( eng , rus ), helped me start, which, as far as I know, is also published in paper form. Patience was enough only for the first couple of chapters and having understood the variables, I immediately switched to cycles.
It turned out that you can drive the cycle in several ways. With my brevity and clarity, I liked this more:
#!/bin/bash
for i in $(seq 1 10)
do
echo "Hello $i times"
done
In many scripting languages, you can ask the interpreter to execute the system command by enclosing it in `reverse apostrophes`, and by escaping a line feed with a backslash \, you can enter a multiline command even into the console.
Now you can try to put it all together.
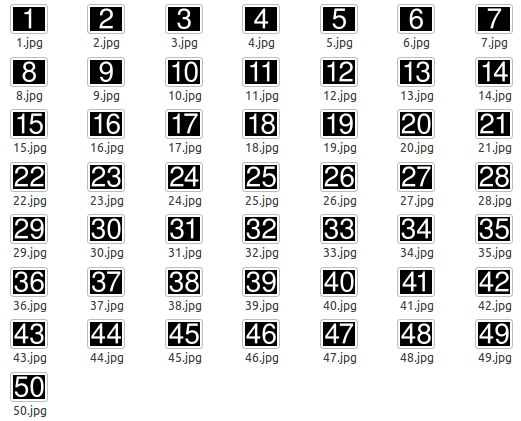
#!/bin/bash
for i in $(seq 1 50)
do
`convert \
-size 1024x768 \
xc:black \
-pointsize 900 \
-fill white \
-gravity center \
-annotate +0+70 "$i" \
${i}.jpg`
done
Happened!
After that, I played a little more with the imagic parameters and, thanks to a successful example, I achieved a glow from the numbers corresponding to the name of the club - “Neon” :-)
Result in kind
Source: https://habr.com/ru/post/111608/
All Articles