Silverlight + Augmented reality + Shaders
Hello to all.
I love working with Silverlight, and just recently came across Augmented Reality using Silverlight. About it and on Habré already written, and quite a lot written in blogs, but I still repeat a little. The very idea of augmented reality is interesting, but I wanted to use it as something unusual. And recently, the hands reached the study of pixel shaders. It became interesting to try to connect it together.
If you are interested in what came out of this, then welcome under the cat:
')
First, download the SLARToolkit .
The downloaded archive contains the necessary libraries and 3 ready-made markers. There are several ways to create your own markers, but for the beginning, ready ones are enough.
Now we create a new Silverlight application and add links to the SLARTooklit.dll and Matrix3DEx.dll from the archive we downloaded.
Next, you need to access the camera and display the image from the camera on the screen.
This is done simply:
There is simply no place.
To do this, add a reference to the XAML method that will be called after the download and a link to the button click handler:
It remains to describe the methods themselves:
Now the picture from the camera is displayed on the screen.
The principle of operation is approximately the following:
The following code is responsible for all these actions:
And of course, we add our marker to the solution. In this case, it is Marker_L_16x16segments_80width.pat. In its Build Action property, specify the Resource.
Now the only thing left for us is to print out the marker we have chosen. For convenience, the developers of SLARToolkit put a pdf version of the marker for printing.
We launch, and see that the Habr logo is superimposed over the marker and follows it.
Wonderful!
In a nutshell, a shader is a program written in HLSL (High Level Shader Language) in which all actions are reduced to changing the color or position of a pixel.
HLSL is C-like language, therefore, to understand it you need a minimum of time.
Silverlight can work with pixel shaders. This is very good. provided hardware acceleration is enabled, shaders are executed on the graphics core.
There are several programs that allow you to simplify the creation of shaders. Personally, I liked the Shazzam program the most. it allows you to immediately view the result on several images and video, has many examples, and most importantly, it generates the C # or VB class, which allows you to connect the shader to our project in one line of code.
So, download Shazzam from the site .
Install and run.
I chose a ready-made shader ZoomBlur. it has all the input parameters I need, namely the degree of blurring and the point relative to which we will blur. In our case, this point will be indicated by a marker.
The result of Shazzam are the files ZoomBlur.ps and ZoomBlurEffect.cs. Add them to our project.
The first file is a ready shader. The second is an automatically generated class that facilitates the use of a shader.
Add another button that will include our shader:
Add a handler to the code:
Now, when you move the marker, the blur changes.
The beauty of these technologies is that they are limited only by your imagination, so let's play with them.
Link to download the source
See how it works.
SLARToolkit - SDK to start games with augmented reality
Shazzam is an application for creating comfortable shaders for Silverlight and WPF.
I love working with Silverlight, and just recently came across Augmented Reality using Silverlight. About it and on Habré already written, and quite a lot written in blogs, but I still repeat a little. The very idea of augmented reality is interesting, but I wanted to use it as something unusual. And recently, the hands reached the study of pixel shaders. It became interesting to try to connect it together.
If you are interested in what came out of this, then welcome under the cat:
')
First, download the SLARToolkit .
The downloaded archive contains the necessary libraries and 3 ready-made markers. There are several ways to create your own markers, but for the beginning, ready ones are enough.
Now we create a new Silverlight application and add links to the SLARTooklit.dll and Matrix3DEx.dll from the archive we downloaded.
Here is the XAML markup of my workpiece.
 <UserControl x: Class = "SilverlightForHabr.MainPage"
     xmlns = "http://schemas.microsoft.com/winfx/2006/xaml/presentation"
     xmlns: x = "http://schemas.microsoft.com/winfx/2006/xaml"
     xmlns: d = "http://schemas.microsoft.com/expression/blend/2008"
     xmlns: mc = "http://schemas.openxmlformats.org/markup-compatibility/2006"
     mc: Ignorable = "d"
     d: DesignHeight = "550" d: DesignWidth = "700">

     <Grid x: Name = "LayoutRoot" Background = "White">
         <StackPanel>
             <TextBlock Text = "Silverlight + Augmented reality + Shaders" HorizontalAlignment = "Center" />
             <Grid Width = "640" Height = "480">
                 <Rectangle Name = "Viewport" Stroke = "Black" StrokeThickness = "2" />
                 <Canvas>
                     <Image Name = "Logo" Source = "habr.png" Width = "300" Height = "300" />
                 </ Canvas>
             </ Grid>
             <Button Content = "Let's start" Padding = "5" Margin = "5" HorizontalAlignment = "Center" />
         </ StackPanel>
     </ Grid>
 </ UserControl>
Next, you need to access the camera and display the image from the camera on the screen.
This is done simply:
- Create a CaptureSource object
- We ask the user for permission to use the camera
- Display a picture
There is simply no place.
To do this, add a reference to the XAML method that will be called after the download and a link to the button click handler:
 Loaded = "UserControl_Loaded">
 and
 <Button Content = "Let's start" Padding = "5" Margin = "5" HorizontalAlignment = "Center" Click = "onStartBtnClick" />
It remains to describe the methods themselves:
 private void UserControl_Loaded (object sender, RoutedEventArgs e)
 {
       captureSource = new CaptureSource ();
       captureSource.VideoCaptureDevice = CaptureDeviceConfiguration.GetDefaultVideoCaptureDevice ();  // bind to the camera by default

       var vidBrush = new VideoBrush ();
       vidBrush.SetSource (captureSource);  // for the brush, specify the video from the camera as the source
       Viewport.Fill = vidBrush;  // paint on our rectangle
 }

 private void onStartBtnClick (object sender, RoutedEventArgs e)
 {
       if (CaptureDeviceConfiguration.RequestDeviceAccess ()) // ask the user whether it is possible to work with the camera
       {
           captureSource.Start (); // if yes, then Let's go!
       }
 }
Now the picture from the camera is displayed on the screen.
Let's start working with Augmented Reality
The principle of operation is approximately the following:
- Create an instance of the CaptureSourceMarkerDetector class, which is responsible for detecting markers in the incoming video from the camera
- If we find something, we call the handler.
- Determine the projection matrix (position in space) of the marker itself
- We apply this matrix to the object that we want to impose on top of the marker.
The following code is responsible for all these actions:
 private void UserControl_Loaded (object sender, RoutedEventArgs e)
 {
       captureSource = new CaptureSource ();
       captureSource.VideoCaptureDevice = CaptureDeviceConfiguration.GetDefaultVideoCaptureDevice ();

       var vidBrush = new VideoBrush ();
       vidBrush.SetSource (captureSource);
       Viewport.Fill = vidBrush;


       arDetector = new CaptureSourceMarkerDetector ();
       var marker = Marker.LoadFromResource ("Marker_L_16x16segments_80width.pat", 16, 16, 80);
       arDetector.Initialize (captureSource, 1, 4000, marker);

       arDetector.MarkersDetected + = (s, me) =>
       {
           Dispatcher.BeginInvoke (() =>
           {
               var dr = me.DetectionResults;
               if (dr.HasResults)
               {
                   var centerAtOrigin = Matrix3DFactory.CreateTranslation (-Logo.ActualWidth * 0.5, -Logo.ActualHeight * 0.5, 0);
                   var scale = Matrix3DFactory.CreateScale (0.5, -0.5, 0.5);
                   var world = centerAtOrigin * scale * dr [0] .Transformation;

                    var vp = Matrix3DFactory.CreateViewportTransformation (Viewport.ActualWidth, Viewport.ActualHeight);
                    var m = Matrix3DFactory.CreateViewportProjection (world, Matrix3D.Identity, arDetector.Projection, vp);

                    Logo.Projection = new Matrix3DProjection {ProjectionMatrix = m};
               }
           });
       };
 }
And of course, we add our marker to the solution. In this case, it is Marker_L_16x16segments_80width.pat. In its Build Action property, specify the Resource.
Now the only thing left for us is to print out the marker we have chosen. For convenience, the developers of SLARToolkit put a pdf version of the marker for printing.
We launch, and see that the Habr logo is superimposed over the marker and follows it.
Wonderful!
Shaders
In a nutshell, a shader is a program written in HLSL (High Level Shader Language) in which all actions are reduced to changing the color or position of a pixel.
HLSL is C-like language, therefore, to understand it you need a minimum of time.
Silverlight can work with pixel shaders. This is very good. provided hardware acceleration is enabled, shaders are executed on the graphics core.
There are several programs that allow you to simplify the creation of shaders. Personally, I liked the Shazzam program the most. it allows you to immediately view the result on several images and video, has many examples, and most importantly, it generates the C # or VB class, which allows you to connect the shader to our project in one line of code.
So, download Shazzam from the site .
Install and run.
I chose a ready-made shader ZoomBlur. it has all the input parameters I need, namely the degree of blurring and the point relative to which we will blur. In our case, this point will be indicated by a marker.
Shader code
 /// <class> ZoomBlurEffect </ class>

 /// <description> An effect that applies a radial blur to the input. </ description>

 // ------------------------------------------------ -----------------------------------------
 // Shader constant register mappings (scalars - float, double, Point, Color, Point3D, etc.)
 // ------------------------------------------------ -----------------------------------------

 /// <summary> The center of the blur. </ summary>
 /// <minValue> 0 </ minValue>
 /// <maxValue> 0.2 </ maxValue>
 /// <defaultValue> 0.9,0.6 </ defaultValue>
 float2 Center: register (C0);

 /// <summary> The amount of blur. </ summary>
 /// <minValue> 0 </ minValue>
 /// <maxValue> 0.2 </ maxValue>
 /// <defaultValue> 0.1 </ defaultValue>
 float BlurAmount: register (C1);

 // ------------------------------------------------ --------------------------------------
 // Sampler Inputs (Brushes, including ImplicitInput)
 // ------------------------------------------------ --------------------------------------

 sampler2D inputSource: register (S0);

 // ------------------------------------------------ --------------------------------------
 // Pixel Shader
 // ------------------------------------------------ --------------------------------------

 float4 main (float2 uv: TEXCOORD): COLOR
 {
	 float4 c = 0;
	 uv - = Center;

	 for (int i = 0; i <15; i ++)
     {
		 float scale = 1.0 + BlurAmount * (i / 14.0);
		 c + = tex2D (inputSource, uv * scale + Center);
	 }

	 c / = 15;
	 return c;
 }
The result of Shazzam are the files ZoomBlur.ps and ZoomBlurEffect.cs. Add them to our project.
The first file is a ready shader. The second is an automatically generated class that facilitates the use of a shader.
Add another button that will include our shader:
<Button Content = "Enable Shader" Name = "ShadersBtn" Padding = "5" HorizontalAlignment = "Center" Click = "SwitchOnShaders" />
Add a handler to the code:
 private void SwitchOnShaders (object sender, RoutedEventArgs e)
 {
     if (Viewport.Effect == zb)
     {
         Viewport.Effect = null;
         ShadersBtn.Content = "Enable Shader";
         return;
     }

     zb.Center = new Point ();
     zb.BlurAmount = 0.2;

     Viewport.Effect = zb;
     ShadersBtn.Content = "Disable Shader";

 }
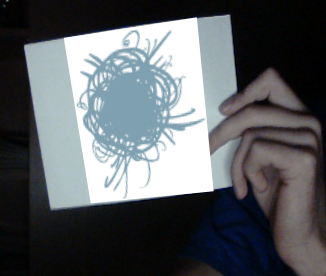
Now, when you move the marker, the blur changes.
Afterword
The beauty of these technologies is that they are limited only by your imagination, so let's play with them.
Links
Link to download the source
See how it works.
SLARToolkit - SDK to start games with augmented reality
Shazzam is an application for creating comfortable shaders for Silverlight and WPF.
Source: https://habr.com/ru/post/111178/
All Articles