Arduino Ethernet Thermometer
A lot has been said about Arduino digital thermometers. All of them either connected to a computer, or displayed the temperature immediately on the display.
But I needed a street thermometer, which is autonomous and sends data to the site. So let's get started.
What we need:
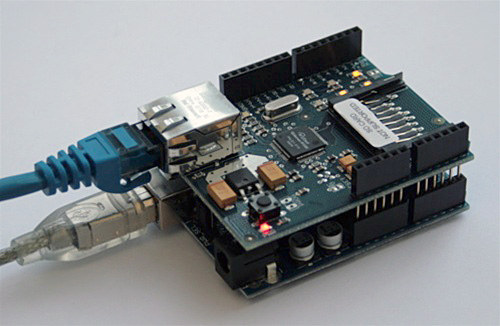
- Arduino Duemilanove (Freeduino 2009)
- Ethernet Shield v2
- digital temperature sensor - DS18B20
- case fan (120 mm)
- can of water emulsion or PVA glue (2 liters)
- Light-emitting diode
- twisted pair
Tasks
Interrogate the temperature sensor on the 1-Wire bus and send the results every 3 seconds to the Web server where they will be stored.
')
The algorithm of the device:
- assign our Ethernet Shield `s MAC address and ip-address
- we initialize connection with the server on port 80
- get data from a digital temperature sensor, on a 1-wire bus
- form GET request
- send GET request
- break the connection
Sketch source code:
Comments on the code should clarify.
include <Ethernet.h>
// Arduino.
// .
include <DallasTemperature.h>

// MAC-
byte mac[] = { 0x00, 0x3A, 0xF1, 0x19, 0x69, 0xFC };
// ip-
byte ip[] = { 192, 168, 1, 156 };
// ip-
byte server[] = { 79, 140, 28, 20 }; //
char temp[6];
byte isdata=0;

Client client(server, 80); // 80-.
DallasTemperature tempSensor;

void setup()
{
Ethernet.begin(mac, ip); // Ethernet Shield
tempSensor.begin(7); // 7-
Serial.begin(9600); // 9600 ( )
}

void loop()
{
delay(3000); // 3 .
//
if (client.connect()) {
Serial.println( "connecting..." ); // Serial.println . , , , .
//
switch (tempSensor.isValid())
{
case 1:
Serial.println( "Invalid CRC" ); //
tempSensor.reset(); //
return ;
case 2:
Serial.println( "Invalid device" ); // - "" :)
tempSensor.reset(); //
return ;
}

Serial.println( "connected" );
char buf[80];
float f=tempSensor.getTemperature(); //

Serial.println(tempSensor.getTemperature());

// . - Arduino float.
// . ,
// Arduino. .
int temp1 = (f - ( int )f) * 100; //
// GET . code , .
// Web-.
sprintf(buf, "GET /class/backend/meteo.php?temp=%0d.%d&code=123456 HTTP/1.0" , ( int )f, abs(temp1));

Serial.println(buf);
client.println(buf); // GET
client.println( "Host: opck.info" ); // , host ip .
client.println();

} else {
Serial.println( "connection failed" );
}

while (client.available()) {
isdata=1;
char c = client.read(); // , Web-
Serial.print(c);

}

if (!client.connected()) {
isdata=0;
Serial.println();
Serial.println( "disconnecting." );
client.stop(); //
}
}
Build device:
- the first "foot" of the sensor we catch on the "minus" GND
- second leg (DQ) on the 7th pin
- third for a plus
- The second and third need to be connected by a resistor of ~ 4.7 K. But I replaced the resistor with a LED and got a sensor bus access indicator (ATTENTION! Nothing will work without a resistor or LED. Do not forget!)
In theory, that's all. Should work.
It works, but the combat conditions showed that when the sunlight falls on the sensor, it can heat up and show the temperature much higher than the real one. That's right - he will show the temperature in the sun. And we need air temperature.
The first time for this was assembled body from under the can of coffee, wrapped in foil. But it did not help.
Studying photographs of real weather stations helped find a solution. The body for the sensor must be larger, and also have active ventilation for such cases.
Making the case for the sensor
Bank of water-based paint turned out to be suitable in size (the same can be from PVA glue, 2-3 liters in volume). At the bottom of the banks make a hole under the fan. And attach it to the bank. In the center of the can, we place a pad under the sensors, with a diameter slightly smaller than the can itself, so that air can circulate.
A few photos:

Water emulsion can

Details and the bank with the lead

Installing the sensor in the housing

Sensor in the housing, top view
As you remember, I replaced the resistor with an LED, so we also make a hole for it so that the operation of the device is always visible.

Corps, side view
We do not need a lid from the can; instead, we need a canopy, such that air is allowed to pass and atmospheric precipitations do not fall inside (the sensor will be located on the street).
I made an Arduino case from a plastic box from an Explay C360 mp3 player.

Arduino
Backend receiving data:
On the server side the script is running, which is accessed by the thermometer. The script verifies the correctness of the secret code so that the testimony cannot be changed.
And then adds a new entry to the MySql table. Then this data can be displayed as you like. At the same time, every minute the data for the past minute is averaged and added to another table.
It is necessary in order to:
1. it was easier to make samples in the database (isn’t it more convenient to specify a specific minute and get the result)
2. samples were faster (for the year ~ 500,000 records instead of 10,000,000)
During the long-term operation of the sensor, a problem was discovered, sometimes it spontaneously (once every 3-4 hours) gives a random value. Therefore, I added a check for a temperature change of more than 1 degree for 15 seconds. Such values are ignored.
What came of it all:
On my website I posted a page with a thermometer and added a temperature chart for the last 24 hours.
You can see here: Ethernet thermometer .
Disadvantages:
The accuracy of the sensor is 0.5 * C, which is not enough for me. But there is a way to improve its characteristics. It will take one more or more sensors (preferably from different batches). We obtain data from all sensors and count the arithmetic average. So you can achieve accuracy to hundredths of a degree.
Future plans:
- humidity sensor
- pressure meter
- wind speed sensor
- light sensor
- put a few of these in the city and make your own weather forecasts
- power Arduino on Power over Ethernet
- automate the switching on and rotational speed of the fan depending on the lighting
- remote control
- data reset in case of lack of communication (for me it is critical)
Known to me disadvantages:
- high price - 2180 rubles. (Freeduino 2009 (800 p.) + Ethernet Shield v2 (1300 p.) + 1 sensor (80 p.))
- if the fan is turned on too quickly, then he himself introduces an error in the temperature, blowing the sensor. It should not blow, but only push the air.
Related Links:
Blog Arduino on Habré
Online thermometer
DS18B20 Datasheet
PS: the article entirely belongs to the liderman - all questions to him
Source: https://habr.com/ru/post/110610/
All Articles