Making Desire HD from Desire
Just a couple of days ago, I read the post The Second Life of HTC HD2 and wondered if I could make Desire HD from my Desire? As it turned out, it is possible, and not even very difficult. In general, after thinking for a while about the pros and cons of switching to HD, I proceeded to the transformation. After all the actions, I got all the features of Desire HD in the Desire package. No problems or errors occurred.
For those who find it difficult to decide whether to switch to Desire HD, I advise you to read the article From HTC Desire to HD: is it worth it? . And I will continue for those who are already sure that they want to update their device.
detailed instructions
')
Before telling how all this is done, I must warn you about the most important minus. With this update, you lose your HTC warranty . But at any time you can roll back and get a pristine Desire with factory firmware, and with it, respectively, and a guarantee. Alas, HTC does not support phones with root (super-user), although there are much more lotions there. Here is a link immediately if you need to roll back the firmware.
Well, I warned you, so if it doesn't scare, let's get started. The original instructions can be read here .
To complete all the transformations you will need:
- HTC Desire
- USB cable
- Computer
- Hour of free time
Required files (better to download them immediately):
- Unrevoked 3 for Windows
- USB Driver
- Desire HD Firmware
- Radio After downloading, rename to update.zip
Unrevoked for Mac and Linux can be downloaded on the Unrevoked website
Everything! Getting started.
1) The most important thing to do before installing is to remove HTC Sync . It must be removed from the computer (including all drivers) and from the phone. Do not worry, after flashing you can put everything back. If you don’t delete Sync, the flashing program simply won’t see the phone and you’ll still have to delete it, but restarting your computer and phone a couple of times. Also, do not forget to backup all data and contacts , since everything will be erased.
2) Now, in order to connect the phone to the computer, we need to install the driver. This is done quite simply.
- Unpack the downloaded USB-Driver file where it suits you
- Turn off the phone
- Connect the phone with a USB cable to the computer
- Start the phone in HBOOT mode (hold down the volume down and power on)
- After the launch of the phone, wait until the screen passes SD checking and the text HBOOT USB PLUG appears.
- Open the device manager on your computer
- Locate the uninstalled Android device. Click on it with the right button, click on “Update Driver” and select the installation from the folder where you unpacked the downloaded file.
There is also a video instruction, perhaps, it will be clearer to someone.
After these actions, the computer sees our device and, in fact, we can do anything with it.
3) Restart the phone in normal mode. Turn on the “Charge Only” mode in the computer connection settings and tick the “Remember my choice” box. Also, enable Debug Mode on the Menu-Settings-Applications-Development page.
Make sure the phone is connected to the computer. Run the downloaded program Unrevoked 3 . It is possible that the program will not see your phone. If this happens, check that you have deleted HTC Sync, if your device is in Device Manager, and if debug modes and Charging are enabled. Problems can arise only because of this.
If you did everything correctly, the program itself will do everything that is needed. Follow her requirements and everything. Perhaps she will ask you to restart the phone. In any case, in 3-7 minutes your phone will be with root and you will be able to install on it applications that require it (for example, Screenshot).
UPD: Sergey Prikhodko shared. “I re-flashed my phone and ran into a certain difficulty.
I was able to overcome it, and decided to share it.
If you do not install HTC Sync on your computer at all, then p. 3 will not be executed, since the devices will have an ADB device, but I did not find the driver for it separately.
The only solution is to install and uninstall HTC Sync, while remaining installed HTC Driver Installer »
4) Download via the Market or manually ROM Manager . This program will help us break the memory card into 2 sections and install the firmware and radio module.
The first thing we do is split the card. Now all applications will be installed in the card and you will not be inconvenienced by the fact that the phone runs out of memory. To be more precise, only the application will be installed into the phone, its basis, and all the caches, settings, data will be in the map. Remember that when you perform this action, all data from the memory card will be deleted
In order to do this, run the installed ROM manager and select the “Partition SD Card” option. Then select Ext Size, that is, just the place where the programs will be stored. I chose 512MB because I put a lot of applications. Next you need to select Swap size, the so-called virtual memory. There will be optimal 128Mb. Then press OK, the phone restarts and breaks your card. You may have problems restarting. You will see the android icon and exclamation mark. Do not be afraid, just restart the phone, go to the ROM Manager and repeat the procedure. Now everything should work.
5) Now, when we have a broken memory card, proceed to the installation of the radio module.
Download Radio to the memory card ( Rename to update.zip first )
Open all the same ROM Manager, select the item “Install ROM from SD Card” and find our update.zip there . Select it and in the menu that appears, remove all the checkmarks and click OK. The phone will reboot and everything will be installed.
Again, it may happen that the phone does not start the installation. To do this, turn off the phone, turn it on in HBOOT mode and select the Recovery item.
6) We start, finally, to install the firmware. We do everything the same as in the previous paragraph with the file Desire HD Firmware . Only with one difference: when after selecting a file a window pops up, you need to set all the checkboxes . Well, if the phone does not start the installation itself, then, as in the previous paragraph, run the Recovery item.
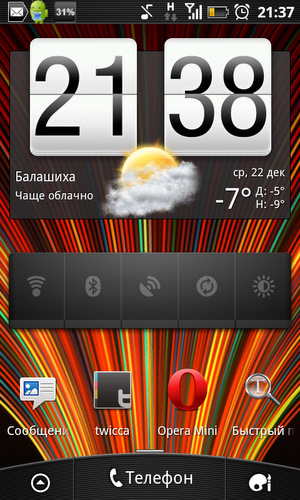
5-10 minutes, it will make a backup of your system and install a new one. After that, the phone will start with the new HTC Sense interface, new applications and features. After this, both the archive (update.zip and ReflexTSenseHD_1.4.1_Sense_DHD_2.2_FRF91_A2SD + .zip can be deleted from the memory card in order not to take up space. They are no longer needed). Installation may be longer than 10 minutes. If you are sure that you have done everything correctly, then wait and do not touch anything. First, the HTC screen will appear, then the black screen, then the buttons will light up, then the splash screen and only after that the desktop.
I also advise you to go into the Spare Parts application, select “Basic SpareParts Settings” at the very bottom and set the “Windows animations” and “Transition animations” options to Fast or Off . This is necessary so that there is no braking effect when switching windows.
UPD: If in paragraphs. 5 and 6 an android will appear with an exclamation mark enough:
1. press the power button,
2. select the item “install zip from sdcard”, press the joystick
3. select “toggle signature verification”, click on the joystick (see Signature Check: Disabled below) to disable the signature verification for the device
4. select the item “choose zip from sdcard”, select the file itself and press the joystick
Congratulations! You have Desire HD (except for a couple of moments, for example, the screen size)
So, what appeared new. I will consider only some changes, because Basically, you just got Desire HD, and you can read about its functions on the Internet.
Now you can register your phone on HTCSense.com and get the opportunity to redirect calls and SMS, block the phone via the Internet and call it if you lost somewhere in the apartment.
There is a HTC Hub in which you can download various themes, ringtones, and more.

Now you can quickly search for many resources at once.

Changed camera interface.
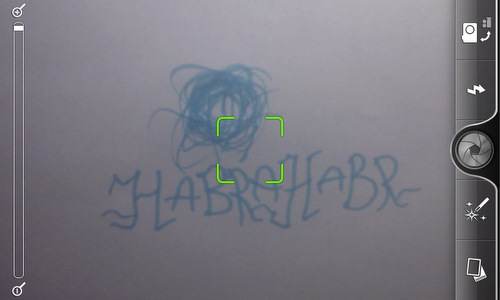
The most important thing: now with Desire you can shoot in HD

Well, about one feature of Root. In addition to the fact that you can now take screenshots directly from your phone (this is forbidden in an unrooted device), an illegal Android has appeared here as well. In general, if your moral principles allow you to use free software, for which others pay, please. But it is on your conscience.

I wish good luck to all who decide to make Desire HD from their Desire. If there are any problems that I have not described - write, we will understand together.
I express my deep gratitude to m1kser , who helped me to go this way and not to break on the third point.
Holiday greetings!
Source: https://habr.com/ru/post/110538/
All Articles