Want to try VDI, but afraid? Then we go to you!
Communicating with many customers, I drew attention to the fact that many of them seem to want to try VDI to taste, but they are afraid that they will not swallow - it is too difficult, they say. Especially for those who think that even a pilot implementation of VDI is too difficult, QUEST has seriously reworked the vWorkspace installer to significantly simplify the entry into the exciting world of VDI. In this post, I will go along with you, dear colleagues, all the way, from the very beginning, from installing the first virtualization server, to showing the Director on his favorite iPad, what is it - the mysterious "virtual desktops infrastructure."
So, let's begin! A small clarification - a booth on the VMware vSphere 4.1 hypervisor, VMware vCenter 4.1 virtualization management server and VDI Quest vWorkspace 7.2 software are considered. The trial key for vWorkspace can be obtained when downloading software from the vendor's website (http://www.quest.com/vworkspace/download.aspx). It is also assumed that the infrastructure already has an Active Directory domain. If there is none (or, for example, to completely isolate the test bench from the current infrastructure, although I do not think this is right, if only because it would make it difficult to test business software that is already deployed in the infrastructure), then you need another VM with domain controller role. First we need to decide how many workstations we will provide to our users. I propose to limit to 5-7, this should be enough to understand, we need it at all or how. Let the client OS be Windows 7, firstly, this OS is already the de facto industrial standard, and secondly, I already know how to optimize it :). As for the hardware characteristics, I suggest the following:
• 1 CPU;
• 768 MB RAM;
• 40 GB HDD.
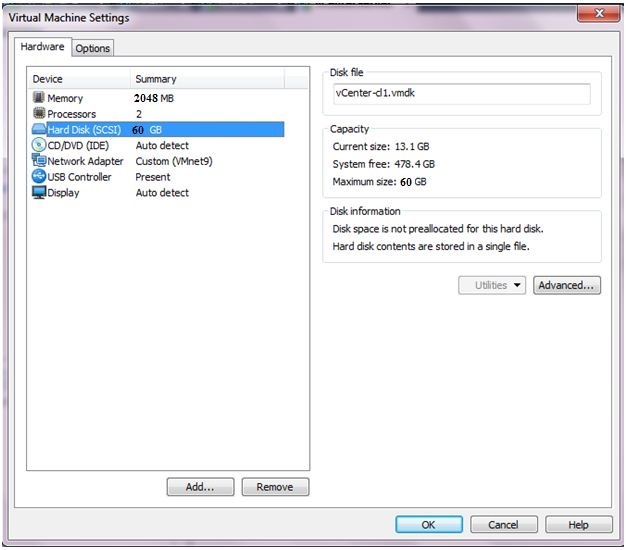
At the same time, we must not forget that we still need two virtual infrastructure management server and the connection broker itself, the heart of VDI. For a pilot implementation, virtual servers on the same hypervisor, which will host guest workstations, are quite suitable. Server OS - Windows Server 2008 R2 x64.
Server hardware requirements:
• 2 CPU;
• 2048 MB RAM;
• 60 GB HDD.
So, for the whole pilot project we need a server with the following characteristics:
• 1 CPU * 4 core;
• 16 GB RAM;
• 500 GB HDD (preferably in RAID 10).
As you can see, colleagues, not so much is needed for our startup. Roughly speaking, even a powerful workstation will be suitable as a similar server. For example, I am on a laptop inside VMware Workstation with 8 GB of RAM and Core2Quad has deployed a similar stand on 2 simultaneously running user VMs. However, it is necessary to clarify that I use management servers based on Windows Server 2003 x64 OS in order to maximize the use of RAM.
Well, let's get started. Start by installing the hypervisor. I’m sure most of you have come across ESX or ESXi one way or another. In our booth, you can use both the first and second hypervisor. Virtualization server settings are absolutely standard, in fact, “next-next-next”. You can use the network settings obtained by using a DHCP server, but it is best to manually assign them.
Now, on any workstation (for example, on the administrator's PC) we need to install VMware Infrastructure Client 4.1 in order to continue working with our virtualization server. The client itself is absolutely free and can be found on the VMware website.
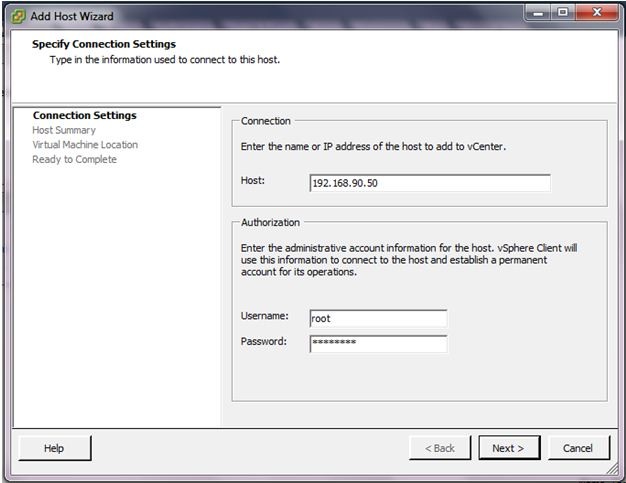
After the client is installed, launch it and specify the parameters for connecting to ESX (server IP address, username - root, password specified during installation).
After connecting, we check that there are no errors in ESX operation. Then we create two VMs, on which we will later install VMware vCenter software and Quest vWorkspace software. I already resulted hardware characteristics above. A hard disk controller is advisable to choose LSI Logic SAS, a hard disk type is Thin, a network card is VMXNet3.
')
We install Windows Server 2008 R2 OS on all three servers and enter them into the domain. It is advisable to allow remote connections (RDP) for these servers, so it will be more convenient. After that, on the first VM, install the VMware vCenter software. Again, on the principle of "next-next-next". As a database, select locally installed SQL Express.
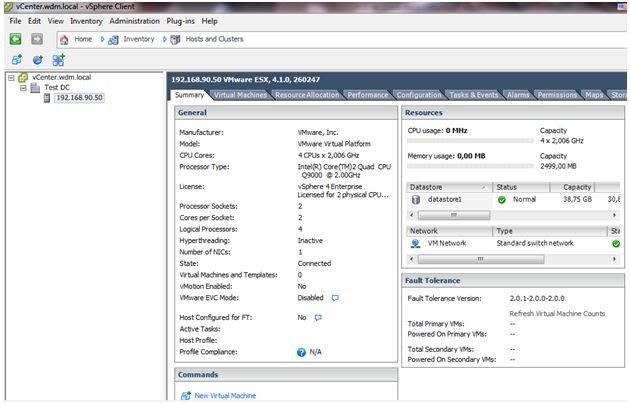
Now connect to vCenter. You can reconfigure the same Infrastructure Client on the administrator's PC or connect via RDP to the server itself. To continue, we need to connect our virtualization server to vCenter.
Fine! At this stage, let's create a VM, which will be our “golden” image of the client workplace. Here I, perhaps, will give everything at the mercy of you, colleagues. Put all the necessary software, patches, etc. The main thing - do not forget to install VMware Tools and Quest PNTools for the correct management of the guest VM and allow the Remote Desktop connection.
To optimize Windows 7, you can use my recommendations (http://habrahabr.ru/company/croc/blog/110027/). For the lazy, you can use Group Policy backup, which allows you to optimize Windows 7 somewhat and save about 100 MB for the bare OS. It would seem - a penny, but multiply it by at least 50-100 (standard VDI project) and it turns out already 5-10 GB. At once I will make a reservation that I do not recommend applying this policy to the working infrastructure without additional testing, if only because different services require different services. The ideal option is to tie this policy to a test OU, move 3-4 test PCs into it, and make sure that everything works. The policy was created by one of the Quest specialists (http://blogs.inside.quest.com/provision/2010/12/17/tuning-windows-7-for-vdi-with-group-policy/).
So, it remains the case for small - to install and configure VDI. To do this, run the installation of the Quest vWorkspace software on the second server. Already on the first screens we will be asked to choose a simple installation (Simple):
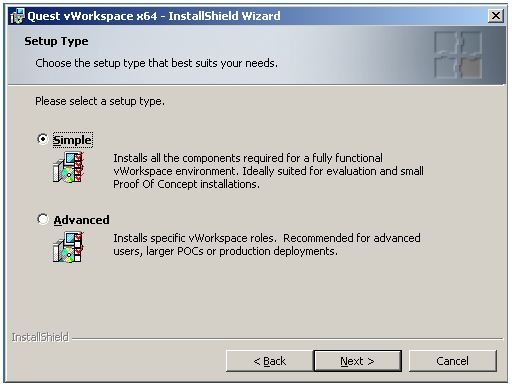
If you select this option, the following components will be installed on one server:

After the first launch of the vWorkspace Management Console, you need to add a license file that will be sent by mail after registering on www.quest.com when downloading software.
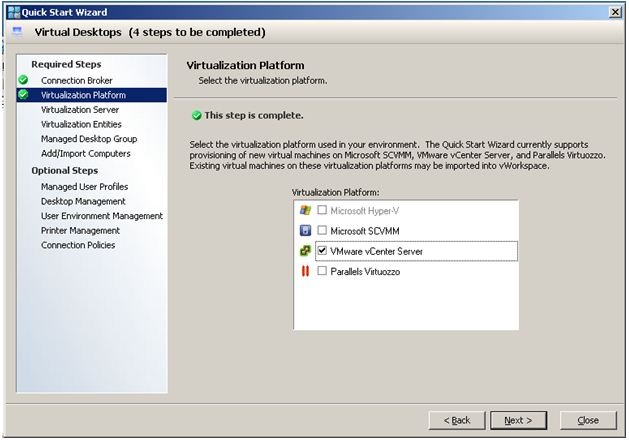
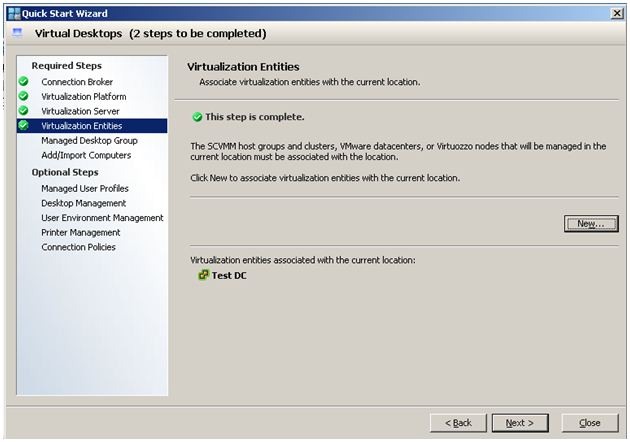
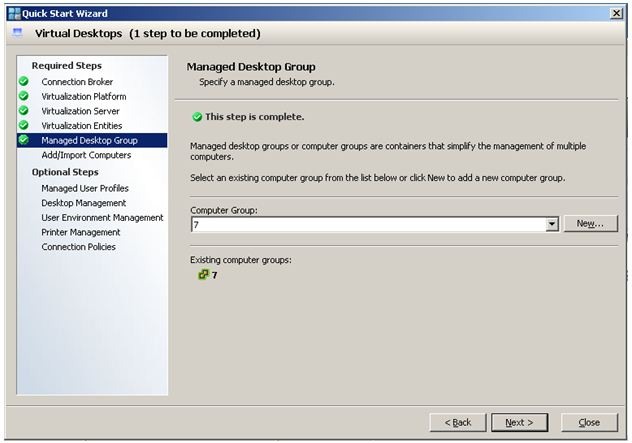
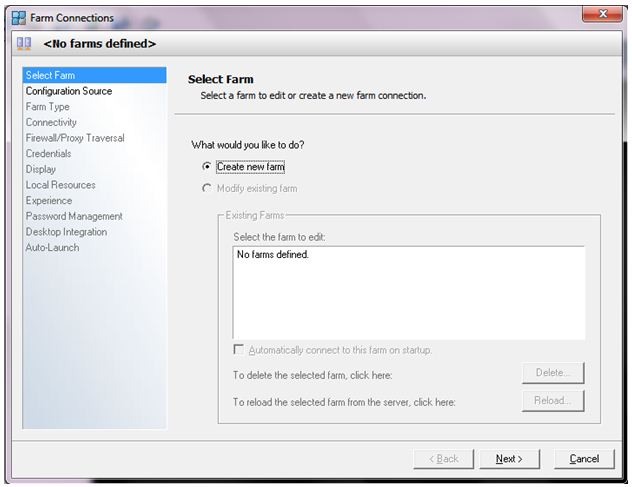
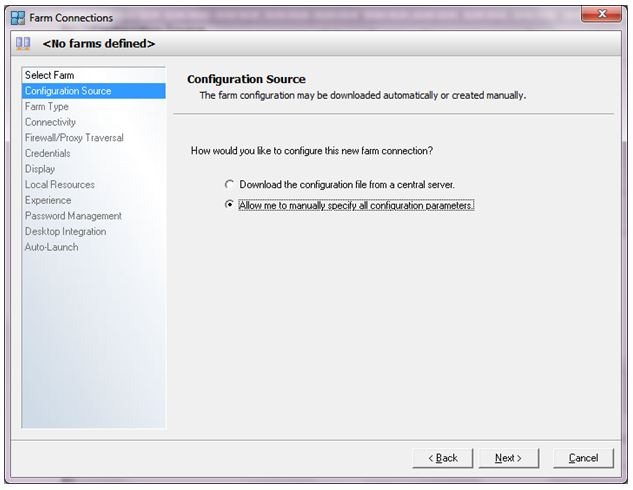
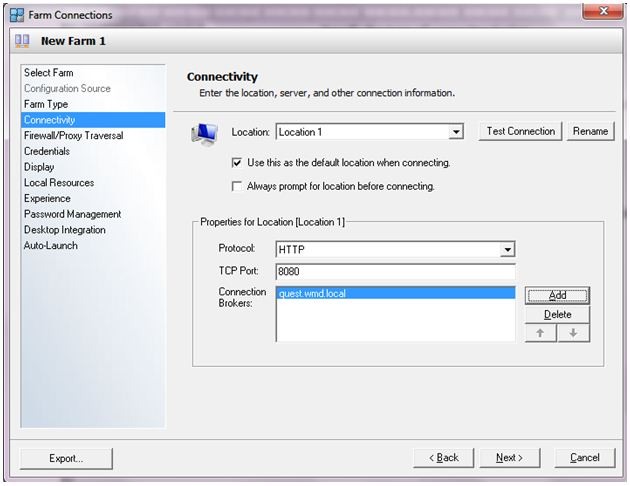
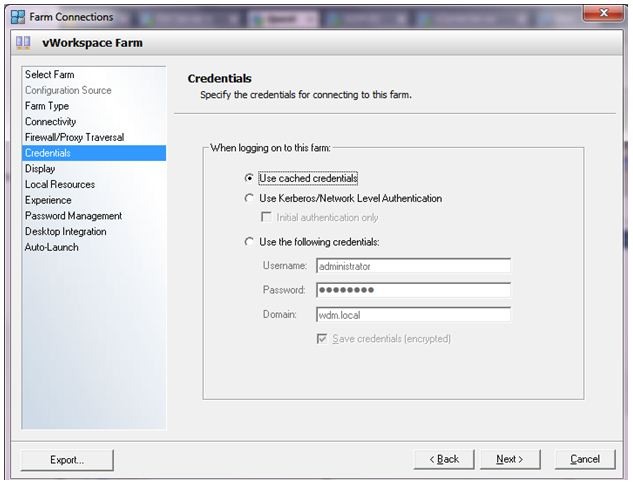
The installation process is complete, now there are quite a bit - a few simple steps to configure vWorkspace. And here the Quest company considerably simplified our task! Already when you first start the management console, you can select the “Virtual Desktops” option and go through all the items in order.


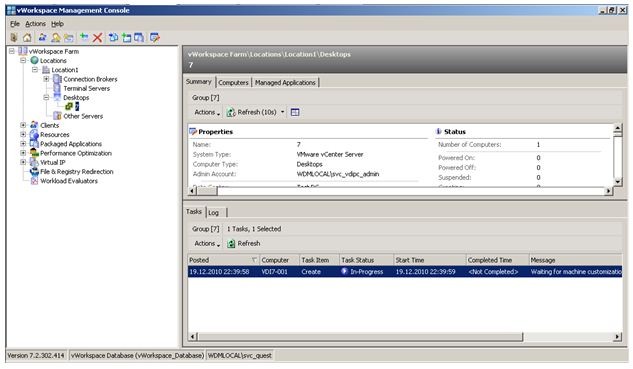
Voila, as they say, everything is ready!
Just put the client part of Quest AppPortal and that’s all, the pilot stand of our VDI solution can be shown to the Director :).
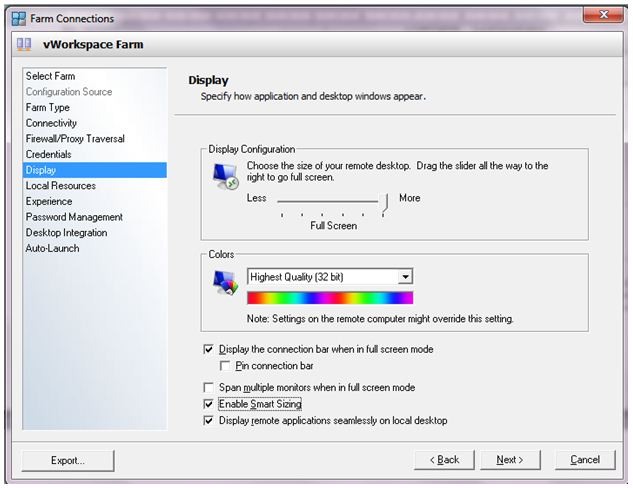
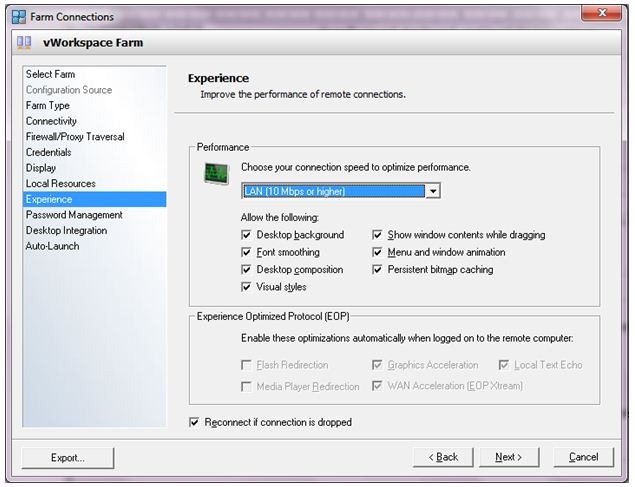
An example of Quest AppPortal settings is shown below.

Always ready to listen to any comments and suggestions.
Yours sincerely, Mikhalych.
So, let's begin! A small clarification - a booth on the VMware vSphere 4.1 hypervisor, VMware vCenter 4.1 virtualization management server and VDI Quest vWorkspace 7.2 software are considered. The trial key for vWorkspace can be obtained when downloading software from the vendor's website (http://www.quest.com/vworkspace/download.aspx). It is also assumed that the infrastructure already has an Active Directory domain. If there is none (or, for example, to completely isolate the test bench from the current infrastructure, although I do not think this is right, if only because it would make it difficult to test business software that is already deployed in the infrastructure), then you need another VM with domain controller role. First we need to decide how many workstations we will provide to our users. I propose to limit to 5-7, this should be enough to understand, we need it at all or how. Let the client OS be Windows 7, firstly, this OS is already the de facto industrial standard, and secondly, I already know how to optimize it :). As for the hardware characteristics, I suggest the following:
• 1 CPU;
• 768 MB RAM;
• 40 GB HDD.
At the same time, we must not forget that we still need two virtual infrastructure management server and the connection broker itself, the heart of VDI. For a pilot implementation, virtual servers on the same hypervisor, which will host guest workstations, are quite suitable. Server OS - Windows Server 2008 R2 x64.
Server hardware requirements:
• 2 CPU;
• 2048 MB RAM;
• 60 GB HDD.
So, for the whole pilot project we need a server with the following characteristics:
• 1 CPU * 4 core;
• 16 GB RAM;
• 500 GB HDD (preferably in RAID 10).
As you can see, colleagues, not so much is needed for our startup. Roughly speaking, even a powerful workstation will be suitable as a similar server. For example, I am on a laptop inside VMware Workstation with 8 GB of RAM and Core2Quad has deployed a similar stand on 2 simultaneously running user VMs. However, it is necessary to clarify that I use management servers based on Windows Server 2003 x64 OS in order to maximize the use of RAM.
Well, let's get started. Start by installing the hypervisor. I’m sure most of you have come across ESX or ESXi one way or another. In our booth, you can use both the first and second hypervisor. Virtualization server settings are absolutely standard, in fact, “next-next-next”. You can use the network settings obtained by using a DHCP server, but it is best to manually assign them.
Now, on any workstation (for example, on the administrator's PC) we need to install VMware Infrastructure Client 4.1 in order to continue working with our virtualization server. The client itself is absolutely free and can be found on the VMware website.
After the client is installed, launch it and specify the parameters for connecting to ESX (server IP address, username - root, password specified during installation).
After connecting, we check that there are no errors in ESX operation. Then we create two VMs, on which we will later install VMware vCenter software and Quest vWorkspace software. I already resulted hardware characteristics above. A hard disk controller is advisable to choose LSI Logic SAS, a hard disk type is Thin, a network card is VMXNet3.
')
We install Windows Server 2008 R2 OS on all three servers and enter them into the domain. It is advisable to allow remote connections (RDP) for these servers, so it will be more convenient. After that, on the first VM, install the VMware vCenter software. Again, on the principle of "next-next-next". As a database, select locally installed SQL Express.
Now connect to vCenter. You can reconfigure the same Infrastructure Client on the administrator's PC or connect via RDP to the server itself. To continue, we need to connect our virtualization server to vCenter.
Fine! At this stage, let's create a VM, which will be our “golden” image of the client workplace. Here I, perhaps, will give everything at the mercy of you, colleagues. Put all the necessary software, patches, etc. The main thing - do not forget to install VMware Tools and Quest PNTools for the correct management of the guest VM and allow the Remote Desktop connection.
To optimize Windows 7, you can use my recommendations (http://habrahabr.ru/company/croc/blog/110027/). For the lazy, you can use Group Policy backup, which allows you to optimize Windows 7 somewhat and save about 100 MB for the bare OS. It would seem - a penny, but multiply it by at least 50-100 (standard VDI project) and it turns out already 5-10 GB. At once I will make a reservation that I do not recommend applying this policy to the working infrastructure without additional testing, if only because different services require different services. The ideal option is to tie this policy to a test OU, move 3-4 test PCs into it, and make sure that everything works. The policy was created by one of the Quest specialists (http://blogs.inside.quest.com/provision/2010/12/17/tuning-windows-7-for-vdi-with-group-policy/).
So, it remains the case for small - to install and configure VDI. To do this, run the installation of the Quest vWorkspace software on the second server. Already on the first screens we will be asked to choose a simple installation (Simple):
If you select this option, the following components will be installed on one server:
After the first launch of the vWorkspace Management Console, you need to add a license file that will be sent by mail after registering on www.quest.com when downloading software.
The installation process is complete, now there are quite a bit - a few simple steps to configure vWorkspace. And here the Quest company considerably simplified our task! Already when you first start the management console, you can select the “Virtual Desktops” option and go through all the items in order.
Voila, as they say, everything is ready!
Just put the client part of Quest AppPortal and that’s all, the pilot stand of our VDI solution can be shown to the Director :).
An example of Quest AppPortal settings is shown below.
Always ready to listen to any comments and suggestions.
Yours sincerely, Mikhalych.
Source: https://habr.com/ru/post/110427/
All Articles