Bulbulator tracker. PCB etching accelerator
I remember as early as 12 years old, when I was poisoning my first printed circuit board, I simply languished with impatience to make this process faster. Then the solution was old and the etching went on almost a day. Now I am hounding, of course, much faster, but still not in a couple of minutes. But so eager to see the result of their work and go to a more interesting stage - drilling and sealing parts. And here the thought settled in my head, how to accelerate this process. Strictly speaking, all those who poison printed circuit boards know that two factors accelerate the etching: an increase in the temperature of the solution and its constant mixing. The first factor is easily achievable - he poured ferric chloride with boiling water and got a profit. And for the implementation of the second one, I didn’t see any constructions: mixers, rocking chairs, pedals, etc. rave. But in fact, everything turned out to be much simpler, cheaper, and most importantly more accessible.
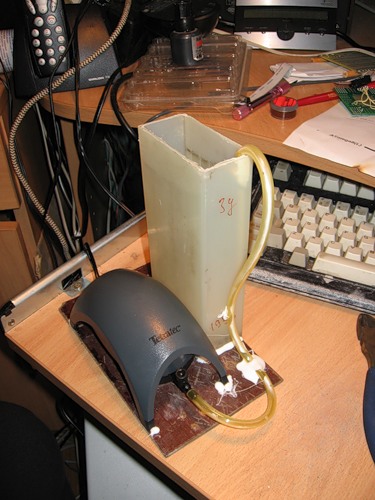
Bulbulator in person
For manufacturing will require:
- half-liter plastic bottle of your favorite drink;
- cheap aquarium compressor;
- vertical rectangular container, preferably transparent (I used the container from an old battery, you can use a square vase, the main thing is that it is not metallic);
- hose for the compressor, long meter (bought in the same store as the compressor itself);
- a rectangular plate for assembly (you can use plywood, or iron, I used a thick getinax).
')
From the tools we need only hot melt glue.
First, I made a holder for printed circuit boards. Since creativity was free, and as an artist paints a picture, I started with the most interesting and simple. From the plastic bottle cut out the holder for printed circuit boards. Simply cut the bottle in half, leaving the neck on one side, and remove the bottom on the other side. In the remaining half, we make two oval holes where the PCB will be inserted. It will be clearer if you look at the picture
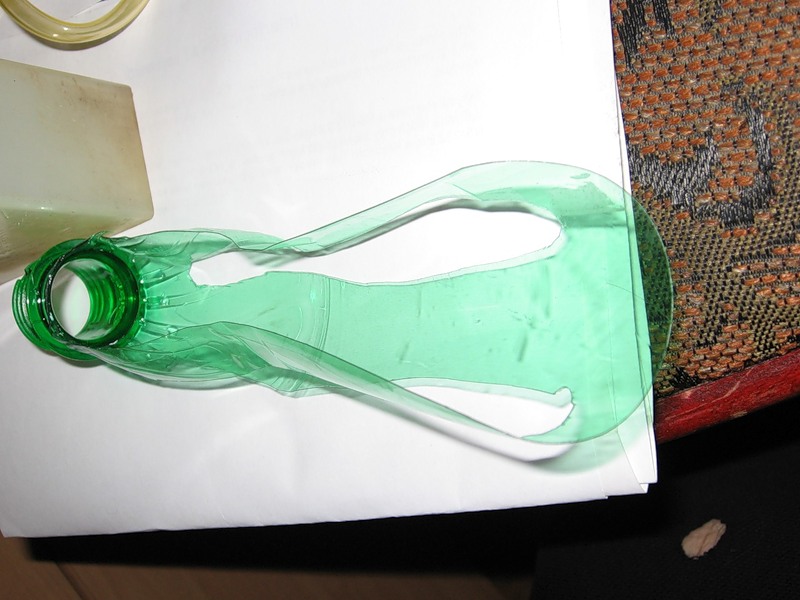
PCB holder.
After that, I proceeded to manufacture the device itself.
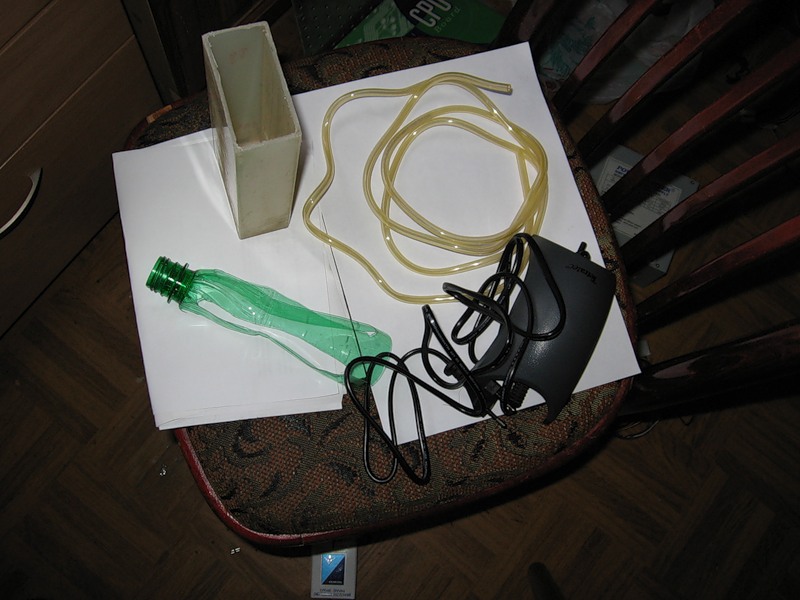
Sources: Capacity, compressor, hose, holder for printed circuit boards.
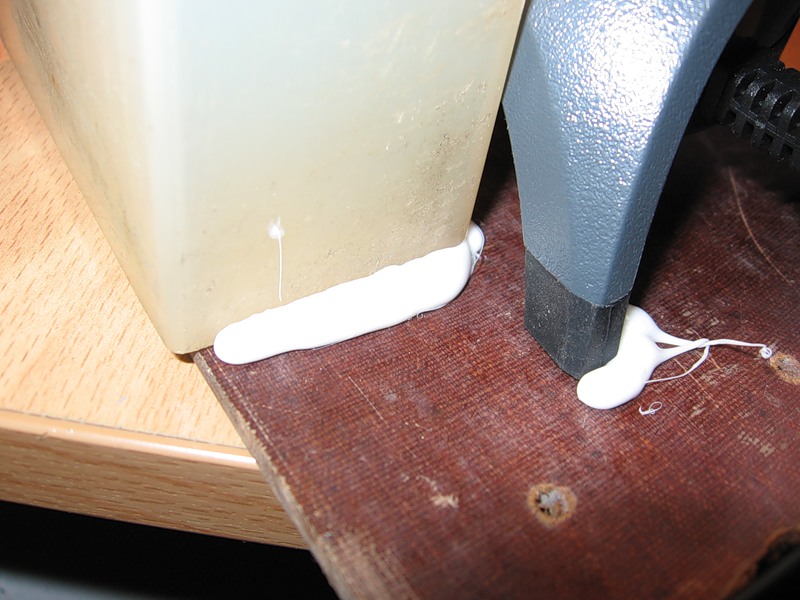
To begin with, the bottom of the getinak plate is covered with a thin layer of hot melt to prevent our sprinkler from running during the operation of the compressor. Cast some kind of legs.
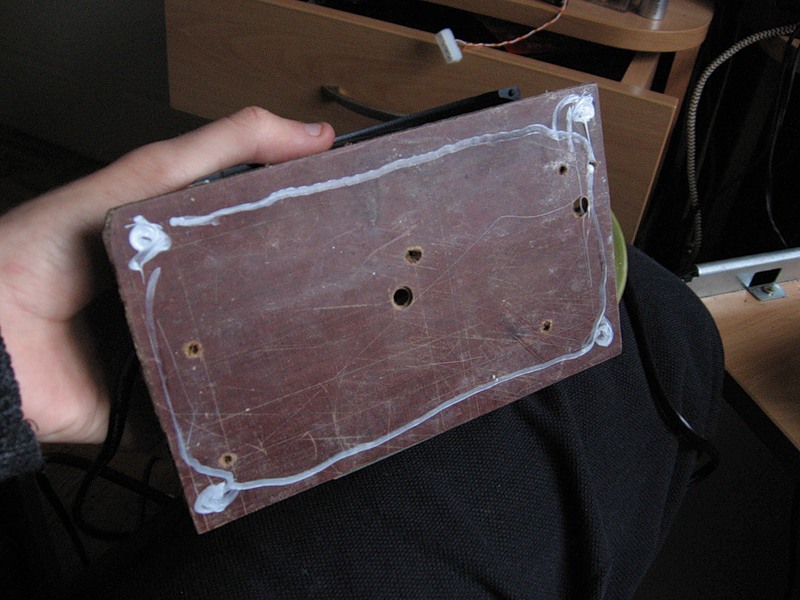
"Legs" for protection against sliding and vibrations
First, we place the components on the plate, estimating their most optimal configuration.

We position the compressor and capacity
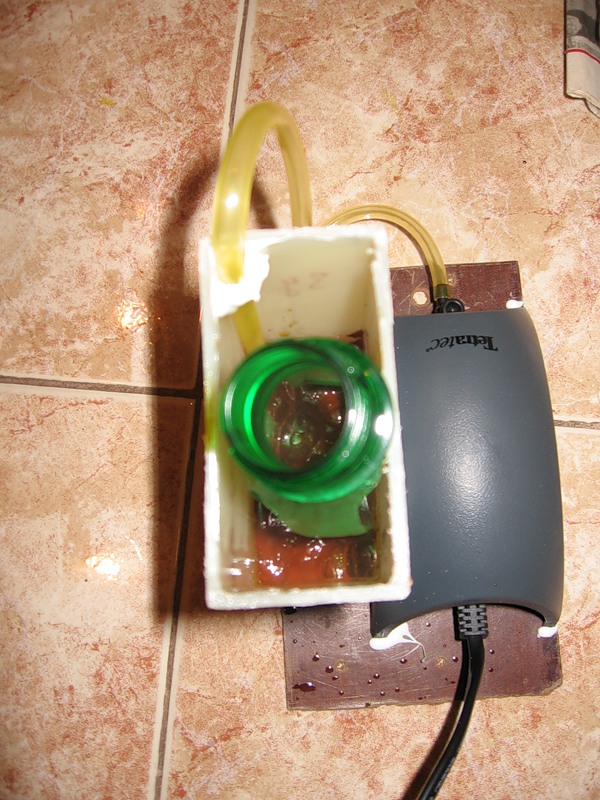
Glue the glue to the getinax plate capacity. Next hot melt do the grooves for the installation of the compressor. You can just stick the compressor next, but I decided to make it removable. If the grooves are not made, the compressor will run away due to vibrations in the process of operation, despite the rubber feet.
Glued tank and poured slots for the compressor
Further, if the hose is twisted, then we need to straighten it. Boil the kettle and go with a hot kettle and a hose to the bathroom. Pour boiling water over the hose and straighten it. Bend at an angle the lower end of the hose, and lower it into the container. Upstairs in the corner we fix with hot melt.

Fix the hose in the tank
We cut off the excess hose, insert it into the compressor, and so that there are no dangling loops, we fix them with hot glue on the plate below and on the tank.

Fastening the hose.
That's it, the device is ready. After that, testing is natural. To begin with, you can pour some water and see how it works, it never flows
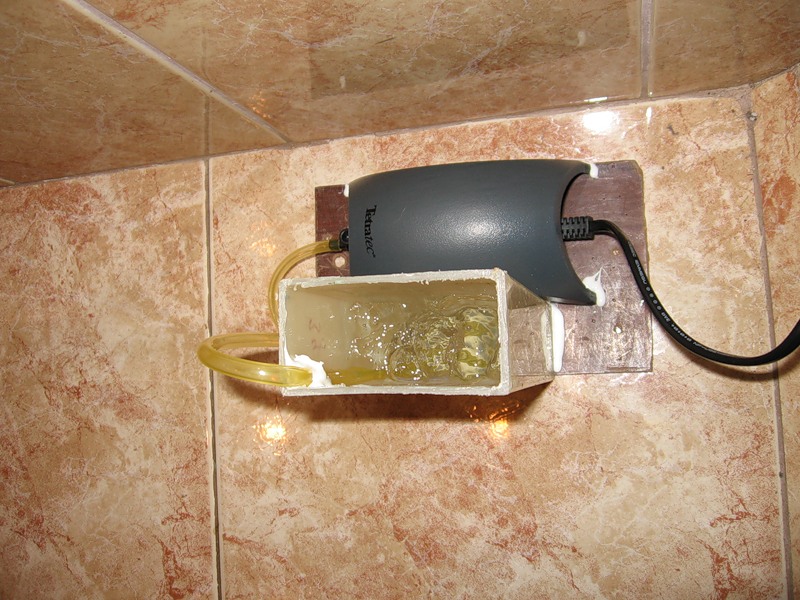
Work device
Check device operation
Pour into the ferric chloride tank and fill it with hot water.
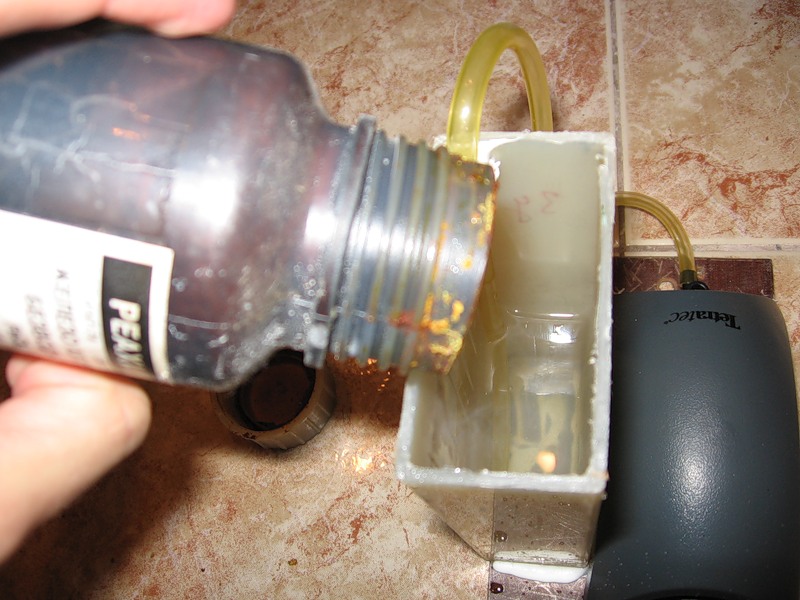
Pouring ferric chloride
I usually fill in from the tap, it is not so hot there and can not melt the toner, when making boards in a laser-ironing method. After that we insert the board into the holder and drop it into the solution, turn on the compressor and poison it.
Inserted board in holder
Etching
Etching process. Yes noisy
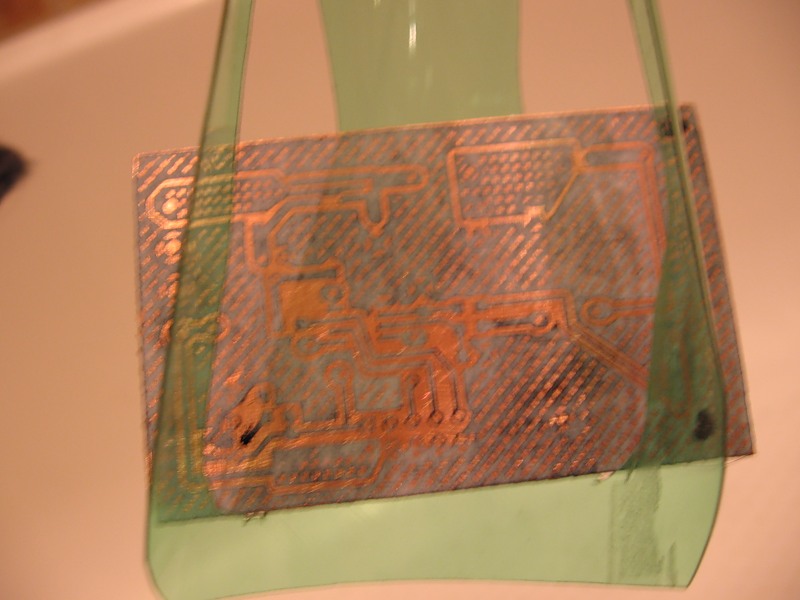
Etching in this way takes no more than 5 minutes.

Ready etched board
A little hemorrhoids, a couple of hours of work, and the results will be on the face. The main thing to be bolder. Looking back I want to say that the capacity should be done as high as possible, because With such etching, it is sour so it is sprayed and then it is very difficult to clean it even from the tile in the bathroom. That's why I covered the container with a rag. Secondly, it makes sense to think over the holder of the printed circuit boards so that it does not interfere with the etching and is not made of metal. In the third capacity was quite small, and is not suitable for etching more serious boards. But the positive thing is that thanks to this construct, at home I produced printed circuit boards in a small-industrial scale.
Literature:
1. ru.wikipedia.org/wiki/Laser-Bulb_Technology - the technology of manufacturing printed circuit boards using iron and a laser printer.
2. easyelectronics.ru/proektirovanie-pechatnoj-platy-i-izgotovlenie-ustrojstva-v-eagle-cad-na-primere-pickit2.html Useful article from A to Z, how to dissolve and make a printed circuit board.
In fairness it should be noted that a similar article was once written for the magazine “Iron”, but especially for Habr this article is completely rewritten and is a separate work.
Bulbulator in person
For manufacturing will require:
- half-liter plastic bottle of your favorite drink;
- cheap aquarium compressor;
- vertical rectangular container, preferably transparent (I used the container from an old battery, you can use a square vase, the main thing is that it is not metallic);
- hose for the compressor, long meter (bought in the same store as the compressor itself);
- a rectangular plate for assembly (you can use plywood, or iron, I used a thick getinax).
')
From the tools we need only hot melt glue.
Manufacturing
First, I made a holder for printed circuit boards. Since creativity was free, and as an artist paints a picture, I started with the most interesting and simple. From the plastic bottle cut out the holder for printed circuit boards. Simply cut the bottle in half, leaving the neck on one side, and remove the bottom on the other side. In the remaining half, we make two oval holes where the PCB will be inserted. It will be clearer if you look at the picture
PCB holder.
After that, I proceeded to manufacture the device itself.
Sources: Capacity, compressor, hose, holder for printed circuit boards.
To begin with, the bottom of the getinak plate is covered with a thin layer of hot melt to prevent our sprinkler from running during the operation of the compressor. Cast some kind of legs.
"Legs" for protection against sliding and vibrations
First, we place the components on the plate, estimating their most optimal configuration.
We position the compressor and capacity
Glue the glue to the getinax plate capacity. Next hot melt do the grooves for the installation of the compressor. You can just stick the compressor next, but I decided to make it removable. If the grooves are not made, the compressor will run away due to vibrations in the process of operation, despite the rubber feet.
Glued tank and poured slots for the compressor
Further, if the hose is twisted, then we need to straighten it. Boil the kettle and go with a hot kettle and a hose to the bathroom. Pour boiling water over the hose and straighten it. Bend at an angle the lower end of the hose, and lower it into the container. Upstairs in the corner we fix with hot melt.
Fix the hose in the tank
We cut off the excess hose, insert it into the compressor, and so that there are no dangling loops, we fix them with hot glue on the plate below and on the tank.
Fastening the hose.
That's it, the device is ready. After that, testing is natural. To begin with, you can pour some water and see how it works, it never flows
Work device
Check device operation
Pour into the ferric chloride tank and fill it with hot water.
Pouring ferric chloride
I usually fill in from the tap, it is not so hot there and can not melt the toner, when making boards in a laser-ironing method. After that we insert the board into the holder and drop it into the solution, turn on the compressor and poison it.
Inserted board in holder
Etching
Etching process. Yes noisy
Etching in this way takes no more than 5 minutes.
Ready etched board
Results
A little hemorrhoids, a couple of hours of work, and the results will be on the face. The main thing to be bolder. Looking back I want to say that the capacity should be done as high as possible, because With such etching, it is sour so it is sprayed and then it is very difficult to clean it even from the tile in the bathroom. That's why I covered the container with a rag. Secondly, it makes sense to think over the holder of the printed circuit boards so that it does not interfere with the etching and is not made of metal. In the third capacity was quite small, and is not suitable for etching more serious boards. But the positive thing is that thanks to this construct, at home I produced printed circuit boards in a small-industrial scale.
Literature:
1. ru.wikipedia.org/wiki/Laser-Bulb_Technology - the technology of manufacturing printed circuit boards using iron and a laser printer.
2. easyelectronics.ru/proektirovanie-pechatnoj-platy-i-izgotovlenie-ustrojstva-v-eagle-cad-na-primere-pickit2.html Useful article from A to Z, how to dissolve and make a printed circuit board.
In fairness it should be noted that a similar article was once written for the magazine “Iron”, but especially for Habr this article is completely rewritten and is a separate work.
Source: https://habr.com/ru/post/109869/
All Articles