Laser show controlled via LPT
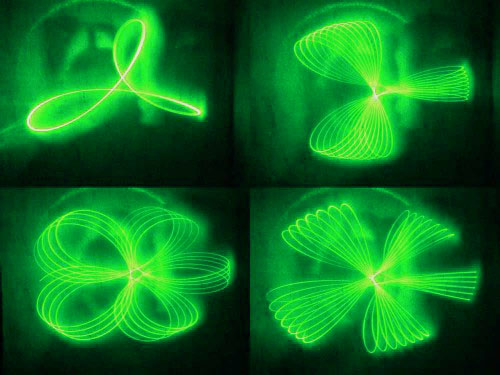
I will tell you how you can make a laser show controlled via the LPT port. The simplest connection scheme and the easiest control method are used.
The idealistic ambition of this project is the achievement of the artistic value of light effects, which is possible only with human creativity. It is understood that the play of light can be considered as an independent work.
So, from the water get down to business.
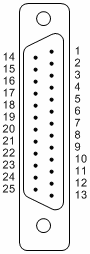
The LPT port of the computer contains 25 pins, located on the back of the system unit, before it was connected to printers. LEDs, loads or something else can be connected to some of these outputs, depending on the fantasy.
')
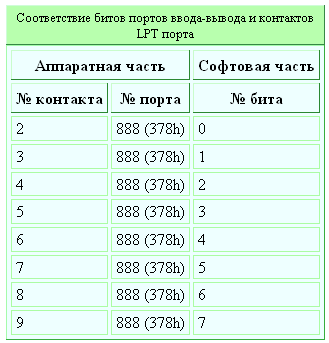
With the help of a special program, we can apply voltage to the output port. Usually used schemes (methods) to connect up to eight loads. I also used this method. A special program sends data to the computer I / O port (378h). With the help of certain electronic elements, this port is connected to an external, in this case, LPT port, which outputs this data "out" in the form of electrical signals. Management of classic 8 loads is carried out on port 888 (378h).
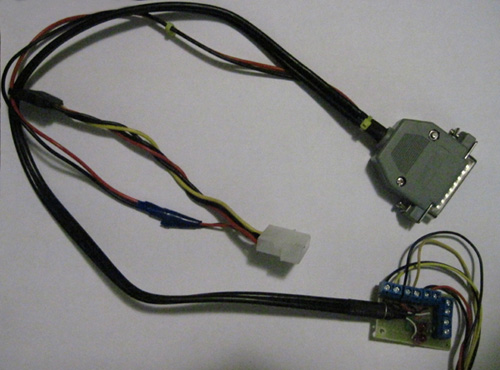
The picture looks like this:
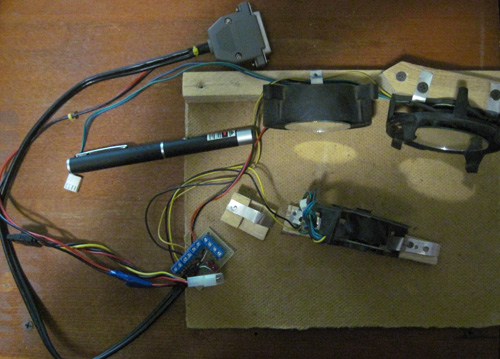
To create the installation you will need: 2 (I used 3) coolers, ulm2003 chip, DB25M plug. On the cooler it is necessary to glue the mirrors approximately at an angle of 1 degree (the greater the angle, the greater the pattern on the screen, the wall). Install the cooler as shown:
or so
To connect the coolers to the LPT port, the ulm2003 chip is used, which is usually used to control the stepper motor. The cooler must be connected as follows:
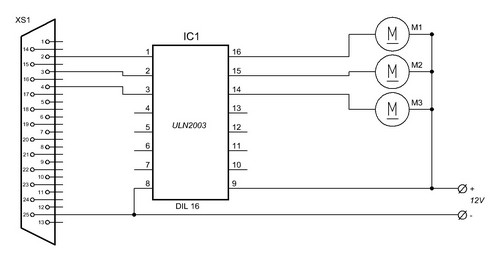
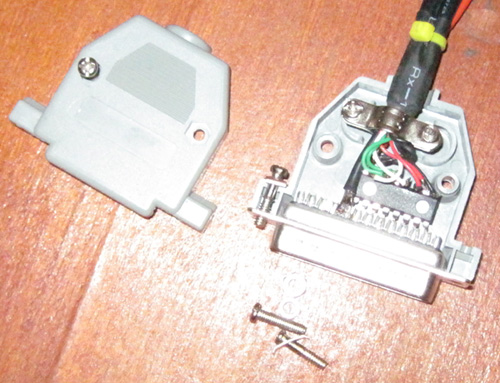
It must be remembered that there is a common "+". Now you need to properly connect the microcircuit to the port:
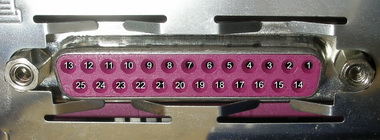
LPT port
Attention!
- The device must be assembled so that none of its conductors can electrically close with the metal case of the computer or any other conductor.
- All responsibility for any actions performed on the port, and hence the computer, you assume. I only advise here.
When the device is assembled, it is the turn to get acquainted with the program that will manage everything.
Brief description of the program Echelon
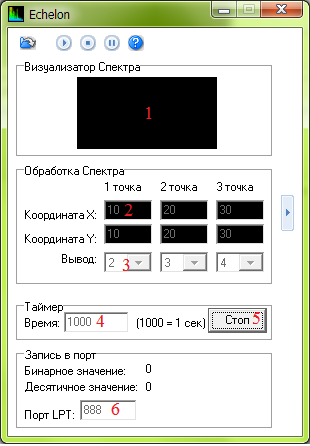
1 - Visualizer.
2 - Coordinates of points on the visualizer from which data is being taken (If the signal level is higher than the specified point, data will be sent to the port).
3 - LPT output number of the port to which the data is sent.
4 - The frequency with which the data is removed from the visualizer (1000 = 1 second).
5 - Enable and disable sending data to the port.
6 - LPT port address.

7 - Add file to playlist.
8 - Delete the selected file.
9 - Clear playlist.
You can also drag and drop files into the program.
Attention!
The program can play only WAV files.
* All files downloaded from the Internet, check the antivirus.
* Make sure that the LPT port is enabled by the BIOS settings and its base address is 378h.
* Make sure that a printer or any device other than the one described here is not connected to the LPT port.
* If there are multiple LPT ports, be sure that the correct port is located at 378h.
* Writing to the registry key a value other than the base address of an existing LPT port can lead to unpredictable results (“system crash”) during program startup or operation.
* There are three standard base addresses of the LPT port: 378h, 3BCh, 278h (the letter h after the number means that it is written in hexadecimal).
Download Echelon
Source: https://habr.com/ru/post/106746/
All Articles