Installing Qt Embedded
A guide to installing development tools and installing the developed application on the target system. The main PC is running Debian, and the target machine is a mini2440 based on a 400 MHz Samsung S3C2440A ARM920T processor.
The manual covers working with the QVFB emulator, compiling on the host machine for the target device, compiling and installing the tslib driver, installing the libraries on the target machine.

')
Short plan of action
1. Install Qt for X11 and compile QVFB.
2. Install Qt for QVFB.
3. Install a compiler for ARM.
4. Install Qt for ARM.
5. Compile tslib.
6. Install the Qt and tslib libraries on the target machine.
Installing Qt for X11
To install all the tools we need about 20 GB of free space on the working machine and 20 MB on the target machine.
We swing Qt 4.6.3 libraries for Linux / X11 .
For unknown reasons, older versions do not work on our mini2440 target device. Therefore, as Qt for ARM, you only need to install this version. As Qt for X11 and Qt for QVFB, you can install the latest version from the official site.
When installing follow the instructions from the official site .
Here is a set of commands that were used in our case.
Install the library. If as a result of the execution of the configure and make commands error messages appear, then you need to install additional libraries referenced by these messages and repeat the commands.
sudo aptitude install libxtst-dev
sudo aptitude install libxext-dev
sudo aptitude install x11protoxext-dev
sudo aptitude install libxrender-dev
sudo aptitude install xnest
Unpack the archives.
gunzip qt-everywhere-opensource-src-4.6.3.tar.gz
tar xvf qt-everywhere-opensource-src-4.6.3.tar
mv ./qt-everywhere-opensource-src-4.6.3 ./qt-X11-src-4.6.3
Go to the folder with Qt and run the configurator (it runs for a few minutes). When installing Qt for X11, no parameters need to be passed to the configurator. The libraries will be installed in the /usr/local/Trolltech/QT-4.6.3 folder.
cd ./qt-X11-src-4.6.3
./configure
Compile the library. It takes a few hours!
make
If as a result of the execution of the configure and make commands error messages appear, then you need to install additional libraries referenced by these messages and repeat the commands.
Install the library. The libraries will be installed in the /usr/local/Trolltech/QT-4.6.3 folder.
sudo make install
Next, you need to compile the QVFB utility and copy it to /usr/local/Trolltech/QT-4.6.3/bin.
cd ./tools/qvfb/
make
sudo make install
cp ../../bin/qvfb /usr/local/Trolltech/QT-4.6.3/qvfb
We got the QVFB utility, which is the device screen emulator.
Installing Qt for QVFB
Unzip our qt-everywhere-opensource-src-4.6.3.tar archive to another folder and rename it.
tar xvf qt-everywhere-opensource-src-4.6.3.tar
mv ./qt-everywhere-opensource-src-4.6.3 ./qt-qvfb-src-4.6.3
We start the configurator and pass parameters to it that indicate the installation location of the libraries and the use of QVFB. Without the option -embedded x86 will not work!
cd ./qt-qvfb-src-4.6.3
./configure -qvfb -embedded x86 -prefix / usr / local / Trolltech / Qt-qvfb
Compile and install.
make
sudo make install
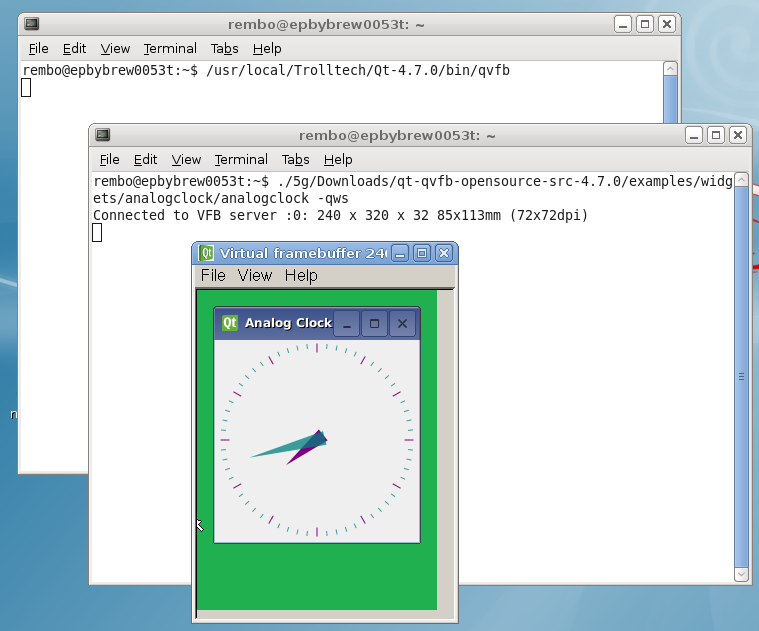
Check how QVFB works.
/usr/local/Trolltech/QT-4.6.3/qvfb
We start the application in QVFB using the –qws key.
./examples/widgets/analogclock/analogclock –qws
If everything is correct, the application will start inside the QVFB window.
Install compiler for ARM
Next you need to install a compiler for our device. For mini2440 arm-linux-gcc 4.3.2 is suitable.
Need to unpack.
gunzip arm-linux-gcc-4.3.2.tgz
tar xvf arm-linux-gcc-4.3.2.tar
Copy all to / usr / local
cp –R ./usr/local/arm / usr / local / arm
And change the PATH environment variable.
export PATH = / usr / local / arm / 4.3.2 / bin: $ PATH
Installing Qt for ARM
We put only Qt 4.6.3 libraries for Linux / X11 . For unknown reasons, older versions do not work on our mini2440 target device.
tar xvf qt-everywhere-opensource-src-4.6.3.tar
mv ./qt-everywhere-opensource-src-4.6.3 ./qt-arm-src-4.6.3
Disable optimization. Without this, nothing works on the target mini2440 device. To do this, in the ./mkspecs/common/g++.conf file, we find the options –O2 and –O1 in the text and replace them with –O0.
We start the configurator and pass parameters to it. The –qt-mouse-tslib parameter indicates that on the target device we will work with the tslib driver.
cd ./qt-arm-src-4.6.3
./configure –embedded arm –xplstform qws / linux-arm-g ++ -prefix / usr / local / Trolltech / Qt-arm –qt-mouse-tslib –little-endian –no-webkit –no-qt3support –no-cups - no-largefile –optimized-qmake –no-openssl –nomake tools
Compile and install.
make
sudo make install
Compiling tslib
Tslib is a touchscreen driver that can be used on mini2440 with Qt. Download the library and unpack it.
tar xjf tslib-1.0.tar.bz2
cd ./tslib-1.0
Install the packages necessary for the configurator.
sudo aptitude install libtool
sudo aptitude install automake1.7
sudo aptitude install m4
Run the configurator scripts.
./autogen.sh
echo "ac_cv_func_malloc_0_nonnull = yes"> arm-linux.autogen
export CC = / usr / local / arm / 4.3.2 / bin / arm-linux-gcc
export CXX = / usr / local / arm / 4.3.2 / bin / arm-linux-g ++
export CONFIG_SITE = arm-linux.autogen
./configure --build = i386-linux --host = arm-linux --target = arm --disable-inputapi --prefix = $ PWD / build
Compile.
sudo make
sudo make install
In the ./build folder there will be all the files that need to be delivered to the target device in the appropriate folders.
Installing libraries on the target machine
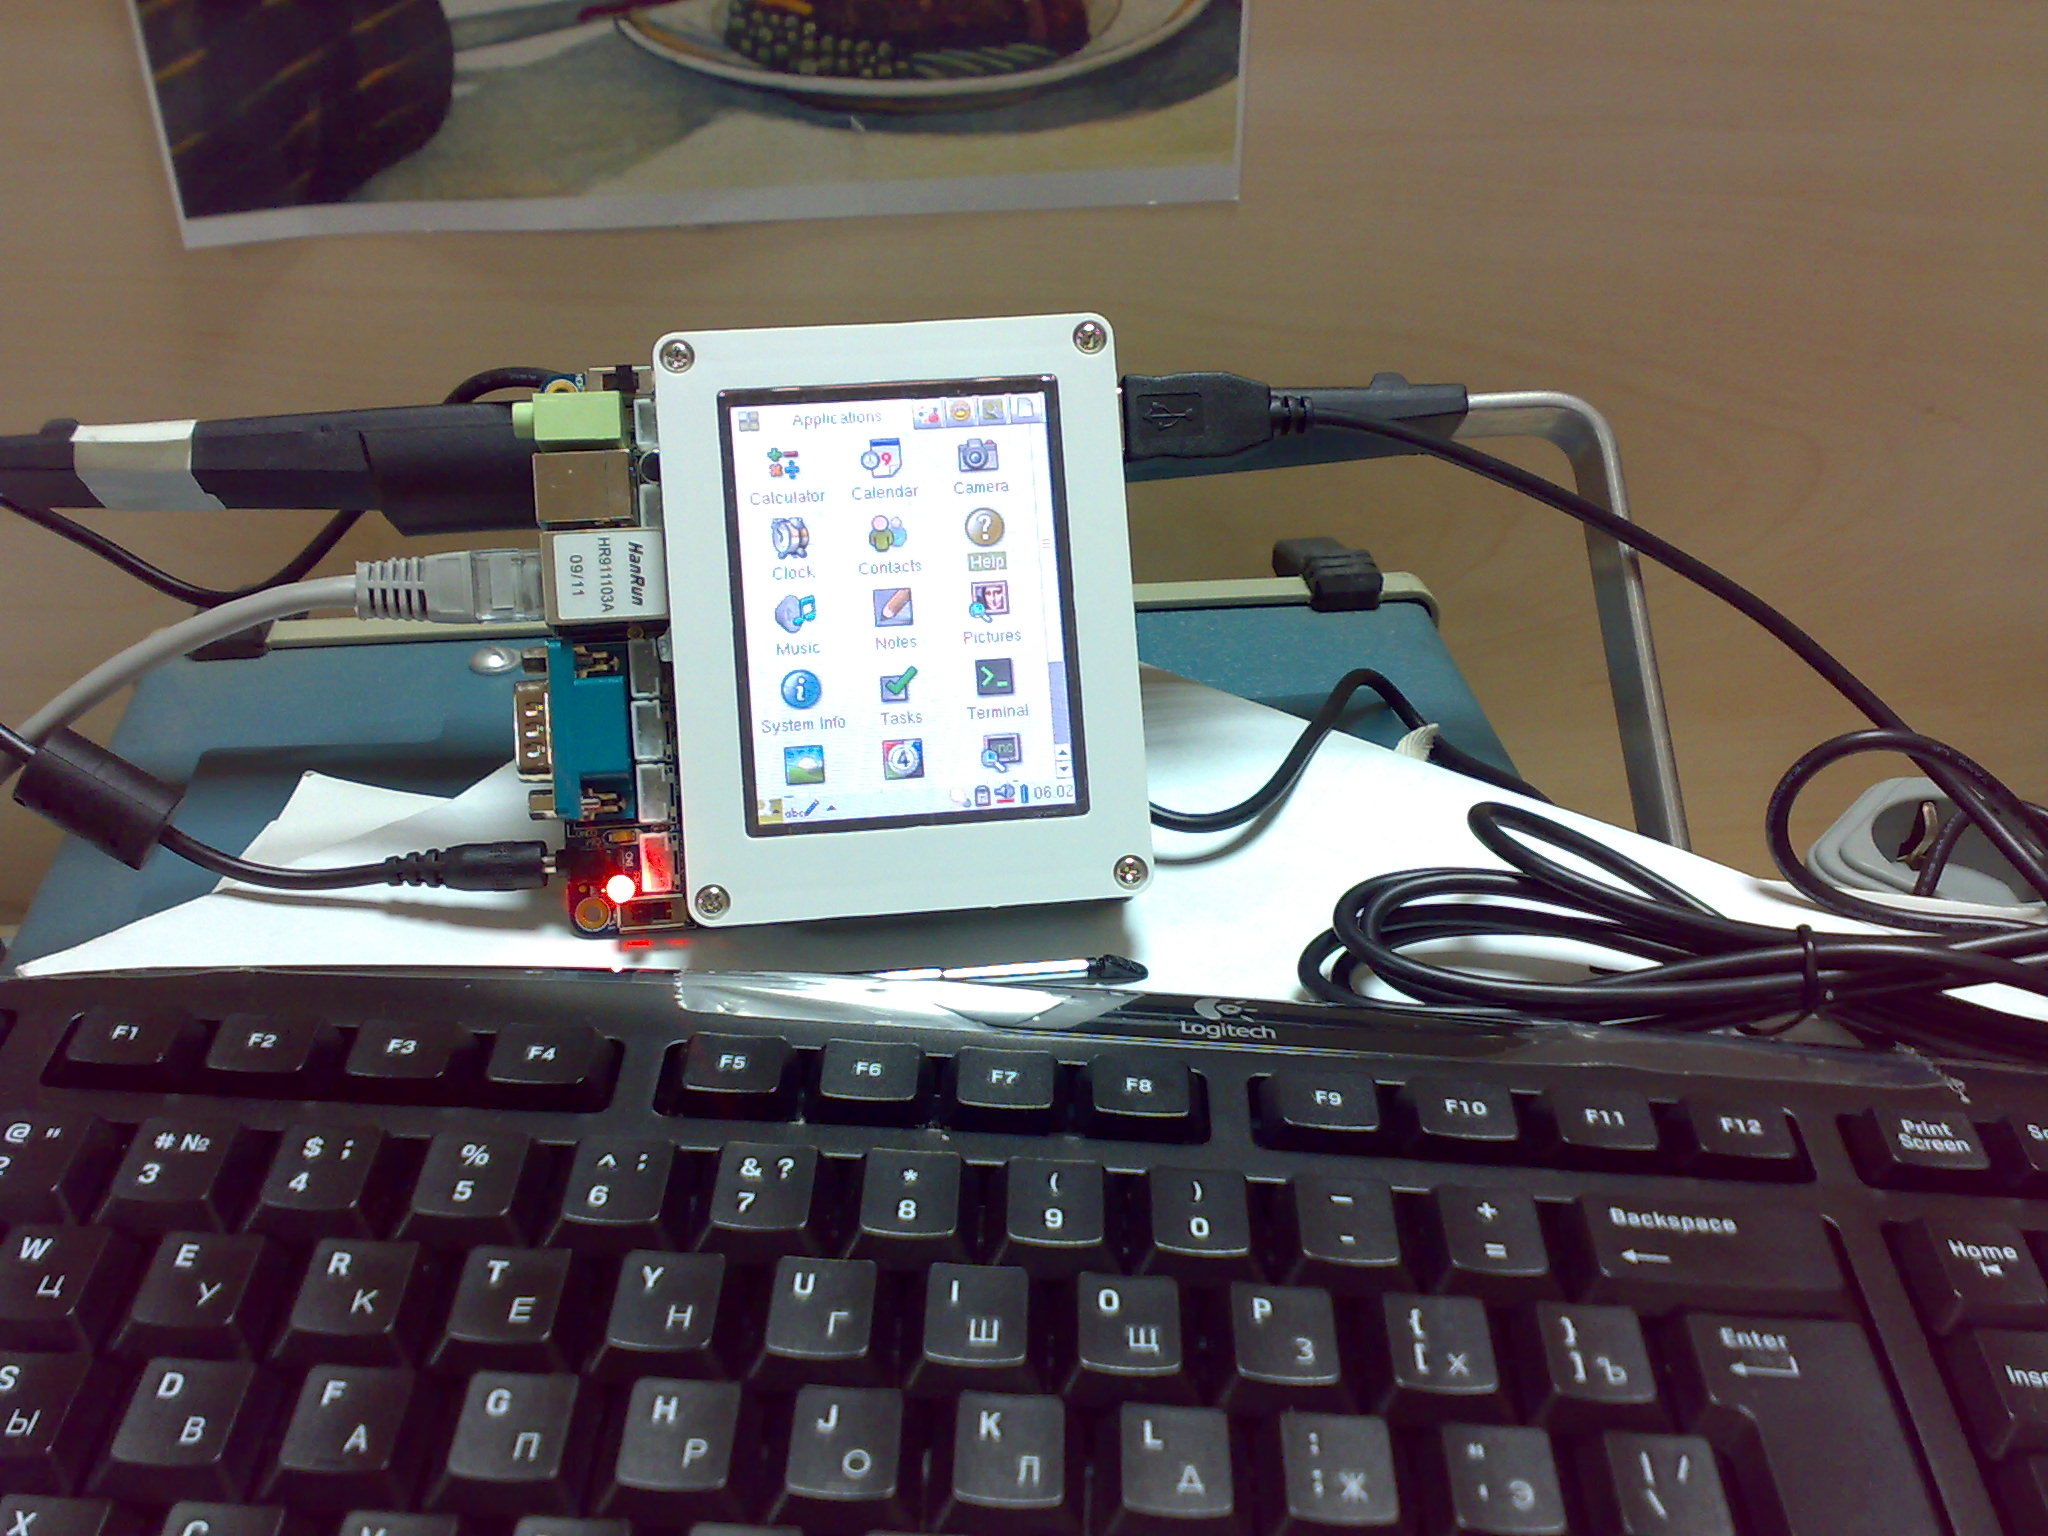
Target machine need to connect to the network and run telnet. On our mini2440 is Linux with Qtopia installed .
On a working machine, we are raising an ftp server.
Copy the build folder from tslib to the root folder of the server.
Also copy the libraries libQtCore.so.4.6.3, libQtGui.so.4.6.3, libQtNetwork.so.4.6.3 from / usr / local / Trolltech / Qt-arm / lib. We change extensions from * .so.4.6.3 to * .so.4 (these files are needed on the device).
Copy these fonts from the / usr / local / Trolltech / Qt-arm / lib / fonts folder: DejaVuSans-Bold.ttf, DejaVuSerif-Bold.ttf, DejaVuSans.ttf, DejaVuSerif.ttf.
And copy several programs from ./qt-arm-src-4.6.3/examples. For example / examples / qws / framebuffer / framefuffer and / examples / widgets / analogclock / analogclock.
Connect via telnet to the target machine (instead of telnet, you can simply connect a keyboard and work on mini2440). And download everything from ftp using the wget command.
We distribute the downloaded files as follows:
libQtCore.so.4.6.3, libQtGui.so.4.6.3, libQtNetwork.so.4.6.3 in the / lib folder.
DejaVuSans-Bold.ttf, DejaVuSerif-Bold.ttf, DejaVuSans.ttf, DejaVuSerif.ttf in the / usr / local / Trolltech / Qt-arm / lib / fonts folder
framefuffer, analogclock in / home.
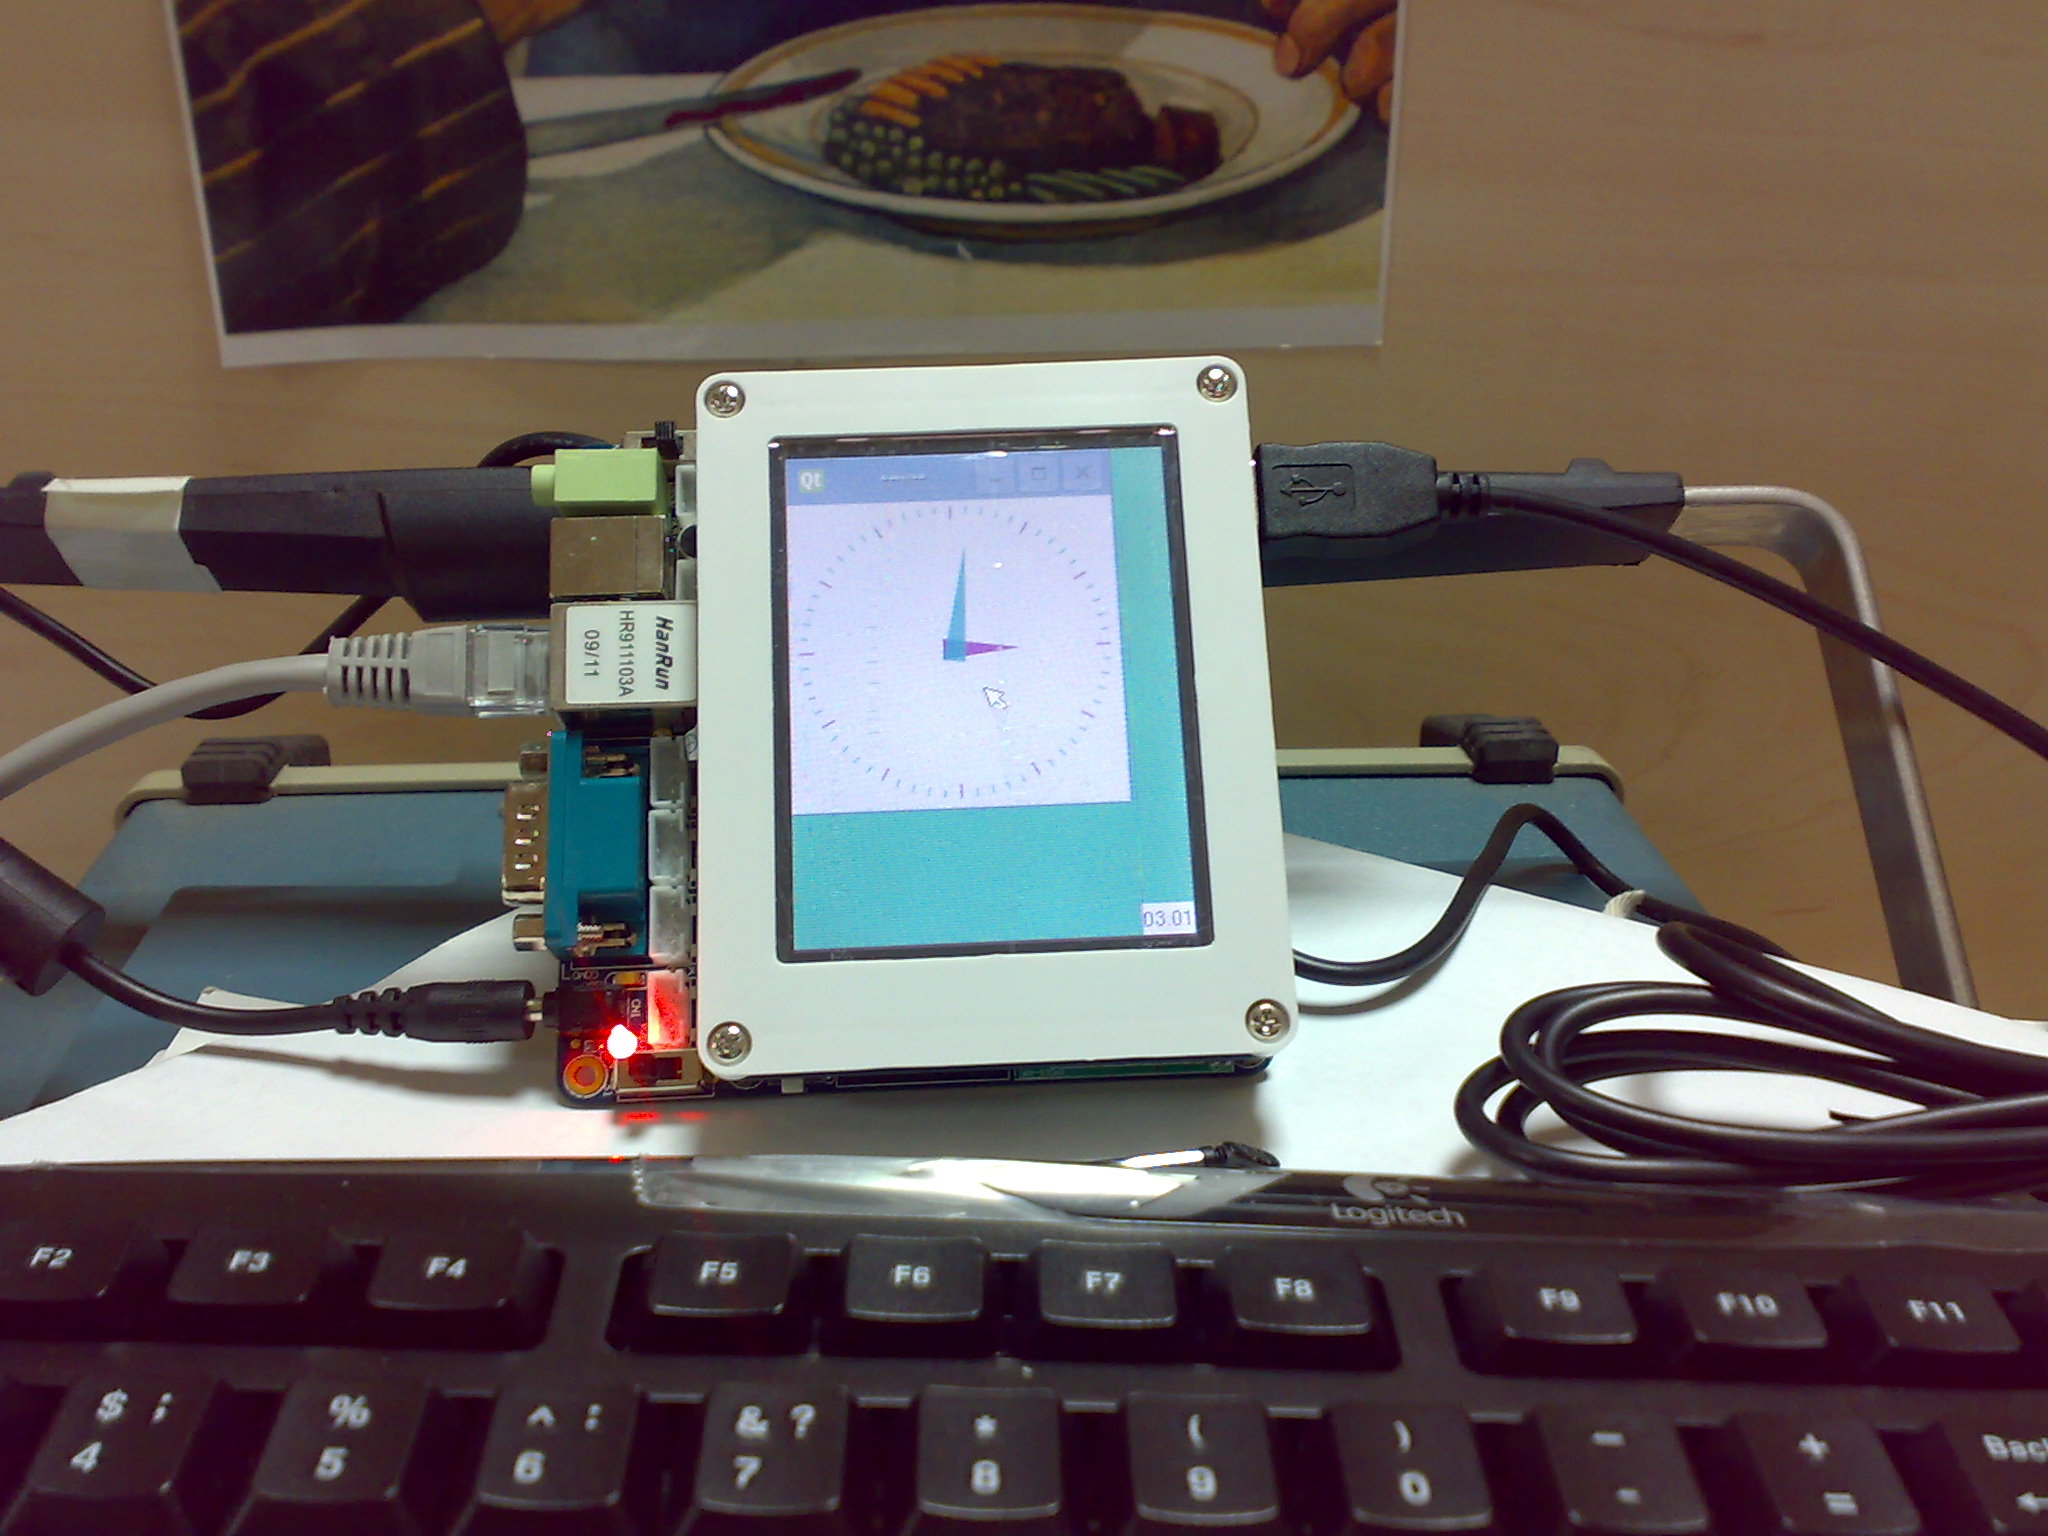
You can try to run analogclock
analogclock –qws
The clock should appear, but the touchscreen does not work yet.
Next install and configure tslib.
On the ftp server, we have a ./build folder that contains tslib files. The contents of the folder must be copied to the root of the target machine.
Then you need to edit the ts.conf file for your device. For mini2440 content is
module_raw input
module pthres pmin = 1
module variance delta = 30
module dejitter delta = 100
module linear
Create the necessary environment variables
export TSLIB_TSDEVICE = / dev / input / event0
export TSLIB_CALIBFILE = / etc / pointercal
export TSLIB_CONFFILE = / etc / ts.conf
export TSLIB_PLUGINDIR = / lib / ts
export TSLIB_FBDEVICE = / dev / fb0
export TSLIB_CONSOLEDEVICE = none
export QWS_MOUSE_PROTO = tslib: / dev / input / event0
Do not create the / etc / pointercal file yourself.
/ dev / input / event0 is a touchscreen device file. On different devices it may be different or absent. In this case, you need to create it.
mknod c 13 64 / dev / input / event0
The correct numbers for the device (13 64) can be found here.
/ sys / device / virtual / input / mice / input1 / event0 / dev
You can test the device like this.
cat / dev / input / event0 | hexdump
Touch the screen and get a stream of bytes.
We try to start the application and check the interaction with the touchscreen.
Calibrate the screen using the ts_calibrate utility from the bin folder.
You can try to run analogclock
analogclock –qws
The manual covers working with the QVFB emulator, compiling on the host machine for the target device, compiling and installing the tslib driver, installing the libraries on the target machine.
')
Short plan of action
1. Install Qt for X11 and compile QVFB.
2. Install Qt for QVFB.
3. Install a compiler for ARM.
4. Install Qt for ARM.
5. Compile tslib.
6. Install the Qt and tslib libraries on the target machine.
Installing Qt for X11
To install all the tools we need about 20 GB of free space on the working machine and 20 MB on the target machine.
We swing Qt 4.6.3 libraries for Linux / X11 .
For unknown reasons, older versions do not work on our mini2440 target device. Therefore, as Qt for ARM, you only need to install this version. As Qt for X11 and Qt for QVFB, you can install the latest version from the official site.
When installing follow the instructions from the official site .
Here is a set of commands that were used in our case.
Install the library. If as a result of the execution of the configure and make commands error messages appear, then you need to install additional libraries referenced by these messages and repeat the commands.
sudo aptitude install libxtst-dev
sudo aptitude install libxext-dev
sudo aptitude install x11protoxext-dev
sudo aptitude install libxrender-dev
sudo aptitude install xnest
Unpack the archives.
gunzip qt-everywhere-opensource-src-4.6.3.tar.gz
tar xvf qt-everywhere-opensource-src-4.6.3.tar
mv ./qt-everywhere-opensource-src-4.6.3 ./qt-X11-src-4.6.3
Go to the folder with Qt and run the configurator (it runs for a few minutes). When installing Qt for X11, no parameters need to be passed to the configurator. The libraries will be installed in the /usr/local/Trolltech/QT-4.6.3 folder.
cd ./qt-X11-src-4.6.3
./configure
Compile the library. It takes a few hours!
make
If as a result of the execution of the configure and make commands error messages appear, then you need to install additional libraries referenced by these messages and repeat the commands.
Install the library. The libraries will be installed in the /usr/local/Trolltech/QT-4.6.3 folder.
sudo make install
Next, you need to compile the QVFB utility and copy it to /usr/local/Trolltech/QT-4.6.3/bin.
cd ./tools/qvfb/
make
sudo make install
cp ../../bin/qvfb /usr/local/Trolltech/QT-4.6.3/qvfb
We got the QVFB utility, which is the device screen emulator.
Installing Qt for QVFB
Unzip our qt-everywhere-opensource-src-4.6.3.tar archive to another folder and rename it.
tar xvf qt-everywhere-opensource-src-4.6.3.tar
mv ./qt-everywhere-opensource-src-4.6.3 ./qt-qvfb-src-4.6.3
We start the configurator and pass parameters to it that indicate the installation location of the libraries and the use of QVFB. Without the option -embedded x86 will not work!
cd ./qt-qvfb-src-4.6.3
./configure -qvfb -embedded x86 -prefix / usr / local / Trolltech / Qt-qvfb
Compile and install.
make
sudo make install
Check how QVFB works.
/usr/local/Trolltech/QT-4.6.3/qvfb
We start the application in QVFB using the –qws key.
./examples/widgets/analogclock/analogclock –qws
If everything is correct, the application will start inside the QVFB window.
Install compiler for ARM
Next you need to install a compiler for our device. For mini2440 arm-linux-gcc 4.3.2 is suitable.
Need to unpack.
gunzip arm-linux-gcc-4.3.2.tgz
tar xvf arm-linux-gcc-4.3.2.tar
Copy all to / usr / local
cp –R ./usr/local/arm / usr / local / arm
And change the PATH environment variable.
export PATH = / usr / local / arm / 4.3.2 / bin: $ PATH
Installing Qt for ARM
We put only Qt 4.6.3 libraries for Linux / X11 . For unknown reasons, older versions do not work on our mini2440 target device.
tar xvf qt-everywhere-opensource-src-4.6.3.tar
mv ./qt-everywhere-opensource-src-4.6.3 ./qt-arm-src-4.6.3
Disable optimization. Without this, nothing works on the target mini2440 device. To do this, in the ./mkspecs/common/g++.conf file, we find the options –O2 and –O1 in the text and replace them with –O0.
We start the configurator and pass parameters to it. The –qt-mouse-tslib parameter indicates that on the target device we will work with the tslib driver.
cd ./qt-arm-src-4.6.3
./configure –embedded arm –xplstform qws / linux-arm-g ++ -prefix / usr / local / Trolltech / Qt-arm –qt-mouse-tslib –little-endian –no-webkit –no-qt3support –no-cups - no-largefile –optimized-qmake –no-openssl –nomake tools
Compile and install.
make
sudo make install
Compiling tslib
Tslib is a touchscreen driver that can be used on mini2440 with Qt. Download the library and unpack it.
tar xjf tslib-1.0.tar.bz2
cd ./tslib-1.0
Install the packages necessary for the configurator.
sudo aptitude install libtool
sudo aptitude install automake1.7
sudo aptitude install m4
Run the configurator scripts.
./autogen.sh
echo "ac_cv_func_malloc_0_nonnull = yes"> arm-linux.autogen
export CC = / usr / local / arm / 4.3.2 / bin / arm-linux-gcc
export CXX = / usr / local / arm / 4.3.2 / bin / arm-linux-g ++
export CONFIG_SITE = arm-linux.autogen
./configure --build = i386-linux --host = arm-linux --target = arm --disable-inputapi --prefix = $ PWD / build
Compile.
sudo make
sudo make install
In the ./build folder there will be all the files that need to be delivered to the target device in the appropriate folders.
Installing libraries on the target machine
Target machine need to connect to the network and run telnet. On our mini2440 is Linux with Qtopia installed .
On a working machine, we are raising an ftp server.
Copy the build folder from tslib to the root folder of the server.
Also copy the libraries libQtCore.so.4.6.3, libQtGui.so.4.6.3, libQtNetwork.so.4.6.3 from / usr / local / Trolltech / Qt-arm / lib. We change extensions from * .so.4.6.3 to * .so.4 (these files are needed on the device).
Copy these fonts from the / usr / local / Trolltech / Qt-arm / lib / fonts folder: DejaVuSans-Bold.ttf, DejaVuSerif-Bold.ttf, DejaVuSans.ttf, DejaVuSerif.ttf.
And copy several programs from ./qt-arm-src-4.6.3/examples. For example / examples / qws / framebuffer / framefuffer and / examples / widgets / analogclock / analogclock.
Connect via telnet to the target machine (instead of telnet, you can simply connect a keyboard and work on mini2440). And download everything from ftp using the wget command.
We distribute the downloaded files as follows:
libQtCore.so.4.6.3, libQtGui.so.4.6.3, libQtNetwork.so.4.6.3 in the / lib folder.
DejaVuSans-Bold.ttf, DejaVuSerif-Bold.ttf, DejaVuSans.ttf, DejaVuSerif.ttf in the / usr / local / Trolltech / Qt-arm / lib / fonts folder
framefuffer, analogclock in / home.
You can try to run analogclock
analogclock –qws
The clock should appear, but the touchscreen does not work yet.
Next install and configure tslib.
On the ftp server, we have a ./build folder that contains tslib files. The contents of the folder must be copied to the root of the target machine.
Then you need to edit the ts.conf file for your device. For mini2440 content is
module_raw input
module pthres pmin = 1
module variance delta = 30
module dejitter delta = 100
module linear
Create the necessary environment variables
export TSLIB_TSDEVICE = / dev / input / event0
export TSLIB_CALIBFILE = / etc / pointercal
export TSLIB_CONFFILE = / etc / ts.conf
export TSLIB_PLUGINDIR = / lib / ts
export TSLIB_FBDEVICE = / dev / fb0
export TSLIB_CONSOLEDEVICE = none
export QWS_MOUSE_PROTO = tslib: / dev / input / event0
Do not create the / etc / pointercal file yourself.
/ dev / input / event0 is a touchscreen device file. On different devices it may be different or absent. In this case, you need to create it.
mknod c 13 64 / dev / input / event0
The correct numbers for the device (13 64) can be found here.
/ sys / device / virtual / input / mice / input1 / event0 / dev
You can test the device like this.
cat / dev / input / event0 | hexdump
Touch the screen and get a stream of bytes.
We try to start the application and check the interaction with the touchscreen.
Calibrate the screen using the ts_calibrate utility from the bin folder.
You can try to run analogclock
analogclock –qws
Source: https://habr.com/ru/post/106526/
All Articles