Introduction to Ruby on Rails 3.0
Good afternoon friends. Not so long ago, my friends and colleagues decided to study Ruby on Rails - what it is and what they eat with - for future use in developing their projects.
Since there was no knowledge of this topic at all, they decided to move gradually. During the initial installation of Ruby with Rails 3.0, we encountered some difficulties that no one mentioned in the manuals at once. Therefore, I decided to write this small guide (which is a summary of my own experience and translation of the manual to guides.rubyonrails.org/getting_started.html ) on the initial installation and configuration of Ruby on Rails 3.0 in order to help beginners like me to find useful information in one place and save your time.
Manipulations were carried out on the system Windows XP SP2. On Windows 7, everything is the same, but on Vista, I haven’t put the rails on, but more on that later.
')
So, first you need to download Ruby installer . Installation there is not difficult and everything is clear (just update the PATH variable immediately, as it is proposed to do).
Then run a command prompt with Ruby support.
Now we need to install rails. In the command line we write:
gem install rails
There was nothing on Vista but nothing happened when starting this command a message appeared stating that the folder C: \ Users \ Owner could not be found. Surely, it was in Cyrillic in the folder name, but I didn’t go into particular details.
We will use sqlite3 database for our initial needs. In order for everything to go correctly, you will need to download 2 archives: here and here and unpack them into the folder with RoR 3.
Now on the command line, type:
gem install sqlite3-ruby
After the installation of the sqlite3 libraries is complete, we will need to create our own application, in our case a blog. In the command line we write:
rails new blog
Our blog is created, now we need to go to the application folder:
cd blog
Rails applications for managing gem dependencies use Bundler by default. Since apart from those gems that we already have, others are not required, you can simply write:
bundle install
Rails comes with native SQLite3 support. This base is quite suitable for development and testing, but not for industrial operation. By default, when creating a new project, Rails uses the SQLite database, but you can easily change these settings.
Here I will provide part of the default configuration file (config / database.yml) with the connection information for the development environment:
development: adapter: sqlite3 database : db/development.sqlite3 pool: 5 timeout: 5000development: adapter: sqlite3 database : db/development.sqlite3 pool: 5 timeout: 5000development: adapter: sqlite3 database : db/development.sqlite3 pool: 5 timeout: 5000development: adapter: sqlite3 database : db/development.sqlite3 pool: 5 timeout: 5000development: adapter: sqlite3 database : db/development.sqlite3 pool: 5 timeout: 5000
Now, after configuring the database, it's time to order the rails to create an empty base. This can be done with the rake command:
rake db: create
After that, the development and test bases will be created in the db / folder.
Actually, now we already have a functioning Rails application. To verify this, you need to start the web server with the command:
rails server
You can see your application in action if you open the browser and type localhost : 3000 in the address bar
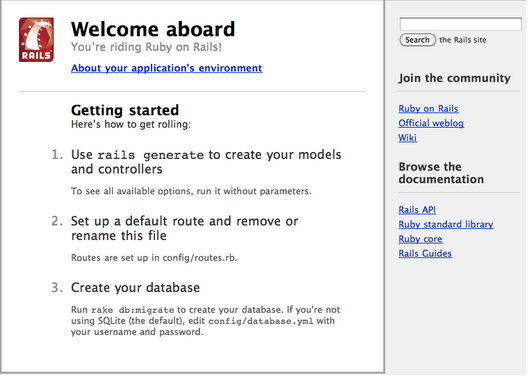
The “Welcome Aboard” page is a test for a Rails application to make sure that you configured the software correctly. You can view information about the environment of your application by clicking on the link “About your application's environment”.
To get Rails to say hello, you need at least a controller and a view. Fortunately, to create them you need only one team:
rails generate controller home index
Rails will create several files, including app / views / home / index.html.erb. This is the sample that will be used to display the results of the index method in the home controller. Open this file in a text editor and edit it so that it contains only one line of code:
- < h1 > Hello, Rails! </ h1 >
Now, after we have created the controller and view, we need to somehow tell the rails when to display the “Hello Rails” page. In our case, we want this page to be displayed on the root URL of our site localhost : 3000, instead of the “Welcome Aboard” test page. The first step is to remove the default page from our application:
cd public
del index.html
Now we need to tell Rails where our current home page is located. Open the config / routes.rb file in a text editor. This is our application's routing file, which contains entry points written in a domain-specific language (DSL). This file contains many examples of paths (they are commented out), and one of them just shows how to connect your root page with a specific controller and perform an action. Find the line that starts with root: to, uncomment it and change it so that it looks like this:
- Blog :: Application.routes.draw do
- # ...
- # You can be routed with "root"
- # just remember to delete public /index.html.
- root: to => "home # index"
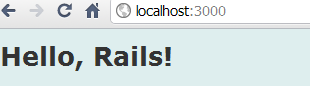
root: to => "home # index" tells Rails to map the root action to the action (method) index of the home controller.
Now if you go to localhost : 3000, you will see the inscription “Hello, Rails!”
Rails has the concept of scaffold - a quick way to create the main parts of an application. If you want to create models, views, and controllers, then this is the tool to use.
In our case (blog application), you can start by creating a Post resource using Scaffolding, which will be a blog post. To do this, write the following command:
rails generate scaffold Post name: string title: string content: text
One of the files created by the rails generate scaffold command is database migration. Migrations are Ruby classes that are designed to simplify the creation and modification of database tables. Rails uses rake commands to run migrations, and it is possible to cancel the migration after it has been applied to the database. The name of the migration file includes a timestamp in order to make sure that the migrations are started in the order they were created.
If you open the db / migrate / 20100917061914_create_posts.rb file (remember that the name of your file will be slightly different), you will see the following:
- class CreatePosts <ActiveRecord :: Migration
- def self.up
- create_table: posts do | t |
- t. string : name
- t. string : title
- t.text: content
- t.timestamps
- end
- end
- def self.down
- drop_table: posts
- end
- end
This migration creates two up methods that are called when the migration to the database starts, and down, which is used when you need to roll back the changes made to the database by this migration. The up command creates a table of posts with two string columns and one text column. It also generates two fields for the time stamps, which are needed to track the creation of records and change data.
Now you can start the migration with the command:
rake db: migrate
Rails will do this migration and report the creation of the Posts table.
To connect posts to the homepage that we created earlier, you can add a link to it. Open the file app / views / home / index.html.erb and change it as follows:
- < h1 > Hello, Rails! </ h1 >
- <% = link_to "My Blog" , posts_path %>
The link_to method is one of the helpers built in to Rails (helper). He creates a hyperlink based on the text to be displayed on the path to which to go - in this case the path to the posts.
Now everything is ready to start working with posts. To do this, you need to open the link localhost : 3000 and click on “My Blog” (I made a personal blog - Alex's blog):

You will see the result of playing the Rails index view of your posts. There is currently no record in the database, but you can create a new post by clicking on “New Post”. After that, you will see that you can edit posts, view the details related to them, and delete them. Actually, that's all for a start, we got on the rails!
The next translation article will discuss how to add a second model to the application. I was glad if I helped someone save at least an hour or two of time searching for information. Good luck to all!
The article was written by my friend alexlash , whose karma
Source: https://habr.com/ru/post/106189/
All Articles