ASUS netbooks opening guide on the example of the eee pc 1101ha
The anomalous heat of last summer will surely be remembered by many of us for the troubles that it has caused in working with various computer equipment and other high-tech equipment. Someone couldn’t withstand the extreme heat of a home computer, someone had a laptop, and someone probably had more serious problems, such as the failure of various communication network equipment, which made them literally sweat during the solution. Problems.
This rock also did not pass me by, and in the middle of August, my ASUS Eee pc 1101ha, who served faithfully and truthfully, began to howl with his only cooler, agreeing to be silent for a while only in response to mysterious taps on his body and other "shamanic" passes. It didn’t affect the performance at all, but it caused certain inconveniences, as a result of which almost a month later I decided to try to fix the problem with my own hands.
A little googling and not finding the answer to the question of how to open my mobile friend painlessly, it was decided to find a description of the process of disassembling any of the laptops or netbooks of ASUS, and having already studied it, begin the process. Within half an hour, several articles on the topic of interest to me were studied, after which the operating table was prepared:
')
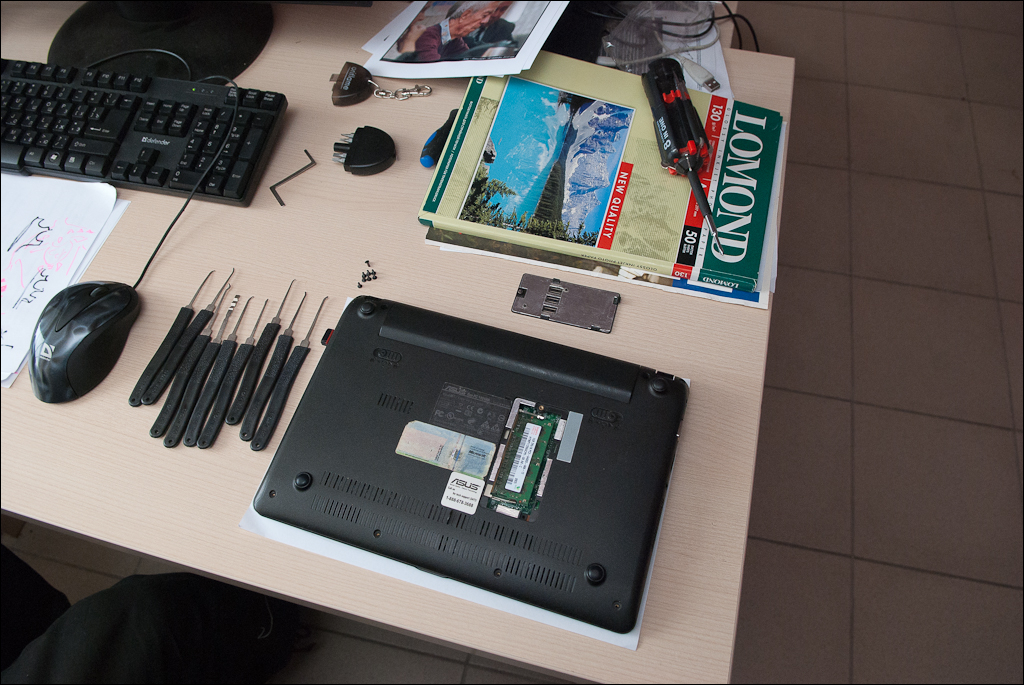
As you can see, I have already removed 8 screws from the back of the device and removed the protective cover of the RAM expansion slot.
What we have in the form of tools:
In general, I always have all these tools with me in my backpack, and some of them are not needed, and the other part, which is not in the photo above, will be discussed later.
After the screws were loosened, the RAM and battery were removed, an attempt was made to remove the case, which was not successful. It became clear that the front part of the netbook would have to be removed, and before that - the keyboard:
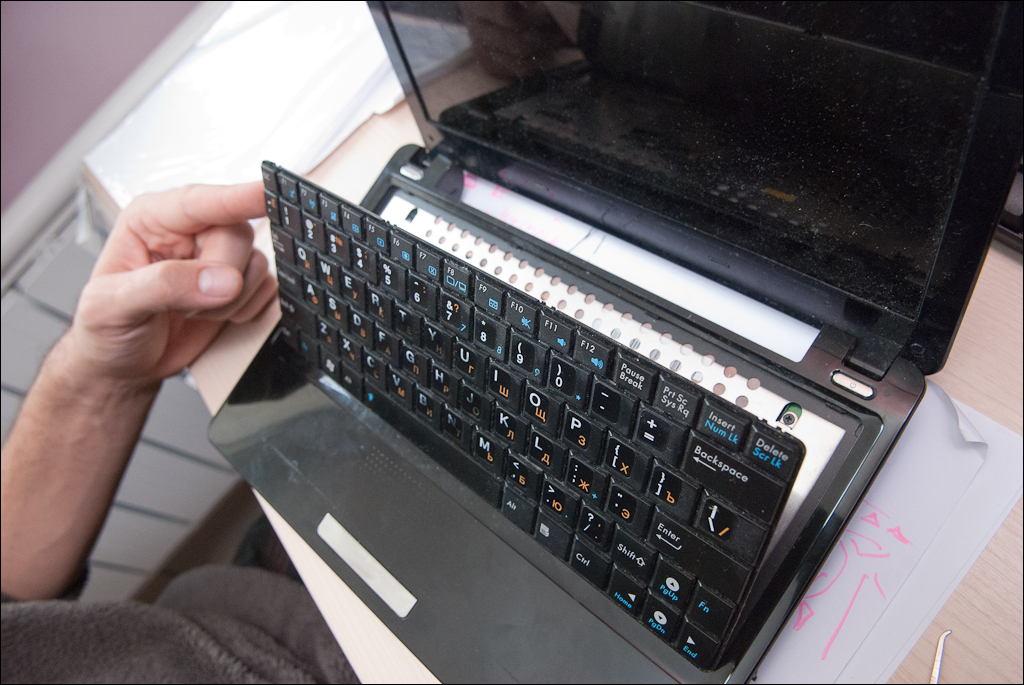
It is removed quite simply, you just need to click on top of a few "locks" along its perimeter. There are four of them, and all of them are at the top of the keyboard:

The scuffs on the keyboard are really just stickers with the usual layout. In order to completely remove the keyboard, we also need to disconnect the cable. He holds not the usual way, but on a special latch, which does not allow him to move away from the connector. The clasp is effortlessly removed from both sides using one of the master keys:
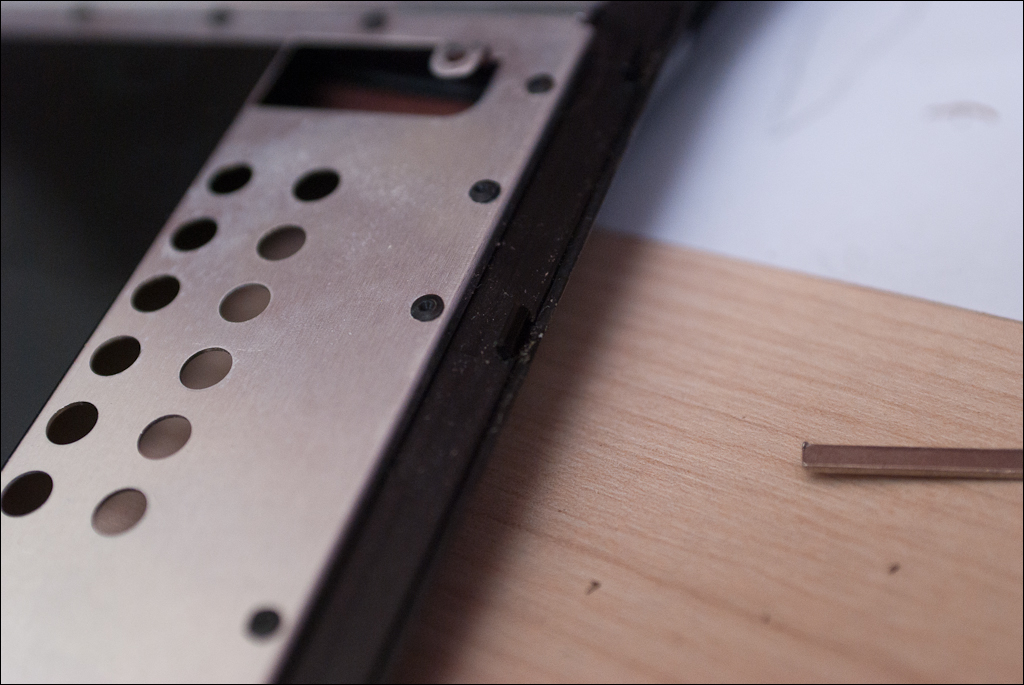
After that, the most interesting thing is to unscrew the last screw, protected by a sticker warning of the loss of the guarantee in case of integrity violation, and try to remove the front side of the working surface of the laptop:

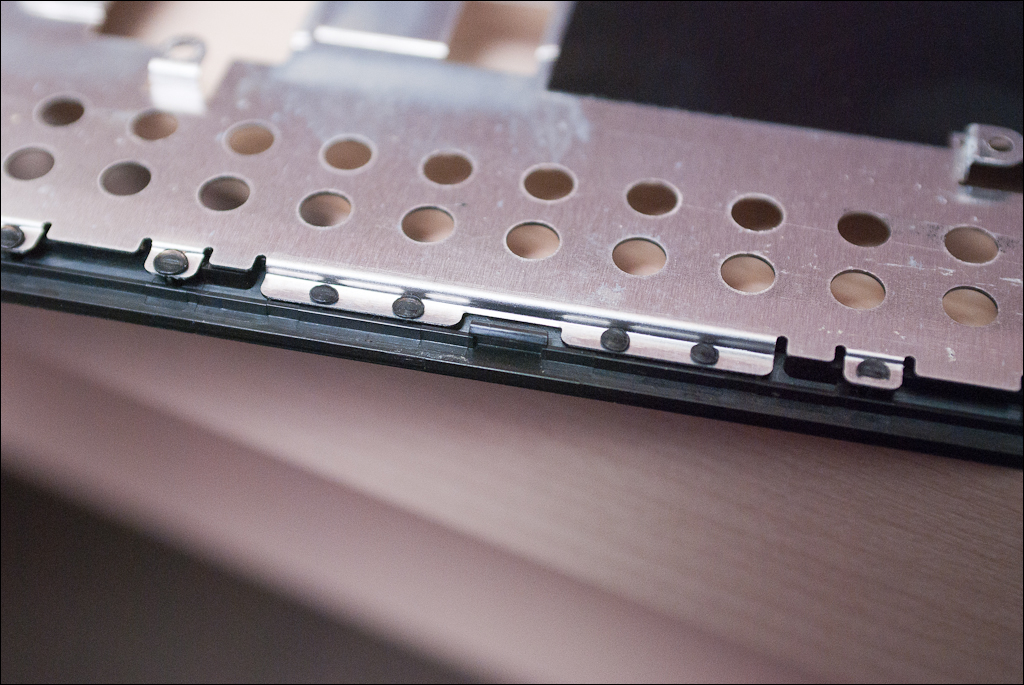
This part of the body is removed at the same time and simply and vice versa, since there is a risk of breaking thin plastic. In general, it is difficult to advise something except to take the thinnest master keys available, find the gap between the back and front parts of the body, and gradually bypass all the “locks”, prying them one by one, and securing success by fixing the resulting gap than Any suitable size. In the end we get the expected picture:
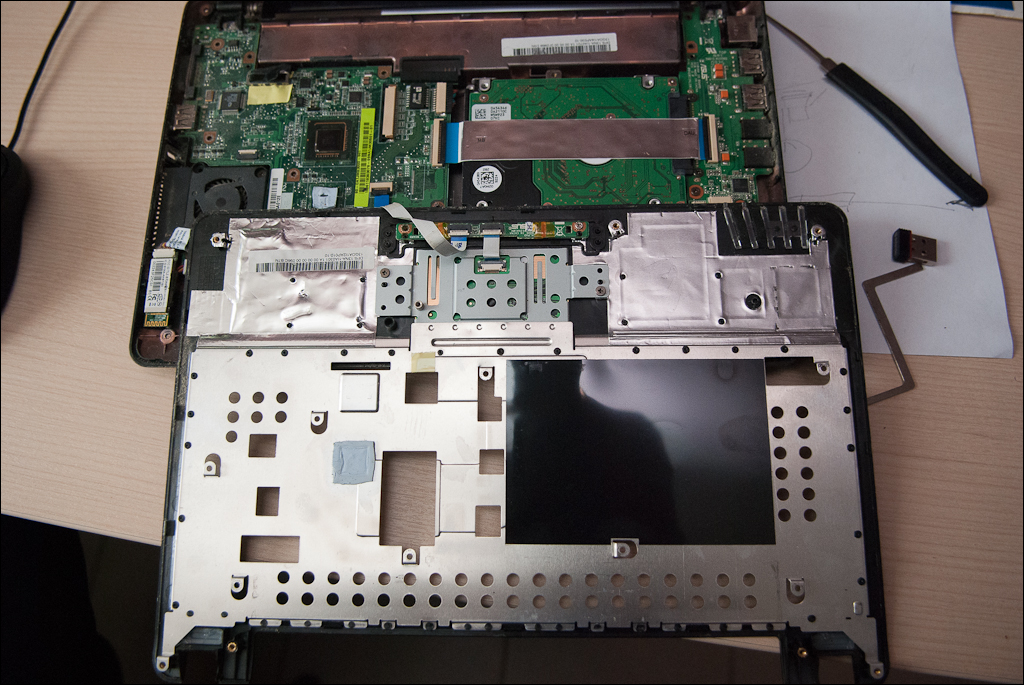
Locks are looked for simply if you at least once were engaged in a similar matter: in those places where it seems that plastic is about to break - there is a “lock” :) With simple manipulations, he hooks and the process goes on. And here is a couple of them, right in the center:
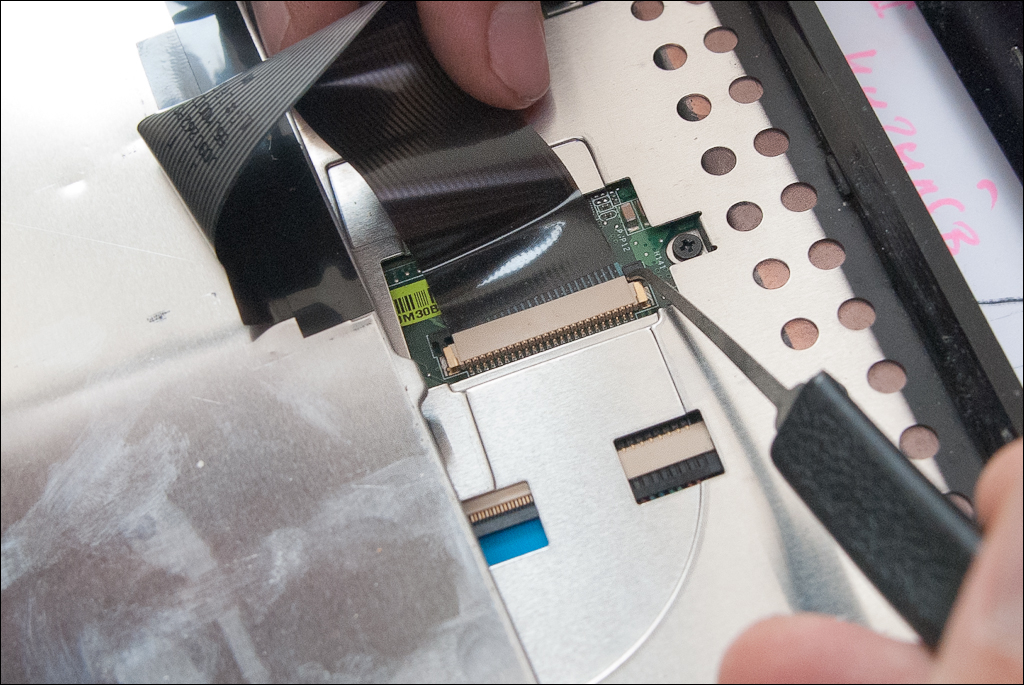
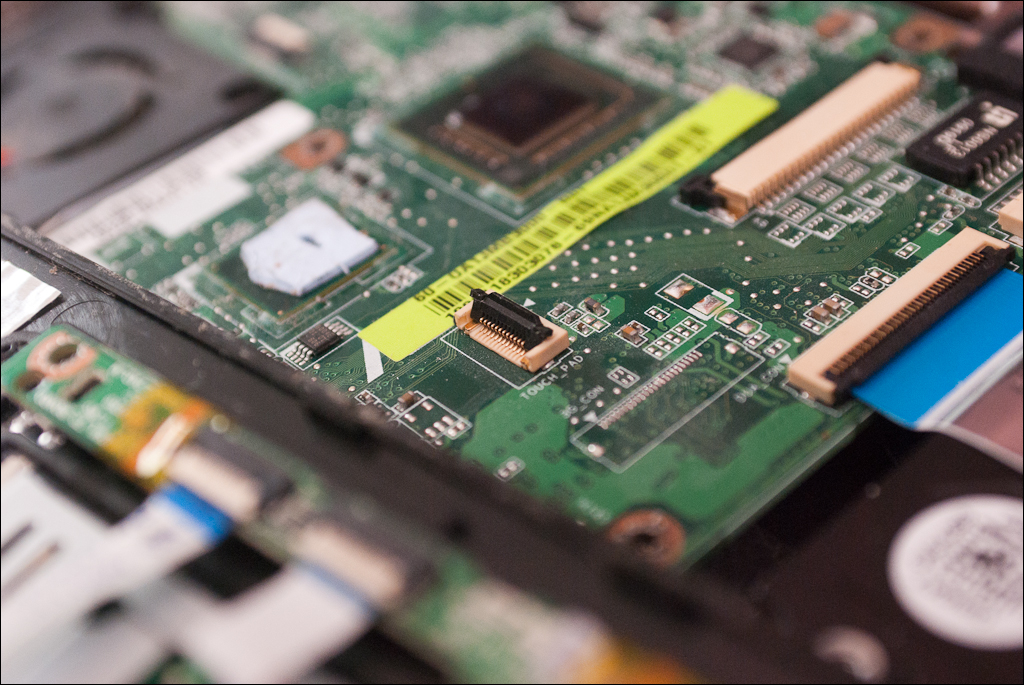
Do not forget that here, as in the case of the keyboard, we are waiting for another loop - coming this time from a multitouch. It is also fastened in a special way, only this time the latch rises up, and does not move forward (here it is already raised):
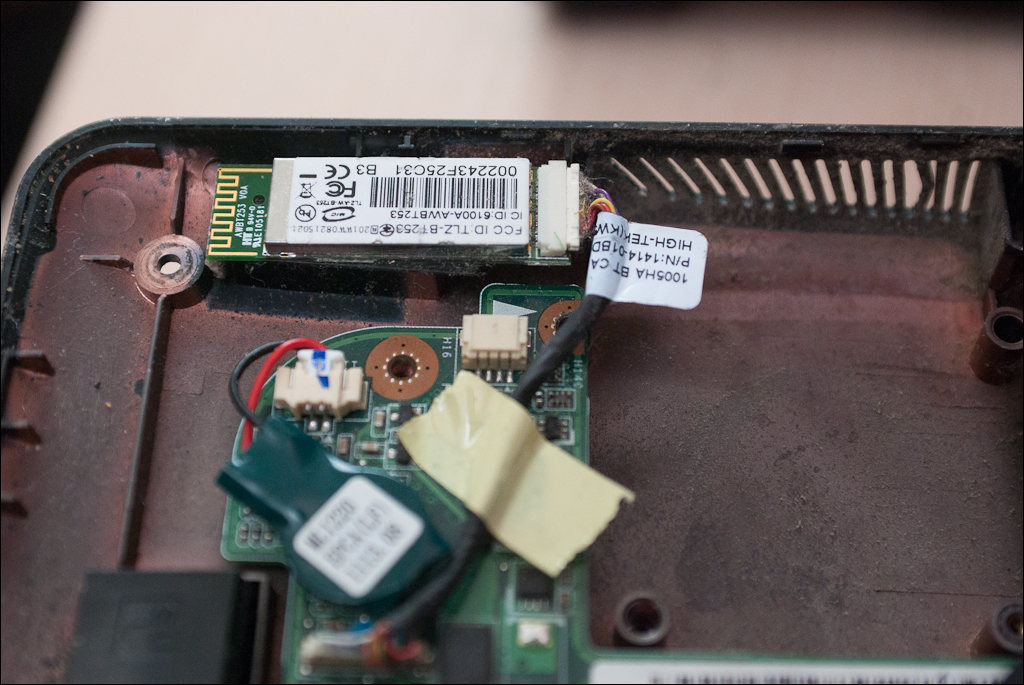
So, we got to the cooler, and at the same time to all the other removable parts of the netbook. It is not a problem to remove the cooler - it is necessary to unscrew the two screws and disconnect it from the motherboard, to which it is attached using a standard (without fasteners) 4-pin connector:
Hero of the occasion:
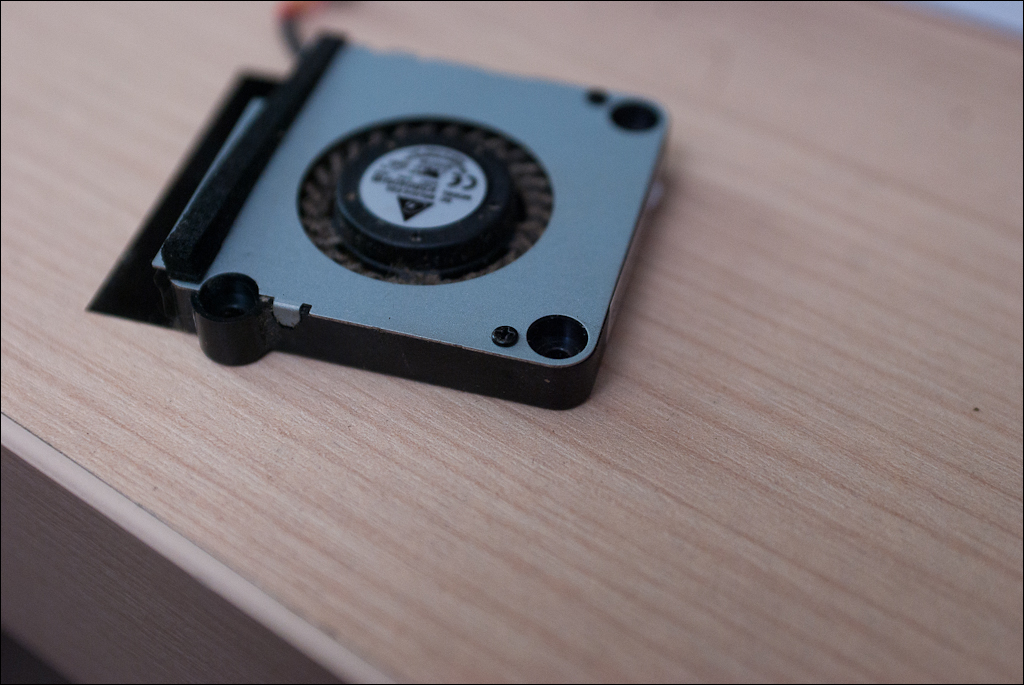
It suddenly turns out that the cooler itself is already packed in a case that is closed with two “watch” bolts, which cannot be turned out with our tools. The usual stationery knife comes to the rescue, as a result, the bolts are removed, and when opened, a small strip of foam rubber is torn along the protective iron casing line (you can see its tip in the upper right corner of the piece of metal), and the casing itself bends to from the sides of the plastic case is attached, as they say, "tightly":
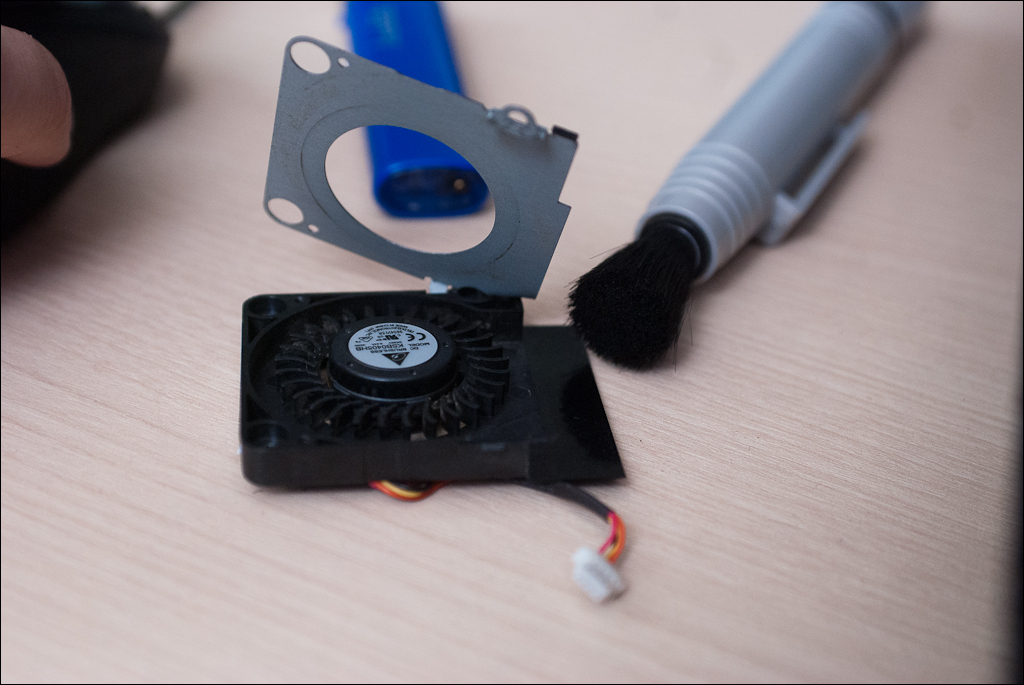
Here the cooler is already clean, this time a brush for cleaning the glasses of camera lenses came to the rescue. If you don’t even have her on hand, then you can build some kind of it from folded paper of several layers, cut into one piece with strips. It will turn out something like an improvised brush, which in its properties will even surpass the analog - in the process of cleaning the cooler, you need more rigid bristles than vice versa.
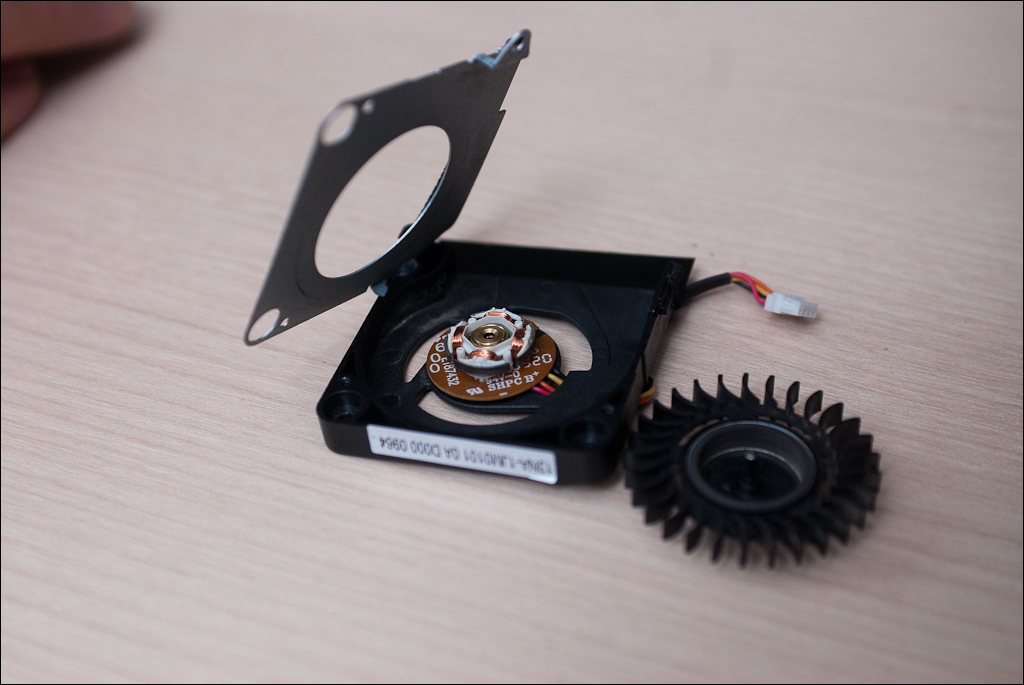
Oh yeah, I completely forgot to say - the top part of the cooler can be removed before cleaning :) It is attached to the magnetic interaction and nothing more, which, however, is enough for a few minutes of misunderstanding, how to remove it painlessly to eliminate pollution and lubrication of the mechanism itself. It is required to lubricate only the sleeve on which the fan blades rotate. The photo clearly shows where it is later inserted:
Behind it all, I hasten to bow out, I still have to collect it all back :) The only thing I can add is that the vast majority of not only ASUS notebooks, but also other companies probably understand this way. You can check it out by your own experience.
PS: special thanks to my colleague "in the shop" Andrew, who helped me in this process.
This rock also did not pass me by, and in the middle of August, my ASUS Eee pc 1101ha, who served faithfully and truthfully, began to howl with his only cooler, agreeing to be silent for a while only in response to mysterious taps on his body and other "shamanic" passes. It didn’t affect the performance at all, but it caused certain inconveniences, as a result of which almost a month later I decided to try to fix the problem with my own hands.
A little googling and not finding the answer to the question of how to open my mobile friend painlessly, it was decided to find a description of the process of disassembling any of the laptops or netbooks of ASUS, and having already studied it, begin the process. Within half an hour, several articles on the topic of interest to me were studied, after which the operating table was prepared:
')
As you can see, I have already removed 8 screws from the back of the device and removed the protective cover of the RAM expansion slot.
What we have in the form of tools:
- 8-in-1 screwdriver with broken flashlight
- Screwdriver with a roulette mark "Oriflame", presented on February 23, one good grandmother in past work
- A set of master keys, bought on DX for some pennies
- Short screwdriver from a lost set
In general, I always have all these tools with me in my backpack, and some of them are not needed, and the other part, which is not in the photo above, will be discussed later.
After the screws were loosened, the RAM and battery were removed, an attempt was made to remove the case, which was not successful. It became clear that the front part of the netbook would have to be removed, and before that - the keyboard:
It is removed quite simply, you just need to click on top of a few "locks" along its perimeter. There are four of them, and all of them are at the top of the keyboard:
The scuffs on the keyboard are really just stickers with the usual layout. In order to completely remove the keyboard, we also need to disconnect the cable. He holds not the usual way, but on a special latch, which does not allow him to move away from the connector. The clasp is effortlessly removed from both sides using one of the master keys:
After that, the most interesting thing is to unscrew the last screw, protected by a sticker warning of the loss of the guarantee in case of integrity violation, and try to remove the front side of the working surface of the laptop:
This part of the body is removed at the same time and simply and vice versa, since there is a risk of breaking thin plastic. In general, it is difficult to advise something except to take the thinnest master keys available, find the gap between the back and front parts of the body, and gradually bypass all the “locks”, prying them one by one, and securing success by fixing the resulting gap than Any suitable size. In the end we get the expected picture:
Locks are looked for simply if you at least once were engaged in a similar matter: in those places where it seems that plastic is about to break - there is a “lock” :) With simple manipulations, he hooks and the process goes on. And here is a couple of them, right in the center:
Do not forget that here, as in the case of the keyboard, we are waiting for another loop - coming this time from a multitouch. It is also fastened in a special way, only this time the latch rises up, and does not move forward (here it is already raised):
So, we got to the cooler, and at the same time to all the other removable parts of the netbook. It is not a problem to remove the cooler - it is necessary to unscrew the two screws and disconnect it from the motherboard, to which it is attached using a standard (without fasteners) 4-pin connector:
Hero of the occasion:
It suddenly turns out that the cooler itself is already packed in a case that is closed with two “watch” bolts, which cannot be turned out with our tools. The usual stationery knife comes to the rescue, as a result, the bolts are removed, and when opened, a small strip of foam rubber is torn along the protective iron casing line (you can see its tip in the upper right corner of the piece of metal), and the casing itself bends to from the sides of the plastic case is attached, as they say, "tightly":
Here the cooler is already clean, this time a brush for cleaning the glasses of camera lenses came to the rescue. If you don’t even have her on hand, then you can build some kind of it from folded paper of several layers, cut into one piece with strips. It will turn out something like an improvised brush, which in its properties will even surpass the analog - in the process of cleaning the cooler, you need more rigid bristles than vice versa.
Oh yeah, I completely forgot to say - the top part of the cooler can be removed before cleaning :) It is attached to the magnetic interaction and nothing more, which, however, is enough for a few minutes of misunderstanding, how to remove it painlessly to eliminate pollution and lubrication of the mechanism itself. It is required to lubricate only the sleeve on which the fan blades rotate. The photo clearly shows where it is later inserted:
Behind it all, I hasten to bow out, I still have to collect it all back :) The only thing I can add is that the vast majority of not only ASUS notebooks, but also other companies probably understand this way. You can check it out by your own experience.
PS: special thanks to my colleague "in the shop" Andrew, who helped me in this process.
Source: https://habr.com/ru/post/103795/
All Articles