Efficient photo processing in Gimp
Having recently read an article on photo processing in Photoshop on Habré, I wanted to tell you how you can do almost the same thing without using monsters like Photoshop and without rebooting in windows.
So, a few simple tools that can significantly change a photo:
Curves are very flexible and powerful tools. Changing the white balance, inverting colors, changing the contrast - all this is a special case of using curves. You can use wrapper tools such as Color-> Brightness-Contrast , but with curves you can do the same with a greater degree of control over what is happening.
Take for example an image that lacks contrast:
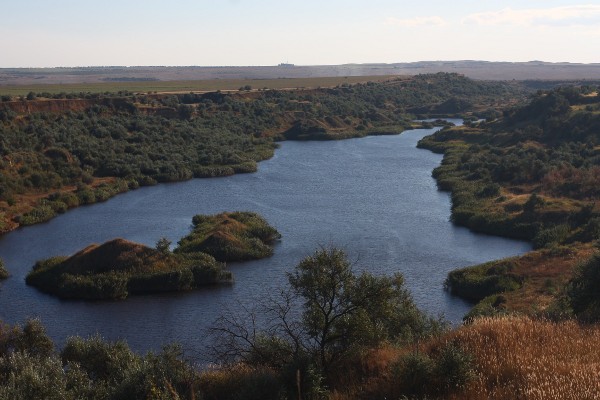
')
By opening the Color-> Curves tool, you can see a histogram of brightness, and through it the fact that we do not have a really black color in the photo. In addition, the histogram shows that dark colors predominate in the photograph.
We need to achieve that black color becomes black, and the overall brightness of the image has increased. To do this, move the beginning of the curve to the beginning of the histogram, and slightly curve it upwards in the field of light shades.
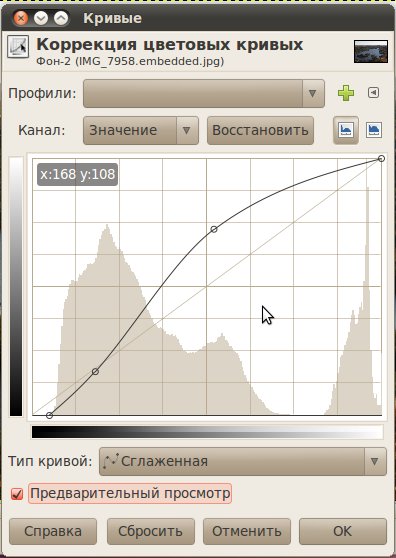
In addition, using the curves, you can adjust the brightness separately by color channels. I slightly bent down the curve of the blue channel to give a photo of warmer tones.
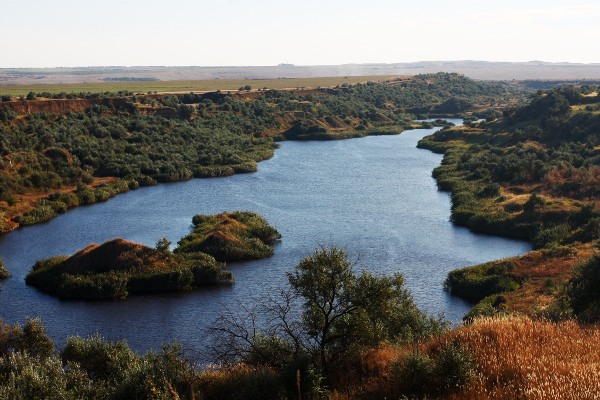
The result of applying the curves:
Therapeutic brush is a tool to help get rid of minor defects. Acne, moles, wrinkles, dust, scratches - all this can be removed with a medical brush. You can choose a healing brush either in the toolbar or through Tools-> Drawing-> Treatment Brush . To use the brush, hold down Ctrl and click on the place on the photo that will become a replacement pattern. After that, you can sketch the defects, the healing brush will copy a part of the image from the place you chose, and change its brightness so that it is combined with the surrounding pixels at the place of replacement.
Here is an example of the work of the healing brush + a slight increase in contrast curves:
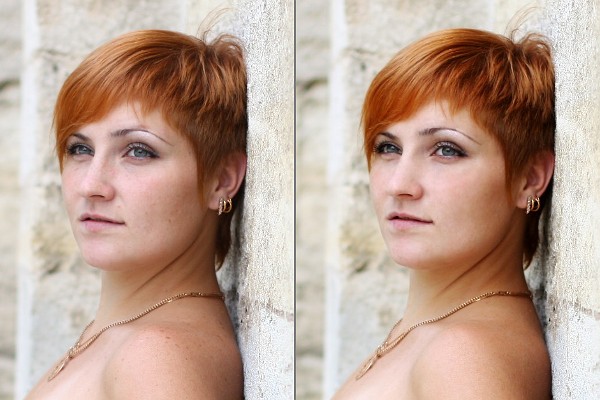
Unfortunately, I did not have a photo with obvious skin defects, but I hope the difference is clear.
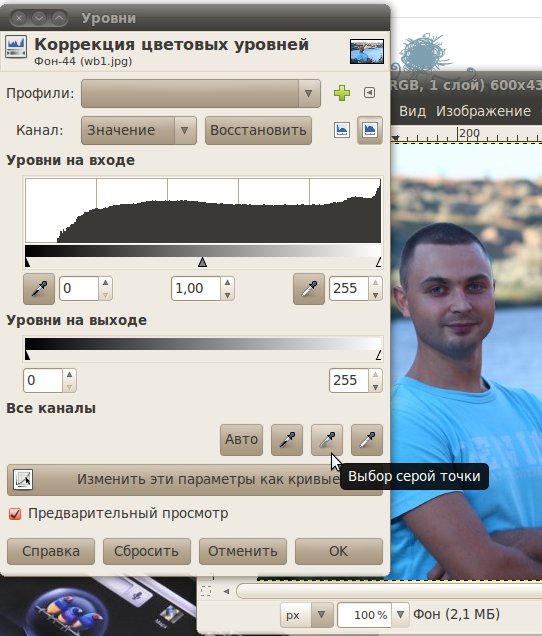
Levels are a simplified version of the curves. In principle, everything that you can do with the help of levels, you can do with the help of curves, as evidenced by the button “Change these parameters as curves”. But levels have one bonus that allows you to quickly and easily adjust the white balance. In the Levels dialog, 3 pipettes are available to us, which can indicate where in the photo should be white, black and gray. In most cases, it is enough to use only one pipette.
We have the original image. The photo seems to be cold, although it is 25 degrees outside, and the skin has an unnatural blue tint:
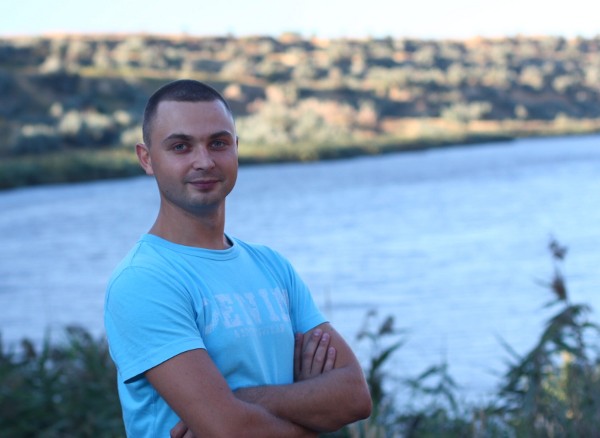
In this photo there are no black or white areas, so take a gray pipette and measure it through the hair
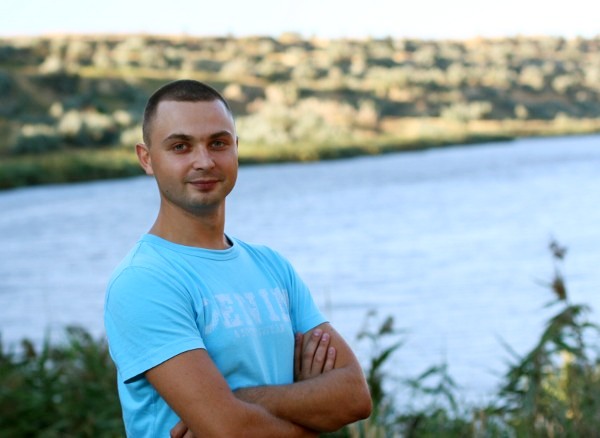
The result is now much more like reality:
There are still many great tools in Gimp, including scaling without deforming key elements that the last Photoshop is so proud of. I told only about the main correction tools that I use when processing my photos, without resorting to any Creative suite and other ultimate editions of programs.
So, a few simple tools that can significantly change a photo:
Curves
Curves are very flexible and powerful tools. Changing the white balance, inverting colors, changing the contrast - all this is a special case of using curves. You can use wrapper tools such as Color-> Brightness-Contrast , but with curves you can do the same with a greater degree of control over what is happening.
Take for example an image that lacks contrast:
')
By opening the Color-> Curves tool, you can see a histogram of brightness, and through it the fact that we do not have a really black color in the photo. In addition, the histogram shows that dark colors predominate in the photograph.
We need to achieve that black color becomes black, and the overall brightness of the image has increased. To do this, move the beginning of the curve to the beginning of the histogram, and slightly curve it upwards in the field of light shades.
In addition, using the curves, you can adjust the brightness separately by color channels. I slightly bent down the curve of the blue channel to give a photo of warmer tones.
The result of applying the curves:
Medical brush
Therapeutic brush is a tool to help get rid of minor defects. Acne, moles, wrinkles, dust, scratches - all this can be removed with a medical brush. You can choose a healing brush either in the toolbar or through Tools-> Drawing-> Treatment Brush . To use the brush, hold down Ctrl and click on the place on the photo that will become a replacement pattern. After that, you can sketch the defects, the healing brush will copy a part of the image from the place you chose, and change its brightness so that it is combined with the surrounding pixels at the place of replacement.
Here is an example of the work of the healing brush + a slight increase in contrast curves:
Unfortunately, I did not have a photo with obvious skin defects, but I hope the difference is clear.
Levels
Levels are a simplified version of the curves. In principle, everything that you can do with the help of levels, you can do with the help of curves, as evidenced by the button “Change these parameters as curves”. But levels have one bonus that allows you to quickly and easily adjust the white balance. In the Levels dialog, 3 pipettes are available to us, which can indicate where in the photo should be white, black and gray. In most cases, it is enough to use only one pipette.
We have the original image. The photo seems to be cold, although it is 25 degrees outside, and the skin has an unnatural blue tint:
In this photo there are no black or white areas, so take a gray pipette and measure it through the hair
The result is now much more like reality:
There are still many great tools in Gimp, including scaling without deforming key elements that the last Photoshop is so proud of. I told only about the main correction tools that I use when processing my photos, without resorting to any Creative suite and other ultimate editions of programs.
Source: https://habr.com/ru/post/103732/
All Articles