Automatic indexing of project files
Despite the fact that there are quite a few articles on the topic “using Vim as an IDE”, I was not satisfied with the result. I really lacked automatic, transparent for the user (that is, me) generating tags for all files in the project, and the project files do not have to be in the same directory and its subdirectories, and it’s easy and pleasant to generate a list of files.
In addition, I should be able to easily transfer a project from one computer to another and should not be tied to a specific project directory.
The long search for plug-ins with the necessary functionality was not successful, so it was decided to write such a plugin. I called it indexer .
')
UPD: at the moment the article is slightly outdated. I will update it when I have time for it. However, the basic works, and backward compatibility is provided, but for a more complete use of the possibilities, I recommend that you read : help indexer-syn-change-4.10 .
The archive with the plugin contains the following files and folders:
To work, you need ctags , but patched ctags are better, because In the latest version 5.8 (at the time of this writing) there is a very unpleasant bug. Read more about the bug and download the patch here .
First of all, it should be said that there are two options for using the plug-in: as an addition to the remarkable project plugin or separately.
A few words about the plugin project: this plugin allows you to conveniently manage projects and the list of files in them. Visually, this is a window with a tree structure of projects, subprojects and files. Projects can be minimized. You can do grep or vimgrep for all project files, and then view the results in quickfix. It is convenient to put some key (for example, F9) on the show / hide window with projects.
A detailed description of this plugin is beyond the scope of this article, moreover, the “vim project” request in Google immediately gives out many links. On vskidku - here . Well, of course,: help project after installing the plugin.
So, let's consider the simplest option: you already use the project plugin and use the default project file ~ / .vimprojects. If so, then setting up the indexer plugin will be very simple: you simply unpack the contents of the archive in $ HOME / .vim (or a similar directory), close Vim (if opened) and run it from any directory of any project present in ~ / .vimprojects . You can simply open any file included in the project.
The indexer will determine that the file included in such a project has been opened, will index all the files included in this project and set the corresponding values in the variables Vim & tags and & path.
Tags will be automatically updated when saving any file included in the project.
Now you can move the cursor to the name of a function, variable, etc., and by pressing g] or Ctrl-] (there are minor differences), move to the declaration of this function. Ctrl-t will take you back. And if you are developing in C / C ++, then you can connect the omnicppcomplete and code_complete plugins, and then by typing “structure_name.” Or “structure_name->”, you will see a popup menu with a selection of elements of this structure, and typing “function_name (” and by pressing Tab, you will get an automatic substitution of all parameters that accepts this function, but I was distracted a little.
It looks like this: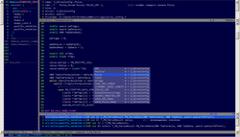
If you use the project plugin, but you have a different project file, you can specify it in your _vimrc:
I will give a complete list of options a little later.
As you can see, working with a bunch of these plugins is quite convenient: the project allows you to manage projects, and the indexer takes care of updating the tags.
If for some reason you do not want to use the project,
You will need to describe in a single file which files are included in which projects. The default is the ~ / .indexer_files file. The syntax of this file is quite simple. Perhaps the best way to explain is to set an example:
as you might guess, there are two projects here: CoolProject and AnotherProject.
The CoolProject project includes all * .c files from the / home / user / myproject / src directory, and all the header files from / home / user / myproject / inc and / home / user / myproject / src.
And AnotherProject includes the * .c and * .h files from the ~ / myproject2 directory and all subdirectories recursively (indicates "**" for recursiveness).
Well, as you can see, in the paths to the files, you can use variables Vim, such as $ HOME, $ VIM, and others, including those declared by the user.
UPD : In version 1.5, at the request of the torkve user, the ability has been added to set a directory containing many projects in this file. Suppose you have a ~ / workspace directory in which there are a lot of projects, and the list of projects often changes. Editing the .indexer_files file each time will be lazy. Then you can specify something like this:
The keyword is PROJECTS_PARENT. Indexer will consider each folder in ~ / workspace as a separate project, including files of the listed types.
Otherwise, the indexer works in the same way as with the project: if you run Vim from the project directory, tags for all files from this project will be generated, and if you save any file from this project, the tags will be updated.
Everything, now I can simply create projects, add files there and forget about how they are indexed. Hooray!
But this was not enough for me.
The fact is that I don’t like it when project files are in different places (except for libraries that are common to several projects. In fact, libraries are separate projects). In the cases considered by us, the project lies in one folder, and the file with the project description (.vimprojects or .indexer_files) in the other (in the home).
That is, I wanted for each project to have its own .vimprojects file, which would lie in the folder of the project itself and in which, in fact, there would be a description of only this project. It turns out, depending on the project, you need to load the settings specific to this project.
I solved this problem as follows: in the root folder of the project I create the folder ".vimprj" (the name can be changed), into which I place files with the settings specific to the project. It also contains .vimprojects. When Vim is launched, indexer will first look for this ".vimprj" folder in the current directory, if it is not there - it is one level higher, and so on. The depth of the recursion can be changed, the default is 10.
If the folder ".vimprj" is found, then the indexer will declare the global variable $ INDEXER_PROJECT_ROOT, in which, as you might guess, the path to the root folder of the project will be specified. Not to the folder ".vimprj", but to the folder in which lies ".vimprj". Also, all * .vim files from this directory will be launched, in which you can specify specific settings. Here is an example of such a sett.vim file:
Also in the project file .vimprojects I use not the absolute path to the project, but substitute the $ INDEXER_PROJECT_ROOT variable. Now I can move the project folder wherever I want, in any case, all the paths will be correct and tags will be generated. This is what I wanted to achieve.
Now a few details.
The only possibility provided by Aric Blumer, the creator of the plugin, is to give the command ": Project /path/to/my/.vimprojects" at each Vim start. Of course, you can put it on some key, but still it is a “crutch”, and it is inconvenient: you can simply forget to press this key. You can run vim with the additional key + “Project /path/to/my/.vimprojects”, but I don’t like it either. I corresponded with the creator of the plugin, but he told me that I was the only one who needed it, and he would not change anything. So I can only tell you how to change project.vim so that you can specify a variable with the project file. It will be necessary instead of one line to insert 5 lines, that's all.
The foregoing is exactly true for the project 1.4.1 version (the latest version at the time of this writing).
Go to line 1272. It should contain only one command:
You need to replace this line with the following code block:
All, now, if you specify the variable g: proj_project_filename, then its value will be used instead of ~ / .vimprojects
UPD : In Indexer version 3.0, there are two very important features for me:
1. Tags are generated in the background. This means that regardless of the size of your project, you will not have to wait until the entire project is indexed. There is one BUT: it works only if the servername is not empty (: help servername). When you run gvim (and not vim), it installs the default servername "GVIM" by itself, that is, in gvim, background tag generation will work out of the box. And if you use console vim and you want tags to be generated in the background, then you need to run it with something like this:
2. It is possible in one vim session to open files from different projects, and tags will be generated correctly for all necessary projects. Tags from different projects are not mixed. It is damn convenient when you need to work with several projects at the same time. (for example, projects of several entities that interact with each other)
g: indexer_lookForProjectDir (default: 1)
If 1, the plugin will search for the ".vimprj" folder.
g: indexer_dirNameForSearch (default: ".vimprj")
The name of the directory with the project settings
g: indexer_recurseUpCount (default: 10)
Recursion depth to search this folder
g: indexer_projectsSettingsFilename (default: "~ / .vimprojects")
Path and name of the project file (plug-in project file)
g: indexer_indexerListFilename (default: "~ / .indexer_files")
Path and file name of the project (indexer plugin's own format).
If both files exist (both ".indexer_files" and ".vimprojects"), then only .indexer_files is used. Another file will be ignored. To find out which file is currently being used, you can use the command: IndexerInfo. I will tell you more about indexer plugin commands below.
g: indexer_projectName (default: "")
Project name to read from the project file. If the project name is not specified, then any project will be used.
g: indexer_enableWhenProjectDirFound (default: 1)
If 1, then the indexer will index the project files if Vim was launched from any directory in which the project files are located.
If 0, then the files will be indexed only if the file included in the project was opened.
g: indexer_tagsDirname (default: "")
Directory for saving tags.
If this option is empty (the default), then the tagged folder name is selected as follows:
Suppose you are using the ~ / .indexer_files file. Then the tags will be saved in the ~ / .indexer_files_tags / project_name folder, where project_name is the name of the project.
If you are using the ~ / .vimprojects file. Then the tags will be saved in the ~ / .vimprojects_tags / project_name folder, where project_name is the name of the project.
If this option is not empty, then all tag files are stored in the specified folder.
I recommend leaving this option blank.
g: indexer_ctagsCommandLineOptions (default: "--c ++ - kinds = + p + l --fields = + iaS --extra = + q")
Options that ctags will run with.
g: indexer_ctagsJustAppendTagsAtFileSave (default: for Linux: 1, for Windows: 0)
If 1, then when saving any file from the project, ctags will be launched with the "-a" (append) key only for this file.
(You also need to pay attention to the g option : indexer_useSedWhenAppend : when installed, before updating the tags, the old tags from this file will be removed using the Sed utility)
If 0, then when you save any file from the project tags will be fully updated.
There are some difficulties. All versions of Sed for Windows that I managed to find work crookedly. I will not talk about their glitches here, I will only say that I did not manage to make them work correctly. It works well in Linux. Therefore, I had to compromise: in Linux, by default, tags are updated only for the saved file, and Sed is used to remove the garbage from the tags file; and in Windows, with each save, all the tags are simply updated. In fact, with the background tag generation in Indexer 3.0, this is no longer a problem.
: IndexerInfo
Displays information about the current state of the plug-in: which project file is used, how many files are indexed, how many and which files were not found, etc.
If for some reason the plugin does not work as you expect, the first thing to do is to give this command.
: IndexerRebuild
Updates tags for all files included in the project.
Indexer plugin page: http://www.vim.org/scripts/script.php?script_id=3221
The plugin project page: http://www.vim.org/scripts/script.php?script_id=69
Patched ctags: http://dfrank.ru/ctags581
Thanks for attention.
In addition, I should be able to easily transfer a project from one computer to another and should not be tied to a specific project directory.
The long search for plug-ins with the necessary functionality was not successful, so it was decided to write such a plugin. I called it indexer .
')
UPD: at the moment the article is slightly outdated. I will update it when I have time for it. However, the basic works, and backward compatibility is provided, but for a more complete use of the possibilities, I recommend that you read : help indexer-syn-change-4.10 .
The archive with the plugin contains the following files and folders:
plugin/indexer.vim
doc/indexer.txt
To work, you need ctags , but patched ctags are better, because In the latest version 5.8 (at the time of this writing) there is a very unpleasant bug. Read more about the bug and download the patch here .
First of all, it should be said that there are two options for using the plug-in: as an addition to the remarkable project plugin or separately.
A few words about the plugin project: this plugin allows you to conveniently manage projects and the list of files in them. Visually, this is a window with a tree structure of projects, subprojects and files. Projects can be minimized. You can do grep or vimgrep for all project files, and then view the results in quickfix. It is convenient to put some key (for example, F9) on the show / hide window with projects.
A detailed description of this plugin is beyond the scope of this article, moreover, the “vim project” request in Google immediately gives out many links. On vskidku - here . Well, of course,: help project after installing the plugin.
Option 1. Use as an add-on to the project plugin
So, let's consider the simplest option: you already use the project plugin and use the default project file ~ / .vimprojects. If so, then setting up the indexer plugin will be very simple: you simply unpack the contents of the archive in $ HOME / .vim (or a similar directory), close Vim (if opened) and run it from any directory of any project present in ~ / .vimprojects . You can simply open any file included in the project.
The indexer will determine that the file included in such a project has been opened, will index all the files included in this project and set the corresponding values in the variables Vim & tags and & path.
Tags will be automatically updated when saving any file included in the project.
Now you can move the cursor to the name of a function, variable, etc., and by pressing g] or Ctrl-] (there are minor differences), move to the declaration of this function. Ctrl-t will take you back. And if you are developing in C / C ++, then you can connect the omnicppcomplete and code_complete plugins, and then by typing “structure_name.” Or “structure_name->”, you will see a popup menu with a selection of elements of this structure, and typing “function_name (” and by pressing Tab, you will get an automatic substitution of all parameters that accepts this function, but I was distracted a little.
It looks like this:
If you use the project plugin, but you have a different project file, you can specify it in your _vimrc:
let g:indexer_projectsSettingsFilename = /path/to/my/.vimprojectsI will give a complete list of options a little later.
As you can see, working with a bunch of these plugins is quite convenient: the project allows you to manage projects, and the indexer takes care of updating the tags.
If for some reason you do not want to use the project,
Option 2. Use without the project plugin
You will need to describe in a single file which files are included in which projects. The default is the ~ / .indexer_files file. The syntax of this file is quite simple. Perhaps the best way to explain is to set an example:
[CoolProject]

/home/user/myproject/src/*.c
/home/user/myproject/src/*.h
/home/user/myproject/inc/*.h

[AnotherProject]

$HOME/myproject2**/*.c
$HOME/myproject2**/*.h
as you might guess, there are two projects here: CoolProject and AnotherProject.
The CoolProject project includes all * .c files from the / home / user / myproject / src directory, and all the header files from / home / user / myproject / inc and / home / user / myproject / src.
And AnotherProject includes the * .c and * .h files from the ~ / myproject2 directory and all subdirectories recursively (indicates "**" for recursiveness).
Well, as you can see, in the paths to the files, you can use variables Vim, such as $ HOME, $ VIM, and others, including those declared by the user.
UPD : In version 1.5, at the request of the torkve user, the ability has been added to set a directory containing many projects in this file. Suppose you have a ~ / workspace directory in which there are a lot of projects, and the list of projects often changes. Editing the .indexer_files file each time will be lazy. Then you can specify something like this:
[PROJECTS_PARENT filter="*.c *.h *.cpp"]
~/workspace
The keyword is PROJECTS_PARENT. Indexer will consider each folder in ~ / workspace as a separate project, including files of the listed types.
Otherwise, the indexer works in the same way as with the project: if you run Vim from the project directory, tags for all files from this project will be generated, and if you save any file from this project, the tags will be updated.
Everything, now I can simply create projects, add files there and forget about how they are indexed. Hooray!
But this was not enough for me.
The fact is that I don’t like it when project files are in different places (except for libraries that are common to several projects. In fact, libraries are separate projects). In the cases considered by us, the project lies in one folder, and the file with the project description (.vimprojects or .indexer_files) in the other (in the home).
That is, I wanted for each project to have its own .vimprojects file, which would lie in the folder of the project itself and in which, in fact, there would be a description of only this project. It turns out, depending on the project, you need to load the settings specific to this project.
I solved this problem as follows: in the root folder of the project I create the folder ".vimprj" (the name can be changed), into which I place files with the settings specific to the project. It also contains .vimprojects. When Vim is launched, indexer will first look for this ".vimprj" folder in the current directory, if it is not there - it is one level higher, and so on. The depth of the recursion can be changed, the default is 10.
If the folder ".vimprj" is found, then the indexer will declare the global variable $ INDEXER_PROJECT_ROOT, in which, as you might guess, the path to the root folder of the project will be specified. Not to the folder ".vimprj", but to the folder in which lies ".vimprj". Also, all * .vim files from this directory will be launched, in which you can specify specific settings. Here is an example of such a sett.vim file:
" .vimprj
let s:sPath = expand('<sfile>:p:h')

" indexer , .vimprj
let g:indexer_projectsSettingsFilename = s:sPath.'/.vimprojects'

" project , .vimprj
" : project.
" project.vim,
"
let g:proj_project_filename=s:sPath.'/.vimprojects'

" , ,
let &makeprg = 'pic30-gcc -mcpu=24HJ128GP504 -xc -c "%:p" -o"%:t:ro" -I"'.$INDEXER_PROJECT_ROOT.'\src\utils" -I"'.$INDEXER_PROJECT_ROOT.'\src\app" -g -Wall -mlarge-code -mlarge-data -O1'
Also in the project file .vimprojects I use not the absolute path to the project, but substitute the $ INDEXER_PROJECT_ROOT variable. Now I can move the project folder wherever I want, in any case, all the paths will be correct and tags will be generated. This is what I wanted to achieve.
Now a few details.
How the project plugin can specify a project file other than ~ / .vimprojects.
The only possibility provided by Aric Blumer, the creator of the plugin, is to give the command ": Project /path/to/my/.vimprojects" at each Vim start. Of course, you can put it on some key, but still it is a “crutch”, and it is inconvenient: you can simply forget to press this key. You can run vim with the additional key + “Project /path/to/my/.vimprojects”, but I don’t like it either. I corresponded with the creator of the plugin, but he told me that I was the only one who needed it, and he would not change anything. So I can only tell you how to change project.vim so that you can specify a variable with the project file. It will be necessary instead of one line to insert 5 lines, that's all.
The foregoing is exactly true for the project 1.4.1 version (the latest version at the time of this writing).
Go to line 1272. It should contain only one command:
ProjectYou need to replace this line with the following code block:
if !exists("g:proj_running") && exists('g:proj_project_filename')
exec('Project '.g:proj_project_filename)
else
Project
endif
All, now, if you specify the variable g: proj_project_filename, then its value will be used instead of ~ / .vimprojects
UPD : In Indexer version 3.0, there are two very important features for me:
1. Tags are generated in the background. This means that regardless of the size of your project, you will not have to wait until the entire project is indexed. There is one BUT: it works only if the servername is not empty (: help servername). When you run gvim (and not vim), it installs the default servername "GVIM" by itself, that is, in gvim, background tag generation will work out of the box. And if you use console vim and you want tags to be generated in the background, then you need to run it with something like this:
$ vim --servername MY_SERVER2. It is possible in one vim session to open files from different projects, and tags will be generated correctly for all necessary projects. Tags from different projects are not mixed. It is damn convenient when you need to work with several projects at the same time. (for example, projects of several entities that interact with each other)
Indexer plugin options
g: indexer_lookForProjectDir (default: 1)
If 1, the plugin will search for the ".vimprj" folder.
g: indexer_dirNameForSearch (default: ".vimprj")
The name of the directory with the project settings
g: indexer_recurseUpCount (default: 10)
Recursion depth to search this folder
g: indexer_projectsSettingsFilename (default: "~ / .vimprojects")
Path and name of the project file (plug-in project file)
g: indexer_indexerListFilename (default: "~ / .indexer_files")
Path and file name of the project (indexer plugin's own format).
If both files exist (both ".indexer_files" and ".vimprojects"), then only .indexer_files is used. Another file will be ignored. To find out which file is currently being used, you can use the command: IndexerInfo. I will tell you more about indexer plugin commands below.
g: indexer_projectName (default: "")
Project name to read from the project file. If the project name is not specified, then any project will be used.
g: indexer_enableWhenProjectDirFound (default: 1)
If 1, then the indexer will index the project files if Vim was launched from any directory in which the project files are located.
If 0, then the files will be indexed only if the file included in the project was opened.
g: indexer_tagsDirname (default: "")
Directory for saving tags.
If this option is empty (the default), then the tagged folder name is selected as follows:
Suppose you are using the ~ / .indexer_files file. Then the tags will be saved in the ~ / .indexer_files_tags / project_name folder, where project_name is the name of the project.
If you are using the ~ / .vimprojects file. Then the tags will be saved in the ~ / .vimprojects_tags / project_name folder, where project_name is the name of the project.
If this option is not empty, then all tag files are stored in the specified folder.
I recommend leaving this option blank.
g: indexer_ctagsCommandLineOptions (default: "--c ++ - kinds = + p + l --fields = + iaS --extra = + q")
Options that ctags will run with.
g: indexer_ctagsJustAppendTagsAtFileSave (default: for Linux: 1, for Windows: 0)
If 1, then when saving any file from the project, ctags will be launched with the "-a" (append) key only for this file.
(You also need to pay attention to the g option : indexer_useSedWhenAppend : when installed, before updating the tags, the old tags from this file will be removed using the Sed utility)
If 0, then when you save any file from the project tags will be fully updated.
There are some difficulties. All versions of Sed for Windows that I managed to find work crookedly. I will not talk about their glitches here, I will only say that I did not manage to make them work correctly. It works well in Linux. Therefore, I had to compromise: in Linux, by default, tags are updated only for the saved file, and Sed is used to remove the garbage from the tags file; and in Windows, with each save, all the tags are simply updated. In fact, with the background tag generation in Indexer 3.0, this is no longer a problem.
Indexer plugin commands
: IndexerInfo
Displays information about the current state of the plug-in: which project file is used, how many files are indexed, how many and which files were not found, etc.
If for some reason the plugin does not work as you expect, the first thing to do is to give this command.
: IndexerRebuild
Updates tags for all files included in the project.
And finally, links
Indexer plugin page: http://www.vim.org/scripts/script.php?script_id=3221
The plugin project page: http://www.vim.org/scripts/script.php?script_id=69
Patched ctags: http://dfrank.ru/ctags581
Thanks for attention.
Source: https://habr.com/ru/post/102954/
All Articles