App Inventor - creating Android apps for everyone: Lesson 1
To begin, I will tell you a little about App Inventor, and then we will write the first application where we will feed the cat.
App Inventor can use a person who does not speak programming languages. By the principle of action, he reminds me of a WYSIWYG editor. While registration is available only with the permission of Google. App Inventor frees you from writing code, instead you use the similarity of flowcharts.
 For better understanding, let's analyze the creation of the HelloPurr application. In this application, the image with the cat and the button for its feeding will appear, after pressing which the cat will meow. We will create the application from scratch, having considered all the development steps presented below:
First, set up your computer and phone to work with App Inventor. Then create a new project, name it “HelloPurr”, open the block editor and connect the phone. Then go back to the browser window.
')
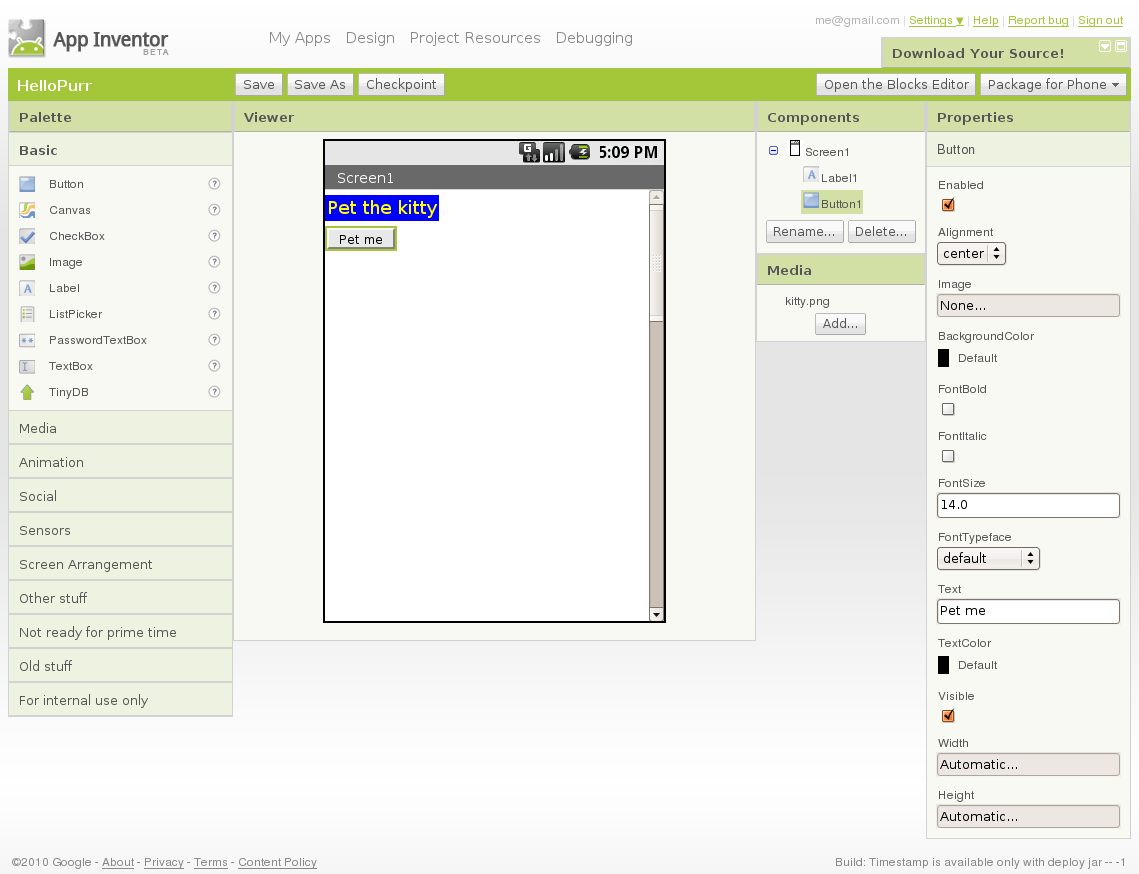
The appinventor.googlelabs.com should now be open in your browser, and the App Inventor Phone Application should be running on your phone. The browser should be open on the constructor page, which looks like this:

In App Inventor, applications are built by combining standard components. Components are the main element of the development of Android applications, as the ingredients in the recipe. Some components are very simple, for example Label (label), which simply shows the text on the screen, or Button , which implements the button. Other components are more complex: Canvas , in which you can place images or animation; The accelerometer (motion) sensor , which acts as a controller from the Wii, and detects when you shake or turn over the phone; components that send messages, play videos, receive data from sites, and many others.
Looking at the constructor window you will see that it consists of several areas:
You will need a picture of a kitten and the sound "Meow . "

Go to the palette and drag the Button into the browser window under the label. After that you will see a rectangular button there. You can click on it, but nothing will happen, so we need to define an action when a button is pressed.
To add a sound, drag the Sound component from the palette, then it will appear below as an invisible component. Click on Sound1 , and select the meow file as the source in the Source parameter.
Now we will make the cat meowed when pressed.
Now your application works, but only until you disconnect the phone.
In the next lesson we will discuss how to save the application and teach the cat new tricks.
App Inventor can use a person who does not speak programming languages. By the principle of action, he reminds me of a WYSIWYG editor. While registration is available only with the permission of Google. App Inventor frees you from writing code, instead you use the similarity of flowcharts.
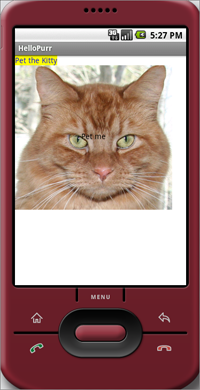
For better understanding, let's analyze the creation of the HelloPurr application. In this application, the image with the cat and the button for its feeding will appear, after pressing which the cat will meow. We will create the application from scratch, having considered all the development steps presented below:- Create a new application on the App Inventor website
- Add components as well as a label containing “Pet the Kitty”
- Add a button with a picture of a cat
- Add sound component to meow
- Event handler that triggers a sound when a button is pressed
Getting Started
First, set up your computer and phone to work with App Inventor. Then create a new project, name it “HelloPurr”, open the block editor and connect the phone. Then go back to the browser window.
')
The appinventor.googlelabs.com should now be open in your browser, and the App Inventor Phone Application should be running on your phone. The browser should be open on the constructor page, which looks like this:
Overview of the development process
In App Inventor, applications are built by combining standard components. Components are the main element of the development of Android applications, as the ingredients in the recipe. Some components are very simple, for example Label (label), which simply shows the text on the screen, or Button , which implements the button. Other components are more complex: Canvas , in which you can place images or animation; The accelerometer (motion) sensor , which acts as a controller from the Wii, and detects when you shake or turn over the phone; components that send messages, play videos, receive data from sites, and many others.
Designer window
Looking at the constructor window you will see that it consists of several areas:
- In the center is a white area called the Viewer . This is the place where you work with components. This area shows how your application will look on your phone.
- On the left is the Palette (palette), which shows the available components. Palette is divided into sections.
- To the right of the Viewer is a list of components where the components used are shown.
- Under the components - Media , which shows used pictures and audio.
- More to the right - Component settings : color, text size, font, and more.
You will need a picture of a kitten and the sound "Meow . "
Create a label
- Go to the palette and click on the Label , and drag it to the viewer window. Next, enter the label text.
- Look in the settings window, it shows the label settings. In the “Text” parameter you can specify the label text, type “Pet the Kitty” there and press Enter. The text will change both in the viewer window and on the phone.
- Change the BackgroundColor label that is not currently set. You can also change the text color in the TextColor parameter; at the end, change the FontSize to 20.
Add a button
Go to the palette and drag the Button into the browser window under the label. After that you will see a rectangular button there. You can click on it, but nothing will happen, so we need to define an action when a button is pressed.
- In the Settings window, all the parameters of the button are shown, if this is not the case, then click the button in the viewer window. Click on the area under Image .
- Click Add ... then select the file and click OK.
- After loading the image, in the preview window you can see a button with a cat image.
- If you carefully <look at the button, you will see "Text for button 1" on it, you can write there "Pet Me" ("feed me") or leave it blank.
To add a sound, drag the Sound component from the palette, then it will appear below as an invisible component. Click on Sound1 , and select the meow file as the source in the Source parameter.
Play the sound when you press
Now we will make the cat meowed when pressed.
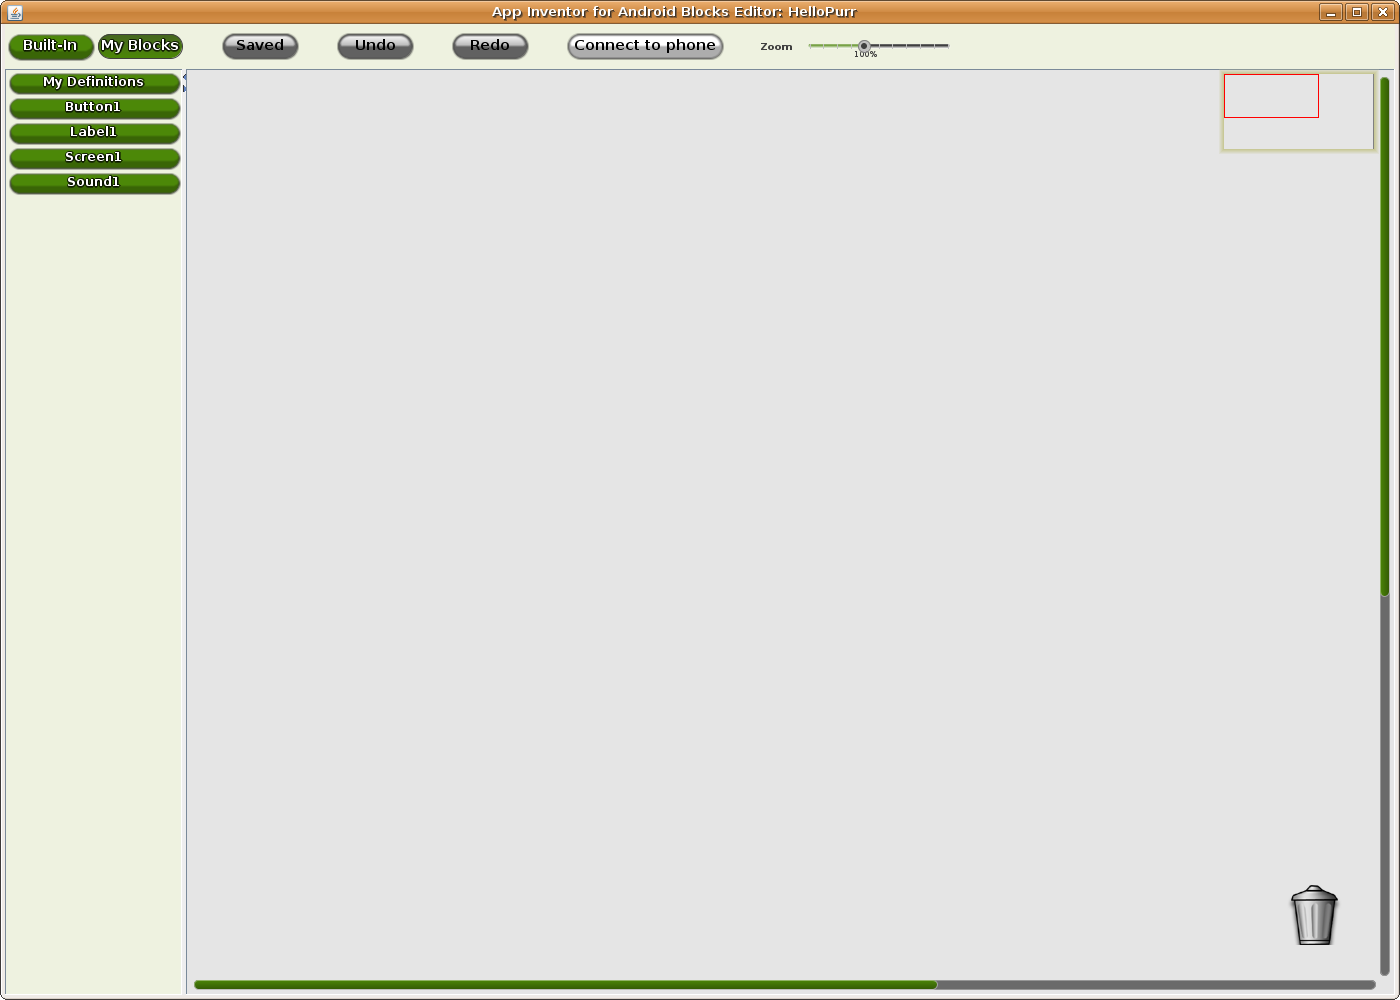
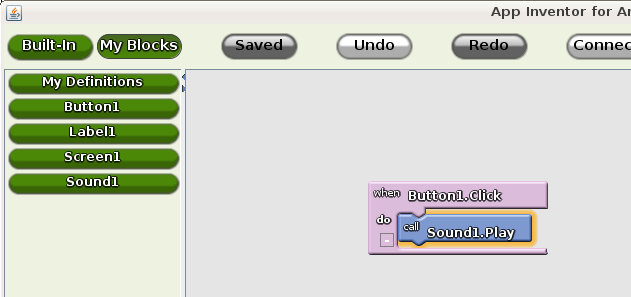
- Look at the block editor window. Now we need to make sure that when you press the button, the sound is played.
- At the top you see the Built-in and My Blocks buttons, click on My Blocks , below you will see a column that contains tabs for each component: Button1 , Label1 , Screen1 , and Sound1 .
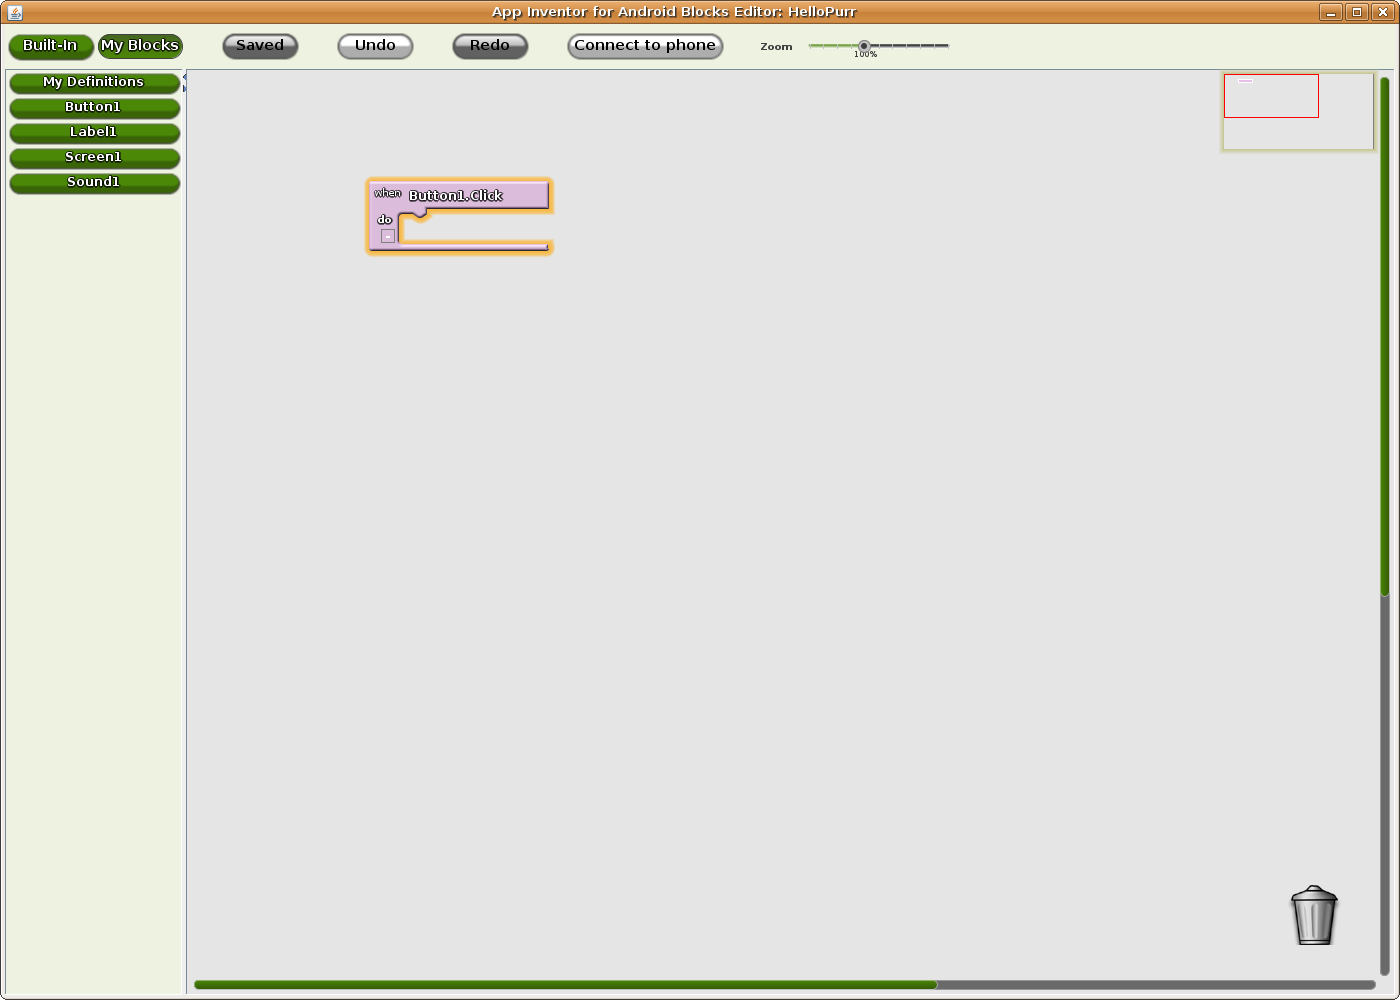
- Click on Button1 , then select the when block Button1.Click on top.
- Drag a button1.Click when to the workspace.
- Click on Sound1 in My Blocks and move the call Sound1.Play block inside the when Button1.Click block .
- Now click on the cat, and you will hear meowing, congratulations!
Now your application works, but only until you disconnect the phone.
In the next lesson we will discuss how to save the application and teach the cat new tricks.
Source: https://habr.com/ru/post/101154/
All Articles