AmbilightUSB
Hi, strangers!
Project update Lightpack: Bleed and open
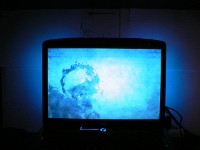
This story is about how to make a super mega cheap and simple ambilight backlight for your computer. The ATtiny44 microcontroller will act as a conductor, and 4 RGB LEDs will play the role of an orchestra.
')
Several pictures in order to arouse interest:
Too lazy to read: a full description in the "pictures" (=
UPDATE: Added video http://www.youtube.com/watch?v=tdp1QeS_JCg
UPDATE2: clarified the name of the used microcontroller in the parts list (ATTINY44-20SSU)
UPDATE3: added fyuzy (wildly sorry that I forgot about them)
UPDATE4: fixed schematic diagram (v2.1.3)
The writer is not very good of me, so let's get straight to the point:
Parts List
| Component | Body / Size | amount |
| ATTINY44-20SSU | SOIC | one |
| 74HC595 | SOIC | 2 |
| RGB LED | SMD 5x5mm | four |
| Resistor 10k | 0805 | one |
| Resistor 1.5k | 0805 | one |
| Resistor 100R | 0805 | 12 |
| Resistor 68R | 0805 | 2 |
| Resistor 0R | 1206 | one |
| Cap tantalum 4.7uF | 1206 | one |
| Cap ceramic 20pF | 0805 | 2 |
| Quartz 12Mhz | HC-49 / US | one |
| Zener diode 3.6V | MiniMELF (1206) | 2 |
| MiniUSB | Type B (SMD) | one |
| PLS-40S | Dip | one |
| Plume | ~ 0.3 m | 5 wires |
| Glass fiber | ~ 160x80 mm | one |
| Double sided tape | fat | one |
Total: not more than 500 rubles.
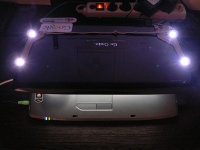
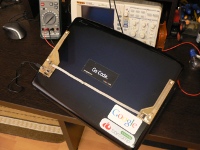
The device is glued to the laptop with double-sided tape:

Probably not ice, but it completely suits me, keeps dead, usb can be connected, disconnected without holding the board. If you peel off, remain stains that are easy to
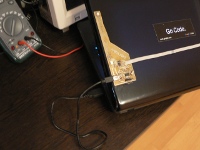
The microcontroller is connected to the computer via USB. The foundation of the project is obdev V-USB library . The first thing that was tested, tested and immediately worked is v-usb / examples / hid-data. HID works everywhere, drivers are standard, working with this class of USB devices is very simple. Moreover, we have already done all the work for us, in the example of hid-data you can find the files hiddata.c and hiddata.h. They implemented a standard interface for working with USB HID for windows (win api) and unix (libusb).
Soft captures 4 areas of the screen, converts to 4 points and sends to the device, breaking into color components Red, Green, Blue. Everything within C ++, Qt and USB HID.
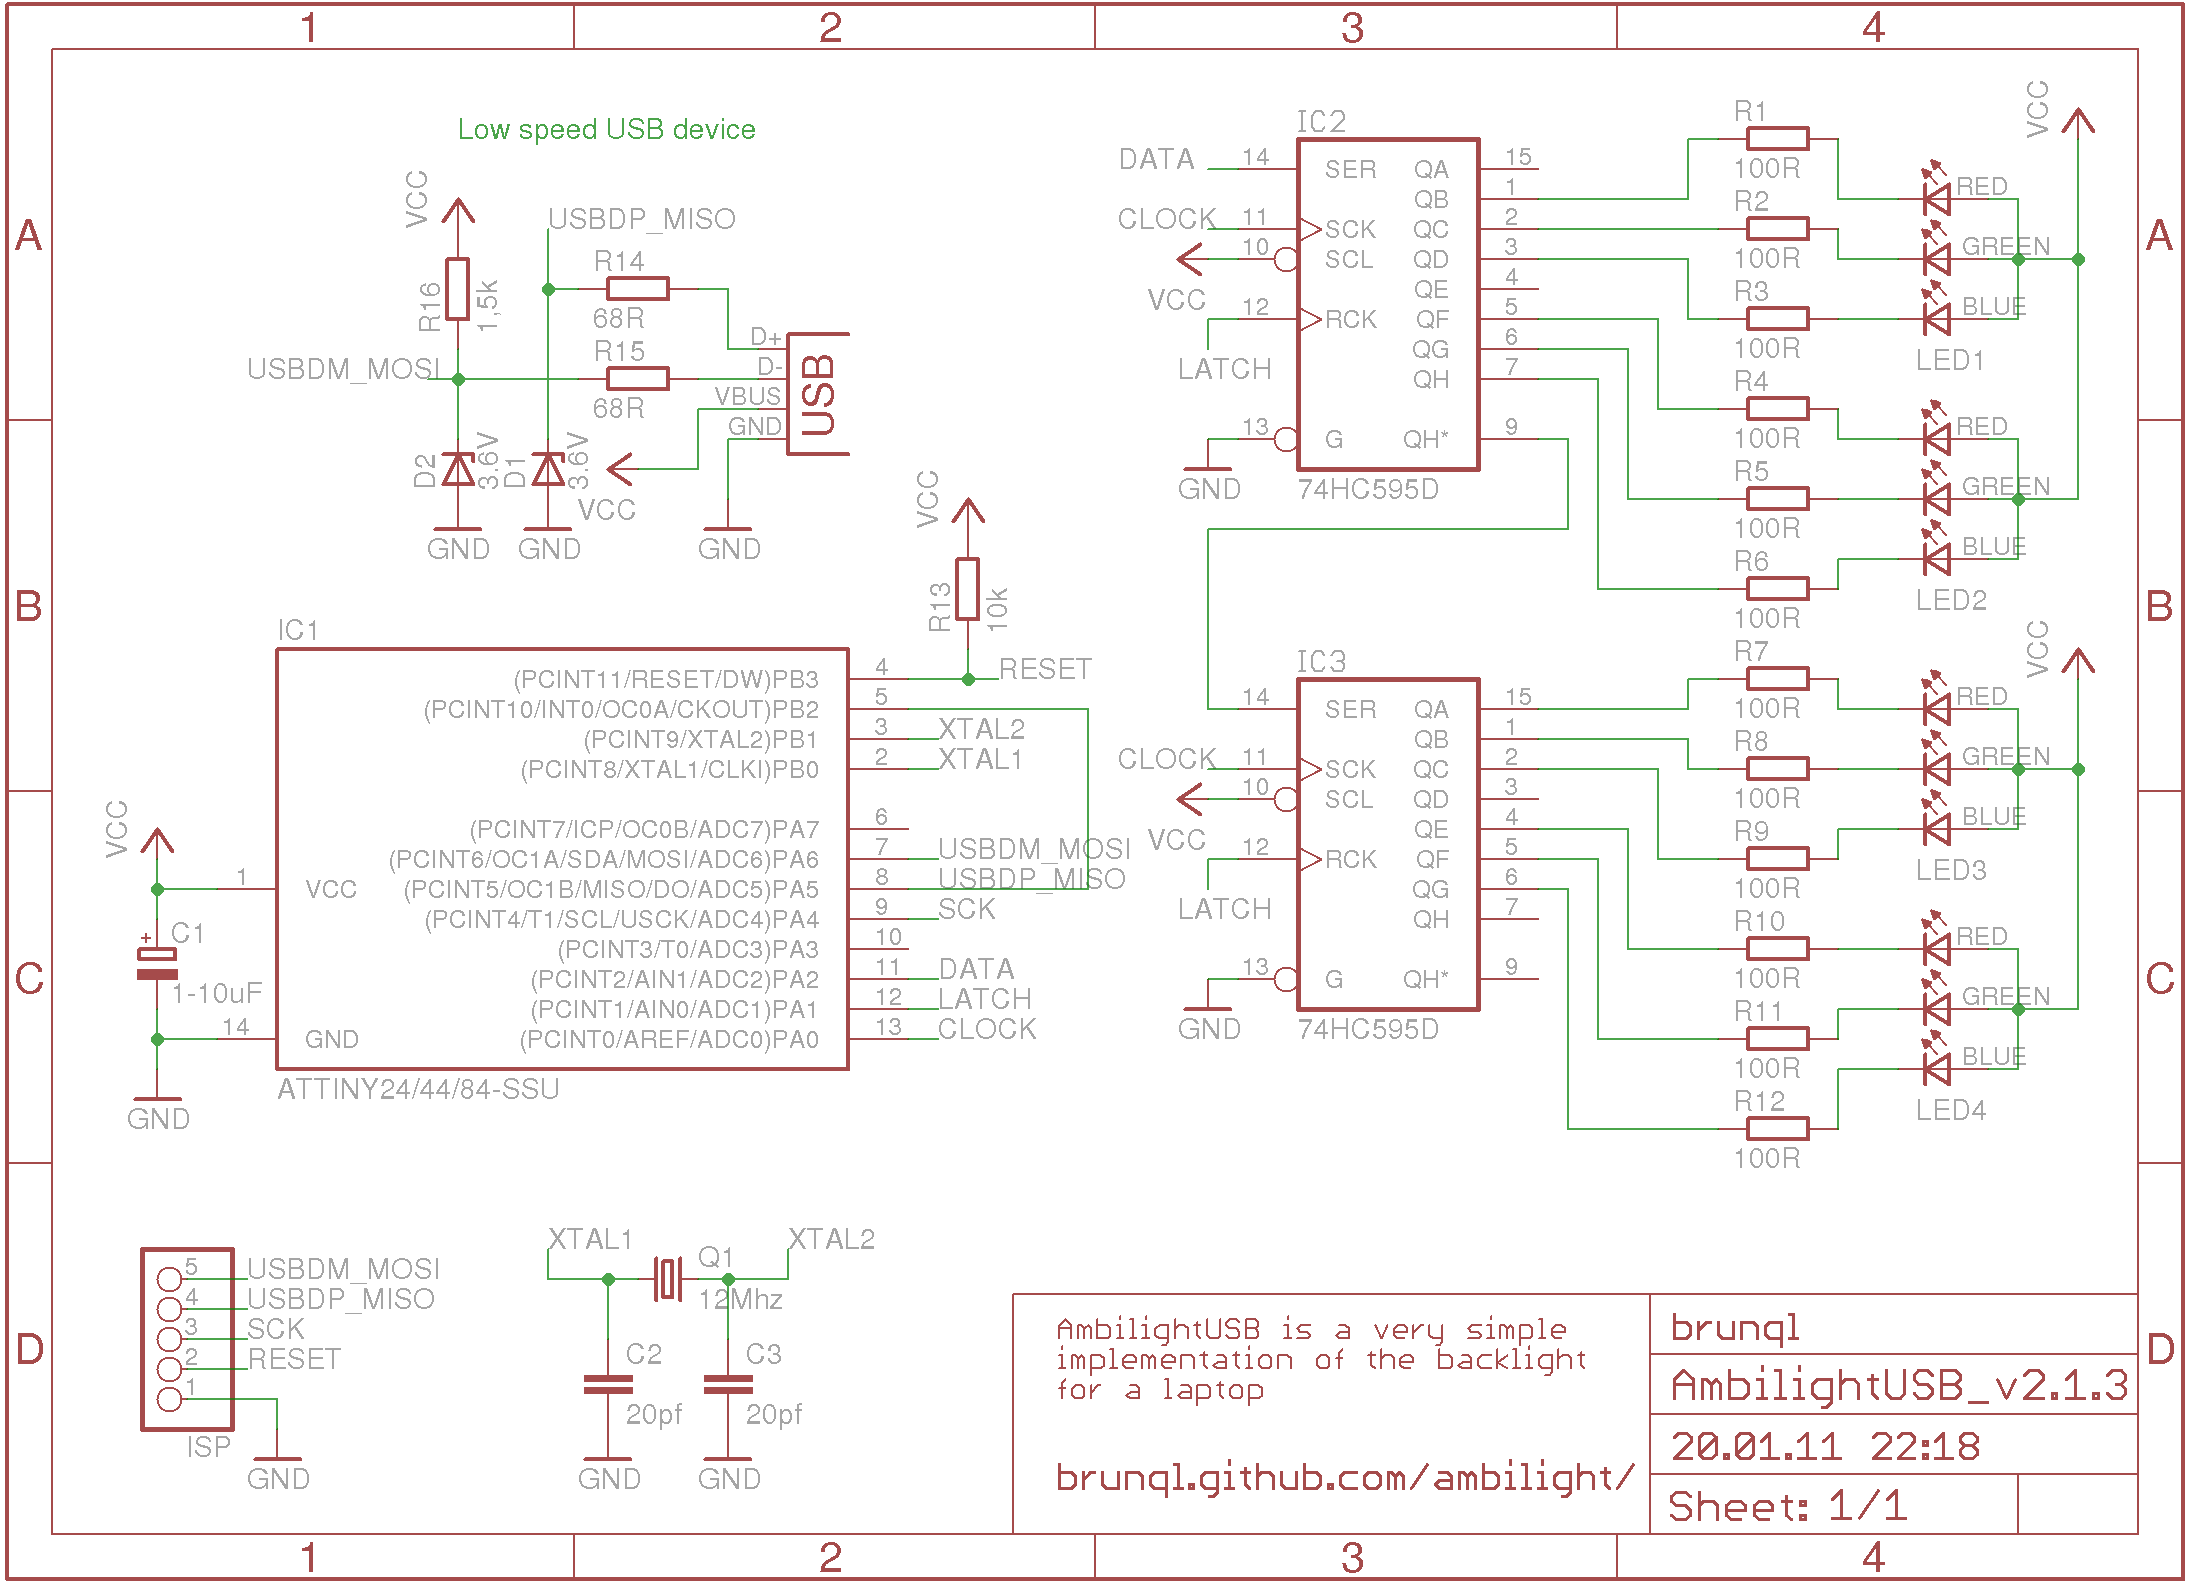
We make the AmbilightUSB.lay board (the current version is hw v2.1), soldered.
Fusion flashing:
avrdude -pt44 -cusbasp -u -Ulfuse:w:0xee:m -Uhfuse:w:0xdf:m -Uefuse:w:0xff:m
And fill the firmware AmbilightUSB_v2.8.hex
avrdude -pt44 -cusbasp -u -Uflash:w:AmbilightUSB_v2.8.hex:a
Connect with USB cable A to miniUSB B:
Excellent iron is ready!
Installation, software setup
If we use Win32 (Windows XP), we add Qt, gcc, mingw ( download ) and the latest version of the software ( AmbilightUSB_v2.7.7.exe ) in one folder. Run and rejoice (=
For Ubuntu x86_64:
1) Download AmbilightUSB_v2.7.7
2) Check /
$ sudo apt-get install libqt4-gui Qt4: $ sudo apt-get install libqt4-gui3) Run:
./AmbilightUSB_v2.7.7Latest versions are available in downloads .
The application immediately after launch minimizes to tray:

Double-click on the icon in the notification area toggles the state
on/off .Tested on Ubuntu 10.04 (x86_64) and on Windows XP (x86):
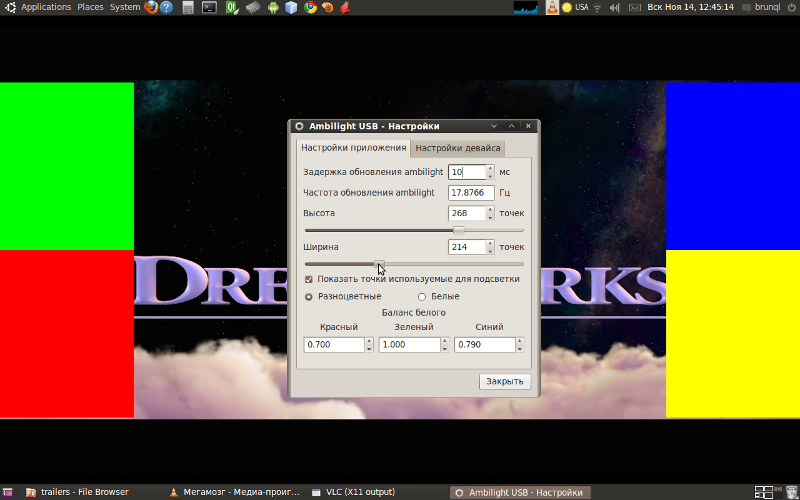
The width and height of the captured areas is very easy to adjust, you can adjust to the resolution of the film. By the way, I immediately answer the question “Why are there no LEDs on top?”, All films are mostly widescreen and the top of the screen is dark, so I thought that this was not necessary. True, if you really want, you can relatively easily add shift registers and LEDs. With iron, everything is simple, but the firmware and software will have to be finished =)

Building from sources (Qt4, gcc)
0) Check / install Qt4
$ sudo apt-get install libqt4-dev$ sudo apt-get install libqt4-gui1) Download source from github:
Latest version from repository: tar.gz or zip
Or the entire project tree:
$ git clone git@github.com:brunql/AmbilightUSB.git2) Extract the tar.gz or zip archive:
tar xzvf brunql-AmbilightUSB-v*.tar.gzunzip brunql-AmbilightUSB-v*.zip3) Build:
$ cd {path/to/AmbilightUSB}/Software/$ ./update_locales.sh$ qmake AmbilightUSB.pro$ make4) Run!
$ ./build/AmbilightUSBLogs are written to the following files:
Linux: ${HOME}/.AmbilightUSB.logWindows: C:\Documents and Settings\UserName\.AmbilightUSB.logSettings are saved here:
Linux: ${HOME}/.config/brunql.dev/AmbilightUSB.iniWindows: C:\Documents and Settings\UserName\Application Data\brunql.dev\AmbilightUSB.iniTo reset the settings in default, simply delete the
AmbilightUSB.ini file.Interface:
English, RussianSources on GitHub , all sorts of things in downloads .
Similar projects
Ardulight Background Illumination Ambilight TV
MoMoLight: YouTube and description .
Ambilight 4PC
On habre: How I wanted to do Ambilight for a mobile phone and what came of it
Thanks for karma habrauser: Toseter , etc , crac , Shpankov , UFO
Please send all ochepyatki in a personal or e-mail: mike.shatohin [at] gmail.com
Source: https://habr.com/ru/post/100085/
All Articles